My primary objective for this project is to demonstrate my expertise as a DevOps Engineer while expanding my technical skill set. I believe that true learning happens through hands-on experience and problem-solving.
Therefore, I will actively engage in the development process to showcase my knowledge and improve my abilities along the way.
Additionally, I aim for this project to serve as a comprehensive guide for individuals looking to establish their own DevOps infrastructure. By documenting the entire process and sharing my experiences, I hope to provide valuable insights and practical instructions that can assist others in successfully implementing similar systems.
Prerequisites
-
AWS Account
An AWS account is essential for using Terraform to build projects. It allows Terraform to interact with and manage AWS resources, facilitating infrastructure provisioning and management.
-
Terraform Installed
Terraform must be installed on your computer to build this project. Terraform is an infrastructure-as-code (IaC) tool that automates and manages cloud resources. Installing Terraform on your PC enables you to define your infrastructure as code and deploy it to AWS.
-
Git Installed
Git must be installed on your computer to clone the project from my GitHub repository. Git is a version control system that facilitates efficient collaboration and code change tracking.
Part 1: Infrastructure Setup
Deciding the Infrastructure Setup
For this stage of the project (highlighted in blue), I have chosen the following infrastructure setup. The image below illustrates the setup:
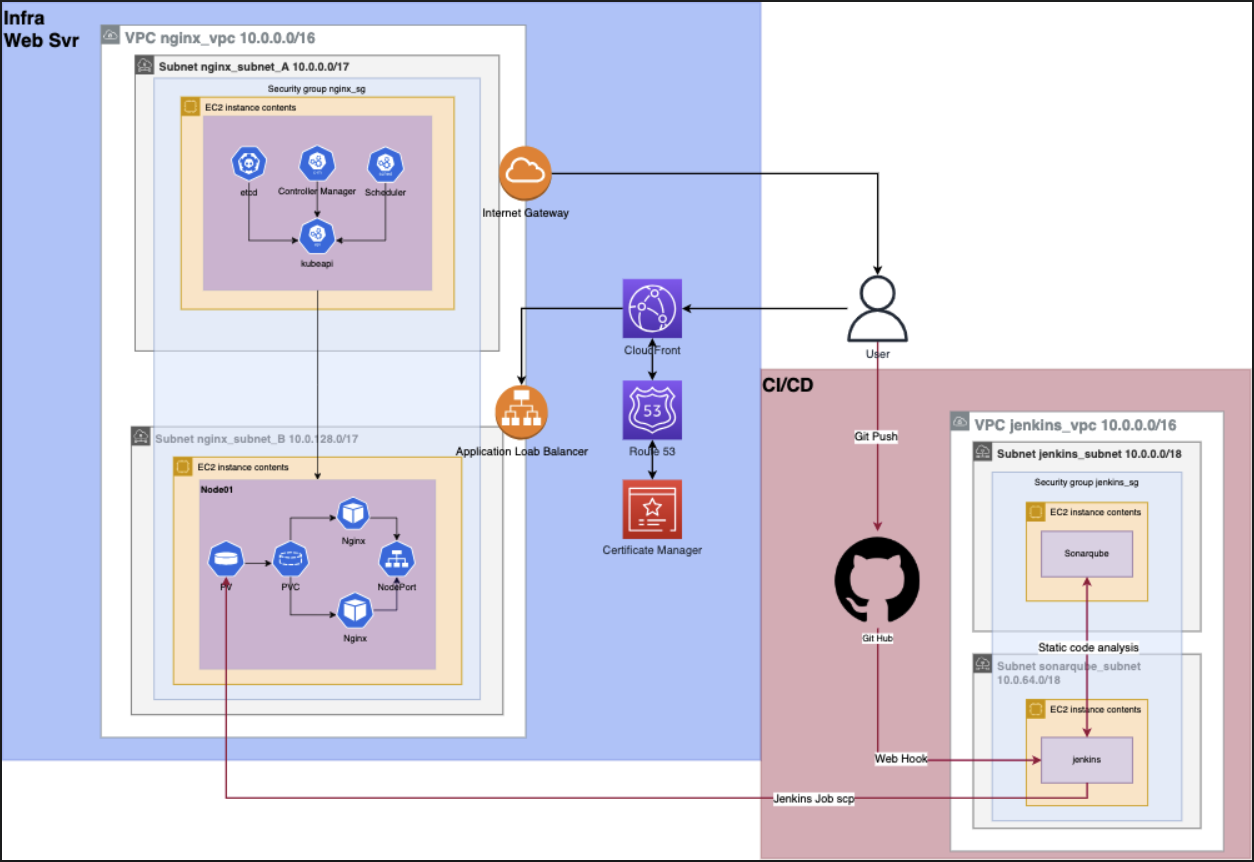
- Terraform: For AWS resource creation.
- CloudFront: To boost user experience with caching services.
- Route 53 and AWS Certificate Manager: For DNS management and SSL certificate configuration for angpenghian.com.
- AWS Application Load Balancer: Load balancing across EC2 instances, currently a single instance for proof of concept.
- AWS Internet Gateway: Provides internet access to VPC resources.
- Kubernetes cluster: Consists of a master and a worker node. NGINX deployment on worker node, leveraging PV and PVC for file reading on EC2 server. Service made public via NodePort.
Instructions
Step 1: Choose a command terminal
Open a terminal (Command Prompt on Windows, Terminal on Mac or Linux).
Step 2: Choose a base folder
Navigate to the empty folder where you want to clone the repository:
cd /path/to/your/folderStep 3: Clone the repository
Once you're in the right directory, use the git clone command followed by the URL of the repository:
git clone https://github.com/angpenghian/resume.gitStep 4: Navigate to the project folder
After cloning the GitHub repository, navigate to the terraform directory that includes the necessary Terraform and Bash scripts:
cd /Your-Folder-Directory/Resume-website/Step 5: Create secrets folder
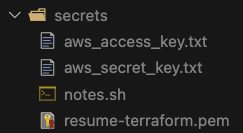
Create a new directory called 'secrets':
mkdir secretsStep 6: Configure AWS credentials
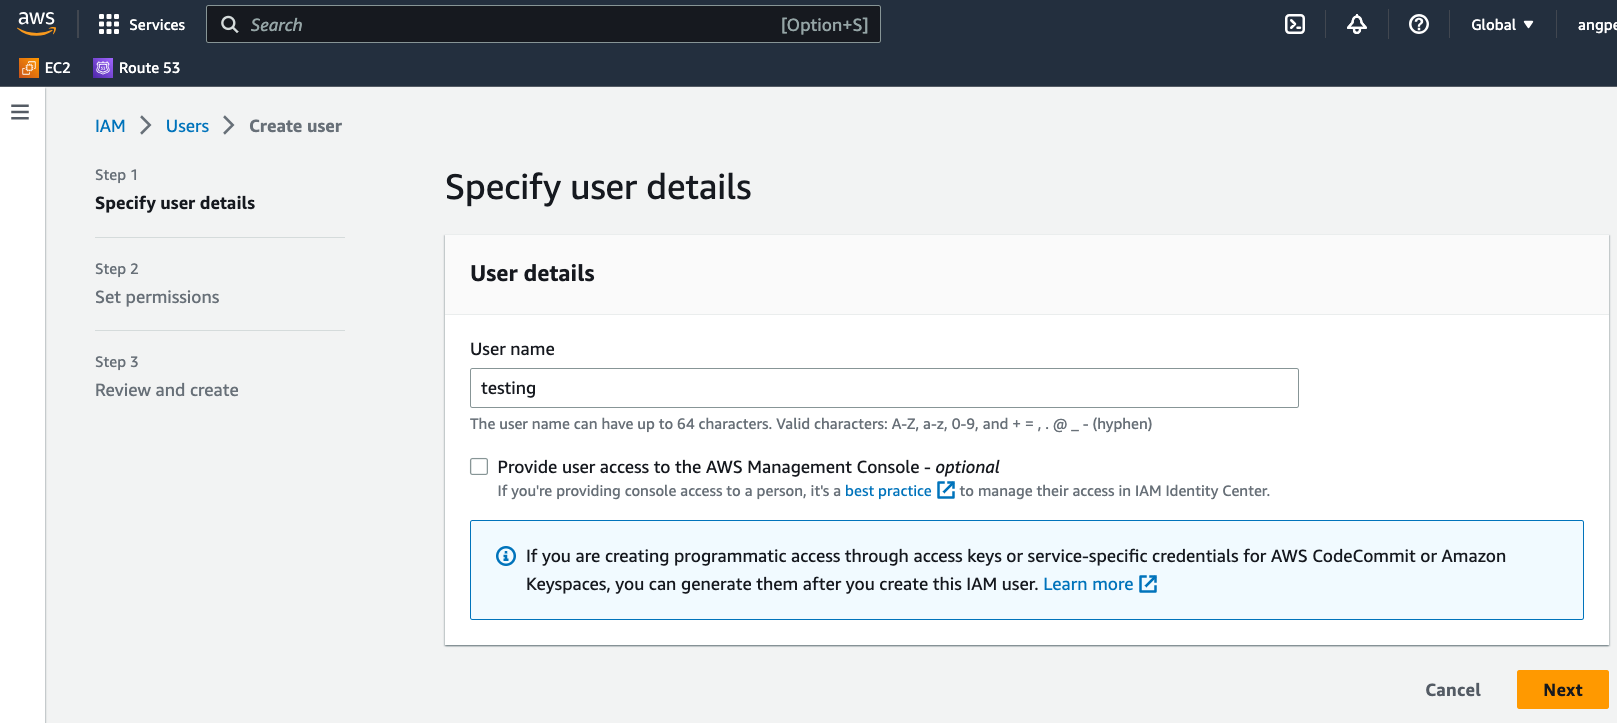
Log into your AWS root user account. Use the console's search bar to find the IAM service.
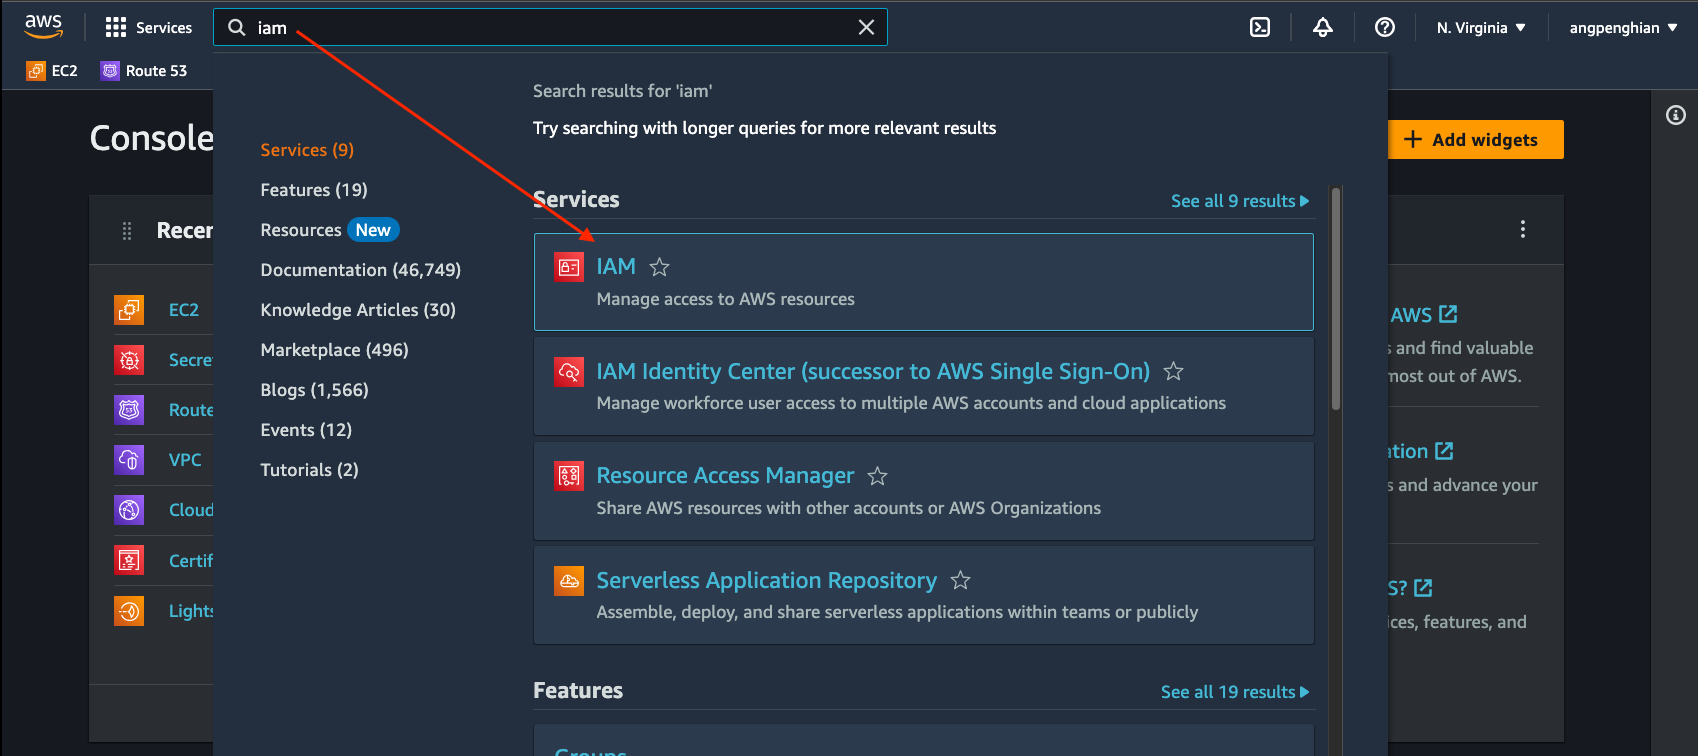
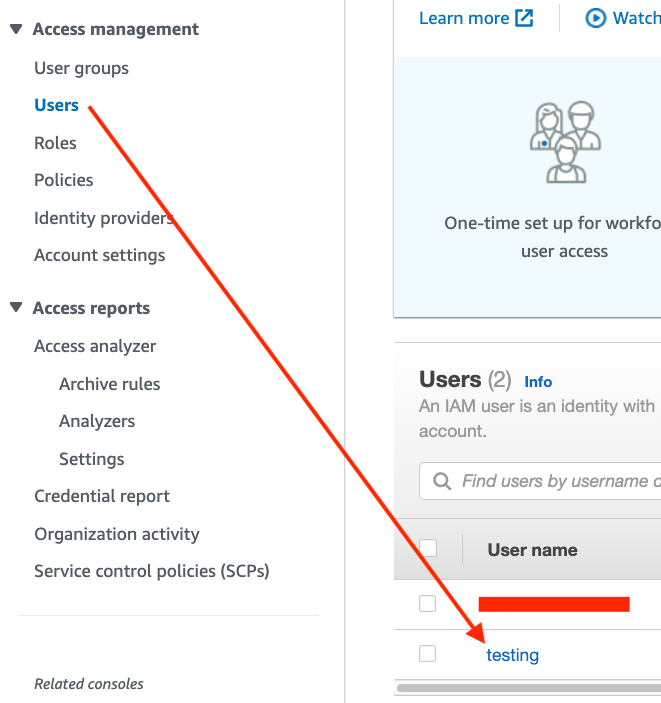
Inside the IAM interface, navigate to the Users section and choose 'Add users'.
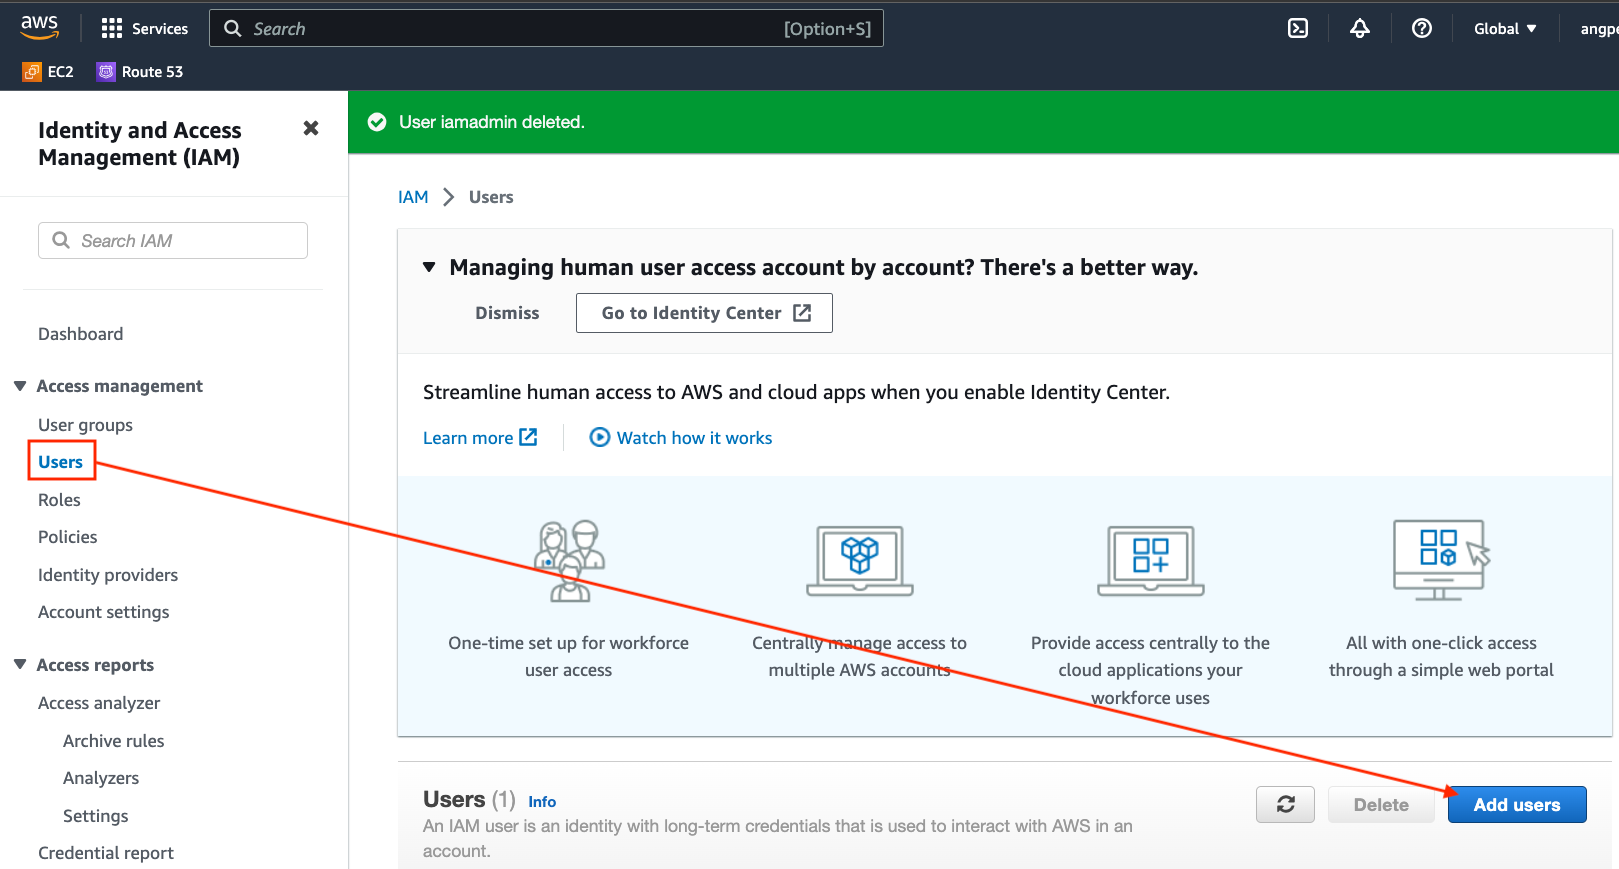
Follow the on-screen instructions to create your IAM user.
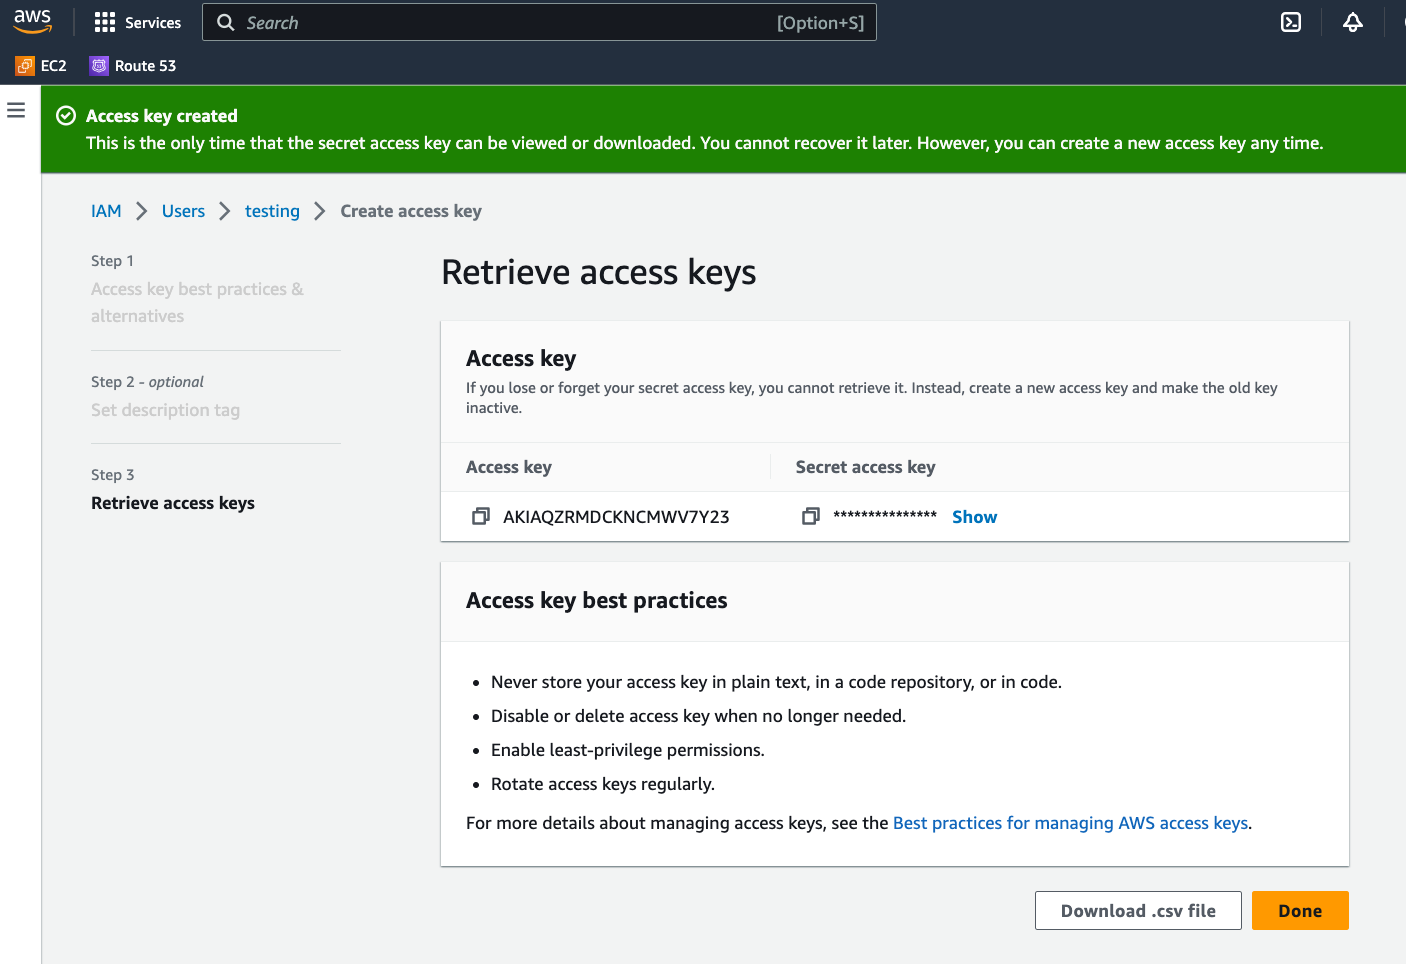
Once the user is created, click on it. In the 'Security credentials' tab, find 'Create access key'.
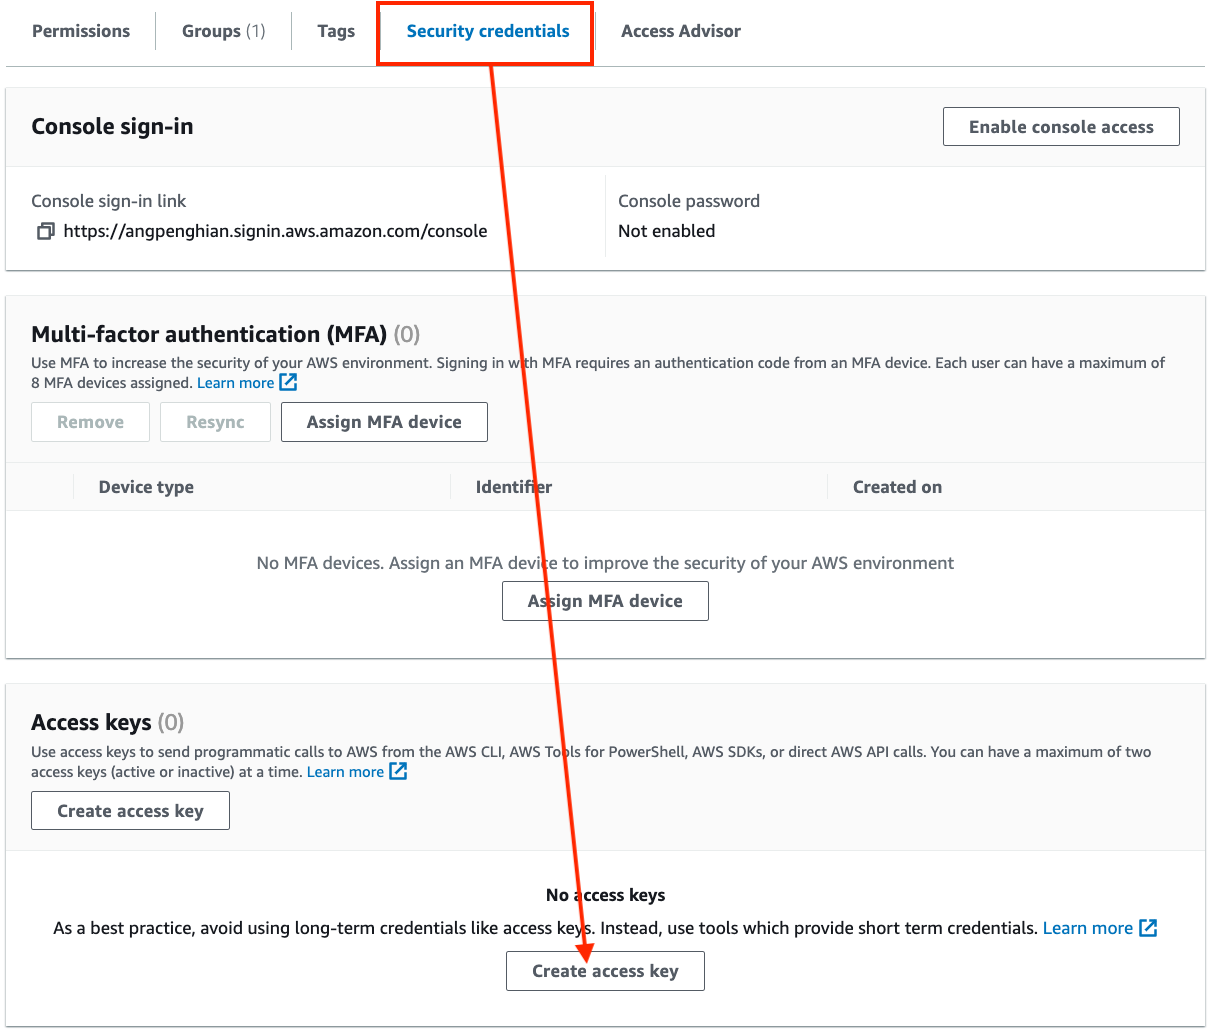
It's crucial to save and document both keys for future reference.
Step 7: Configure AWS key pairs
Create a key pair to enable SSH access into the AWS EC2 machines. Use the console's search bar to find "Key pairs".
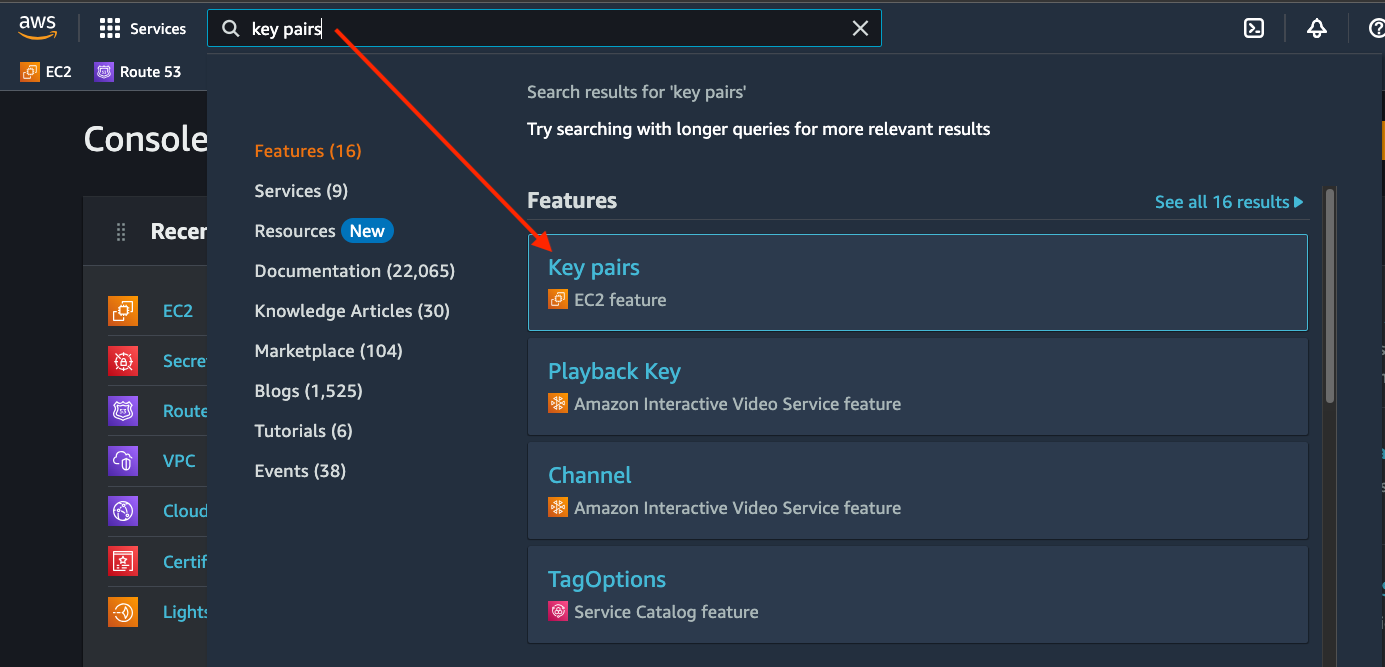
In the Key pairs section, select Create key pair. Take note of the region you're in because key pairs are region-specific.

Input your preferred key name.
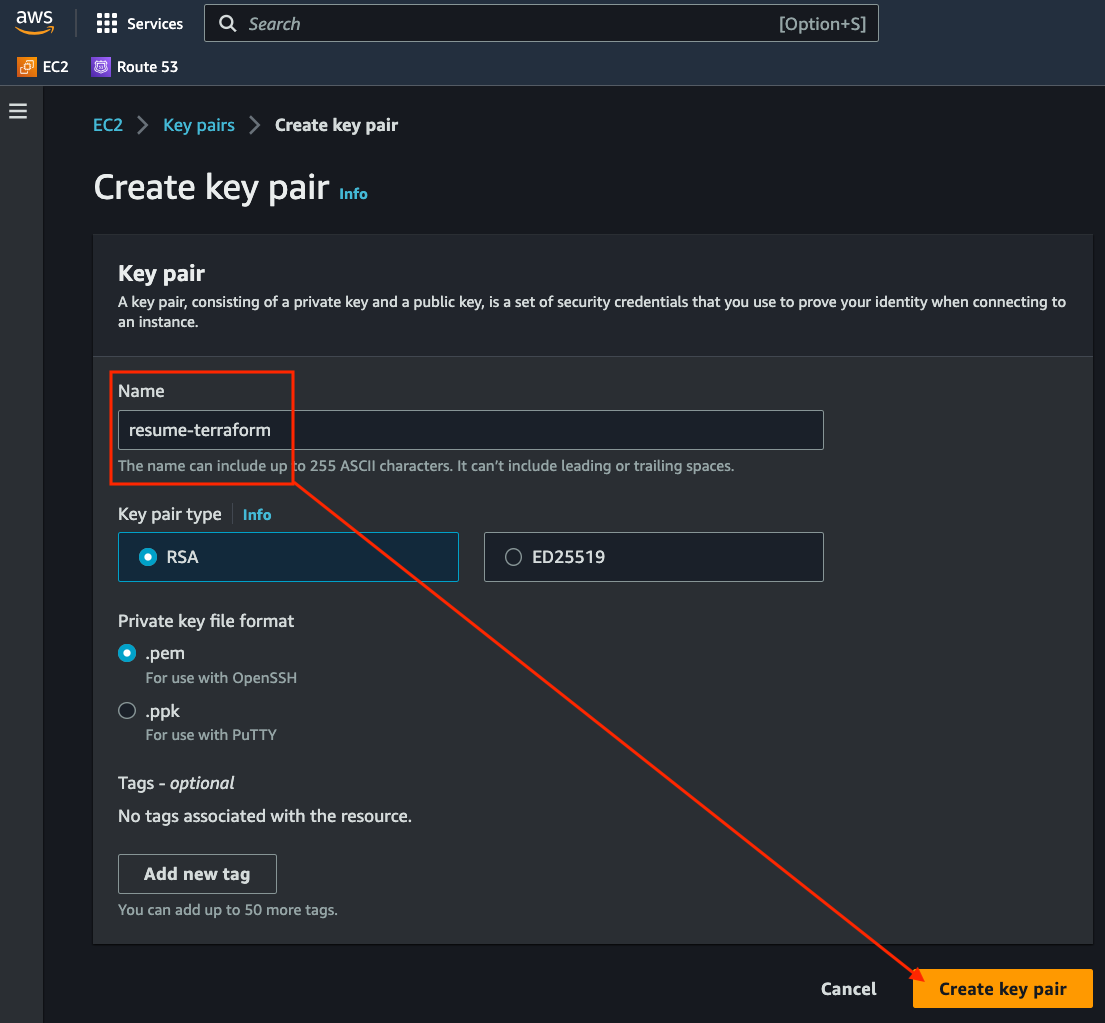
Upon completion, the key pair will be generated and a .pem file will be downloaded.
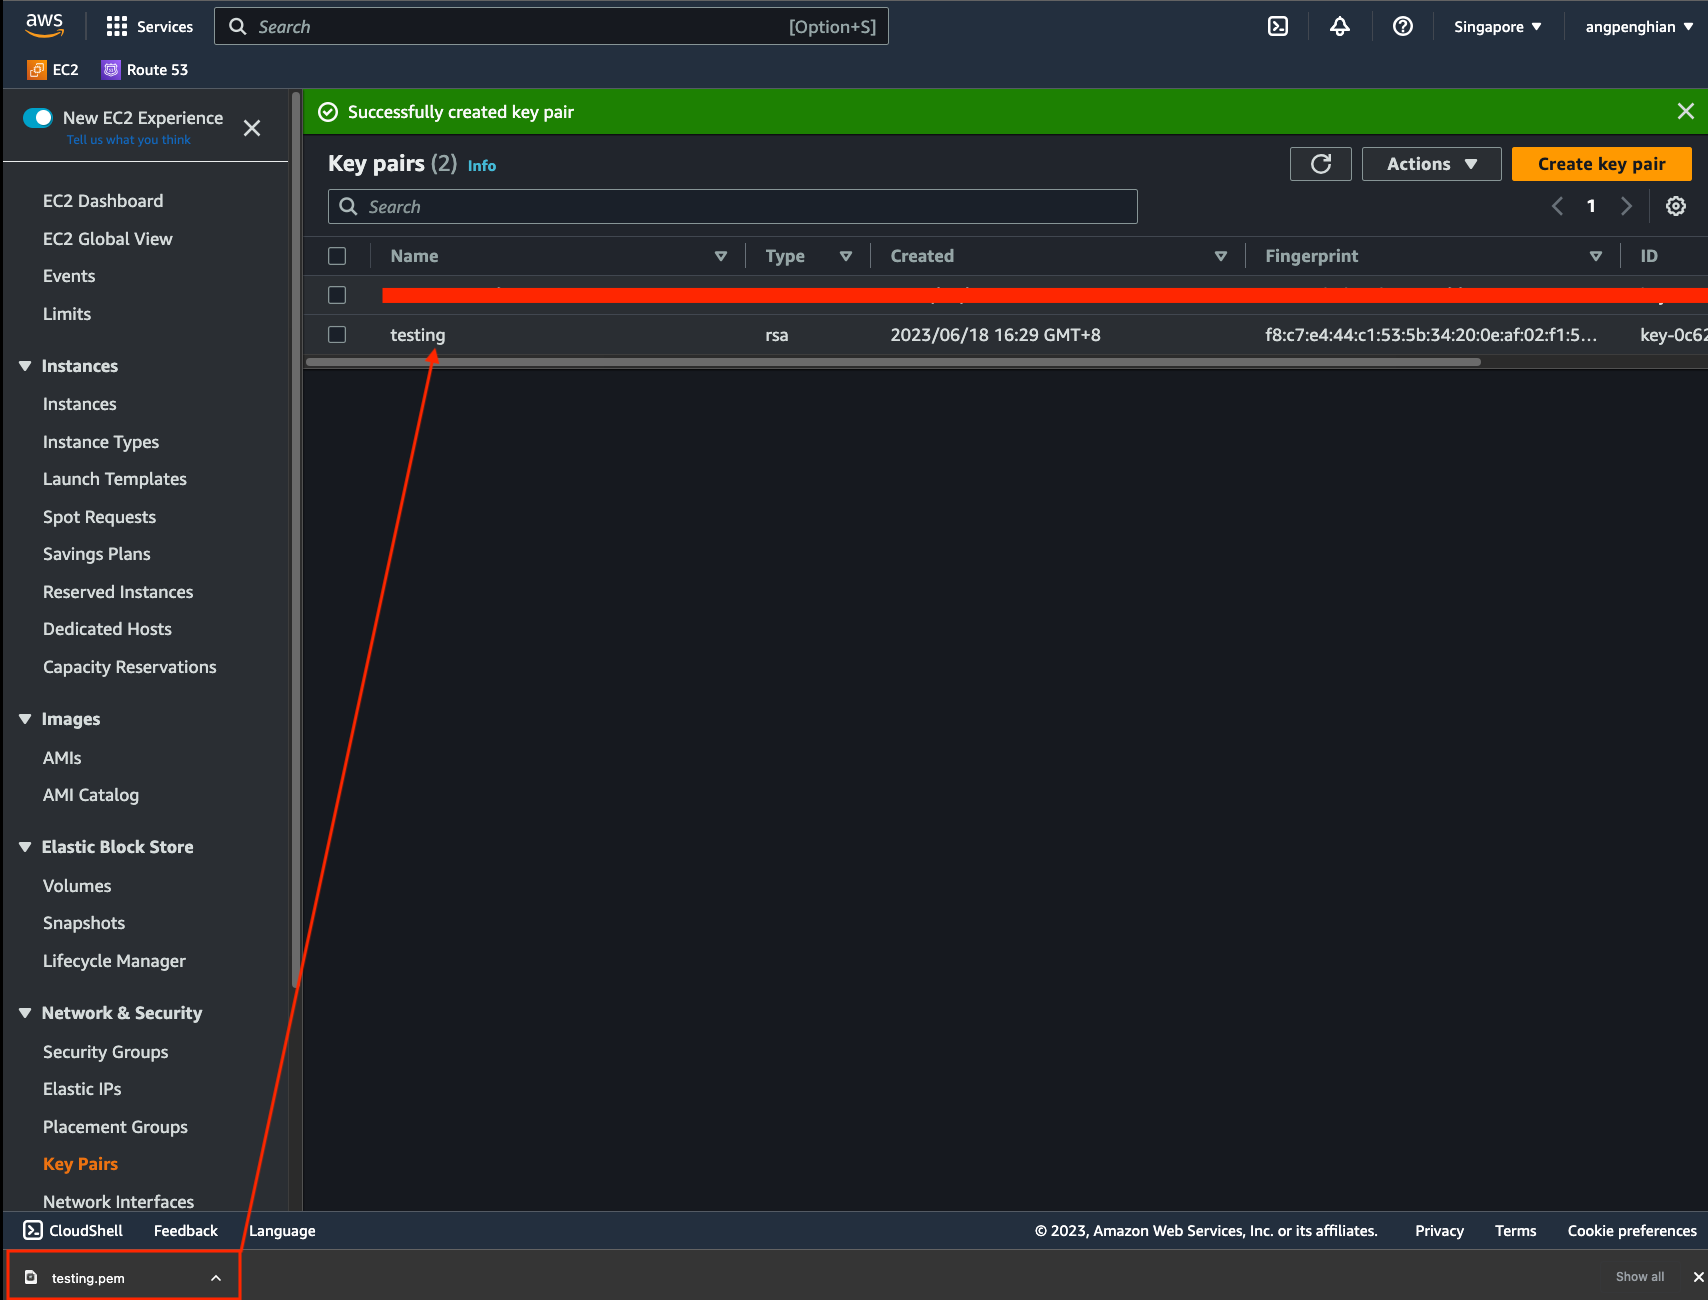
Step 8: Place secrets and key pair
Save the access keys and key pairs in the given format within the 'secrets' directory.
Step 9: Setup Terraform
Now that your security credentials are properly set up, there are still a few files you need to edit for the Terraform setup.
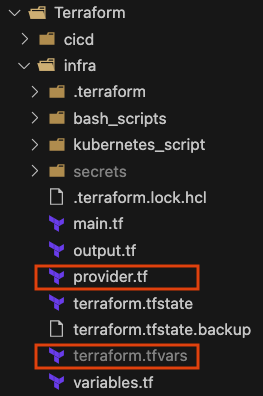
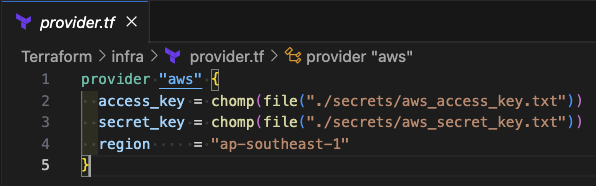
Step 10: Configure Terraform provider
In the provider file, you can modify the access key location if you've stored it elsewhere.
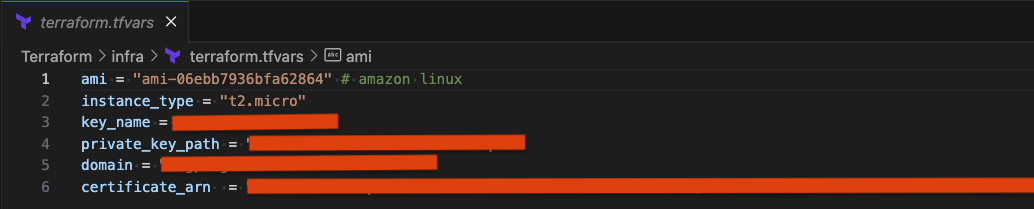
Step 11: Configure Terraform variables
For terraform.tfvars, you can modify parameters such as the EC2 machine image, your instance type, private key path, the domain you're using, and a validated SSL certificate ARN from AWS Cert Manager.
Step 12: Initialize Terraform
Once you've finished editing the files, navigate to the terraform directory (Resume-website > terraform > server-based) and initialize:
terraform init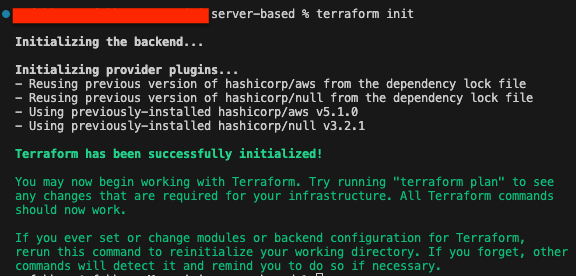
Step 13: Apply Terraform
Navigate to the server-based directory and apply the infrastructure:
terraform apply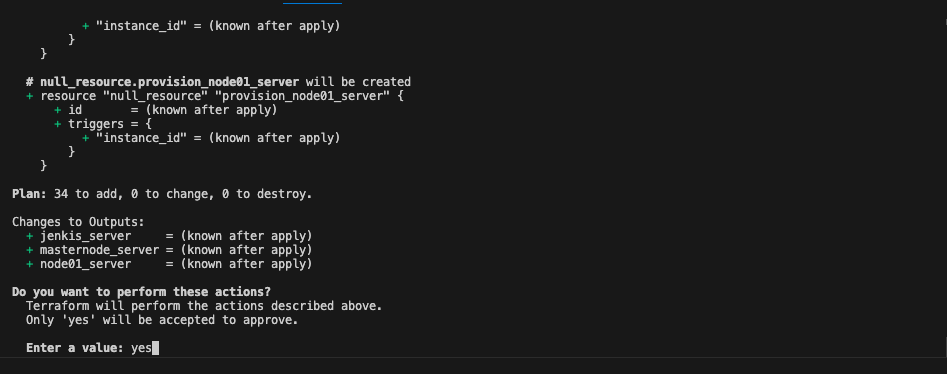
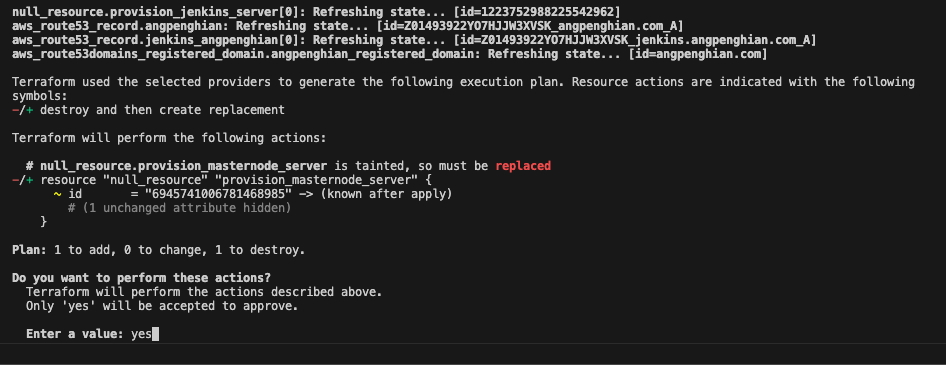
Step 14: Handle Terraform errors
After running terraform apply, it might have an error for remote-exec. Type terraform apply again.
terraform apply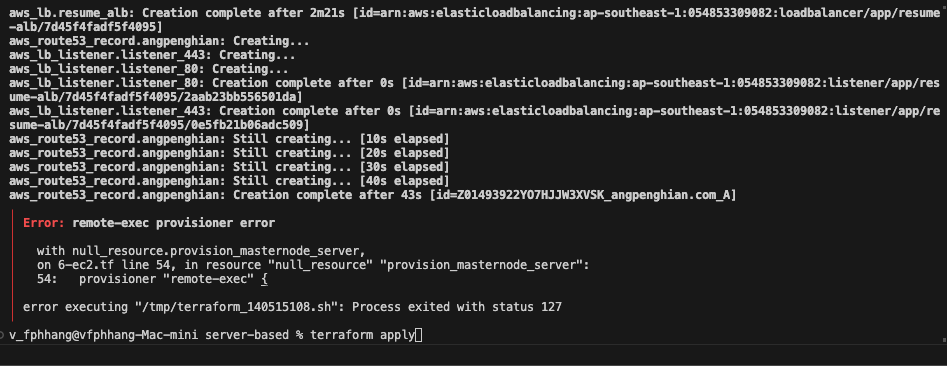
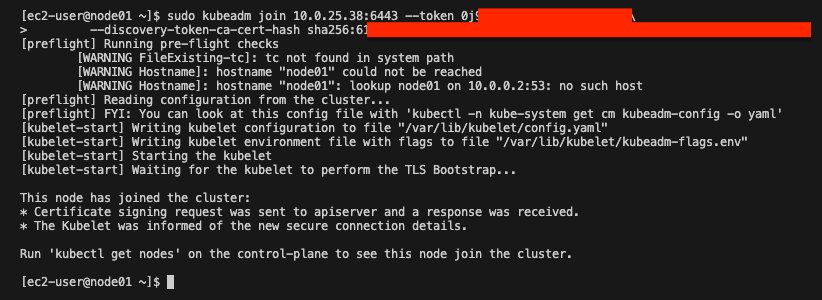
Step 15: Note the kubeadm join command
Once the initialization is complete, you will see a kubeadm join command. Take note of it and the IP addresses:
sudo kubeadm join [your-ip]:6443 --token [your-token] --discovery-token-ca-cert-hash [your-hash]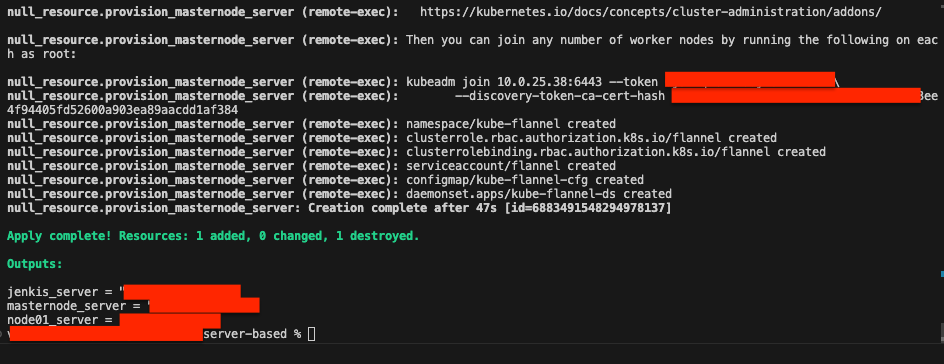
Step 16: Change permission for secret key
Before SSH-ing into EC2, change the permission of the key.pem file:
chmod 400 [your-key.pem]
Step 17: SSH into node01
Access the server via SSH to setup the Nginx Kubernetes deployment on node01:
ssh -i [your-key.pem] ec2-user@[your-ip]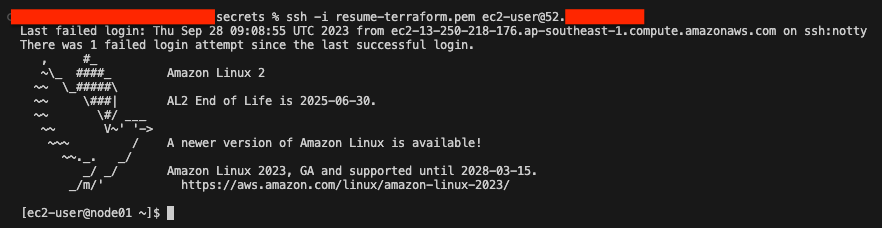
Step 18: Join node01 to the Kubernetes cluster
Using the previous kubeadm join command, join node01 to the cluster.
Step 19: Check node status
SSH into the master node and check the status of all nodes:
ssh -i [your-key.pem] ec2-user@[your-ip]kubectl get node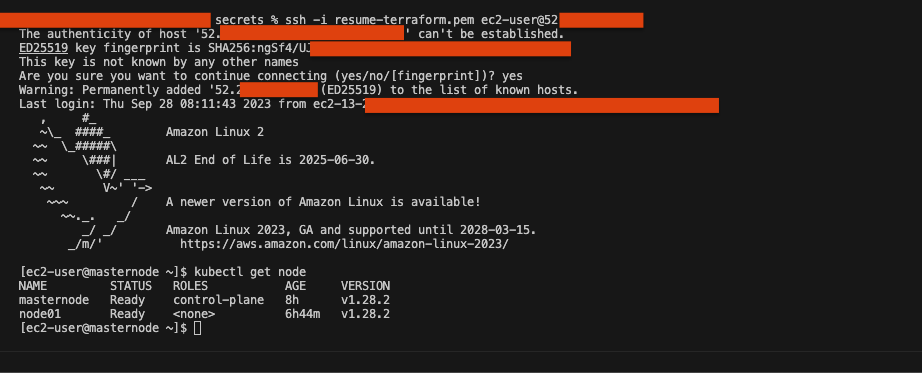
Step 20: Navigate to Kubernetes YAML files
Navigate to the nginx directory on the master node:
cd /home/ec2-user/website/kubernetes-setup
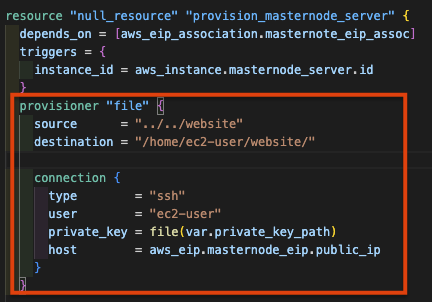
Step 21: How the website files got to the server
The website folder is copied to the EC2 instance via the Terraform provisioner in 6-ec2.tf:
Step 22: Create Nginx deployment
Deploy the nginx deployment on the Kubernetes cluster:
kubectl apply -f kubernetes-nginx-setup.yaml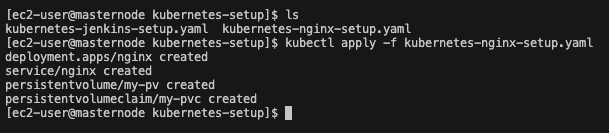
Step 23: Check deployment status
kubectl get all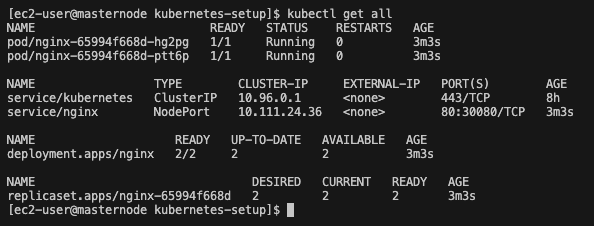
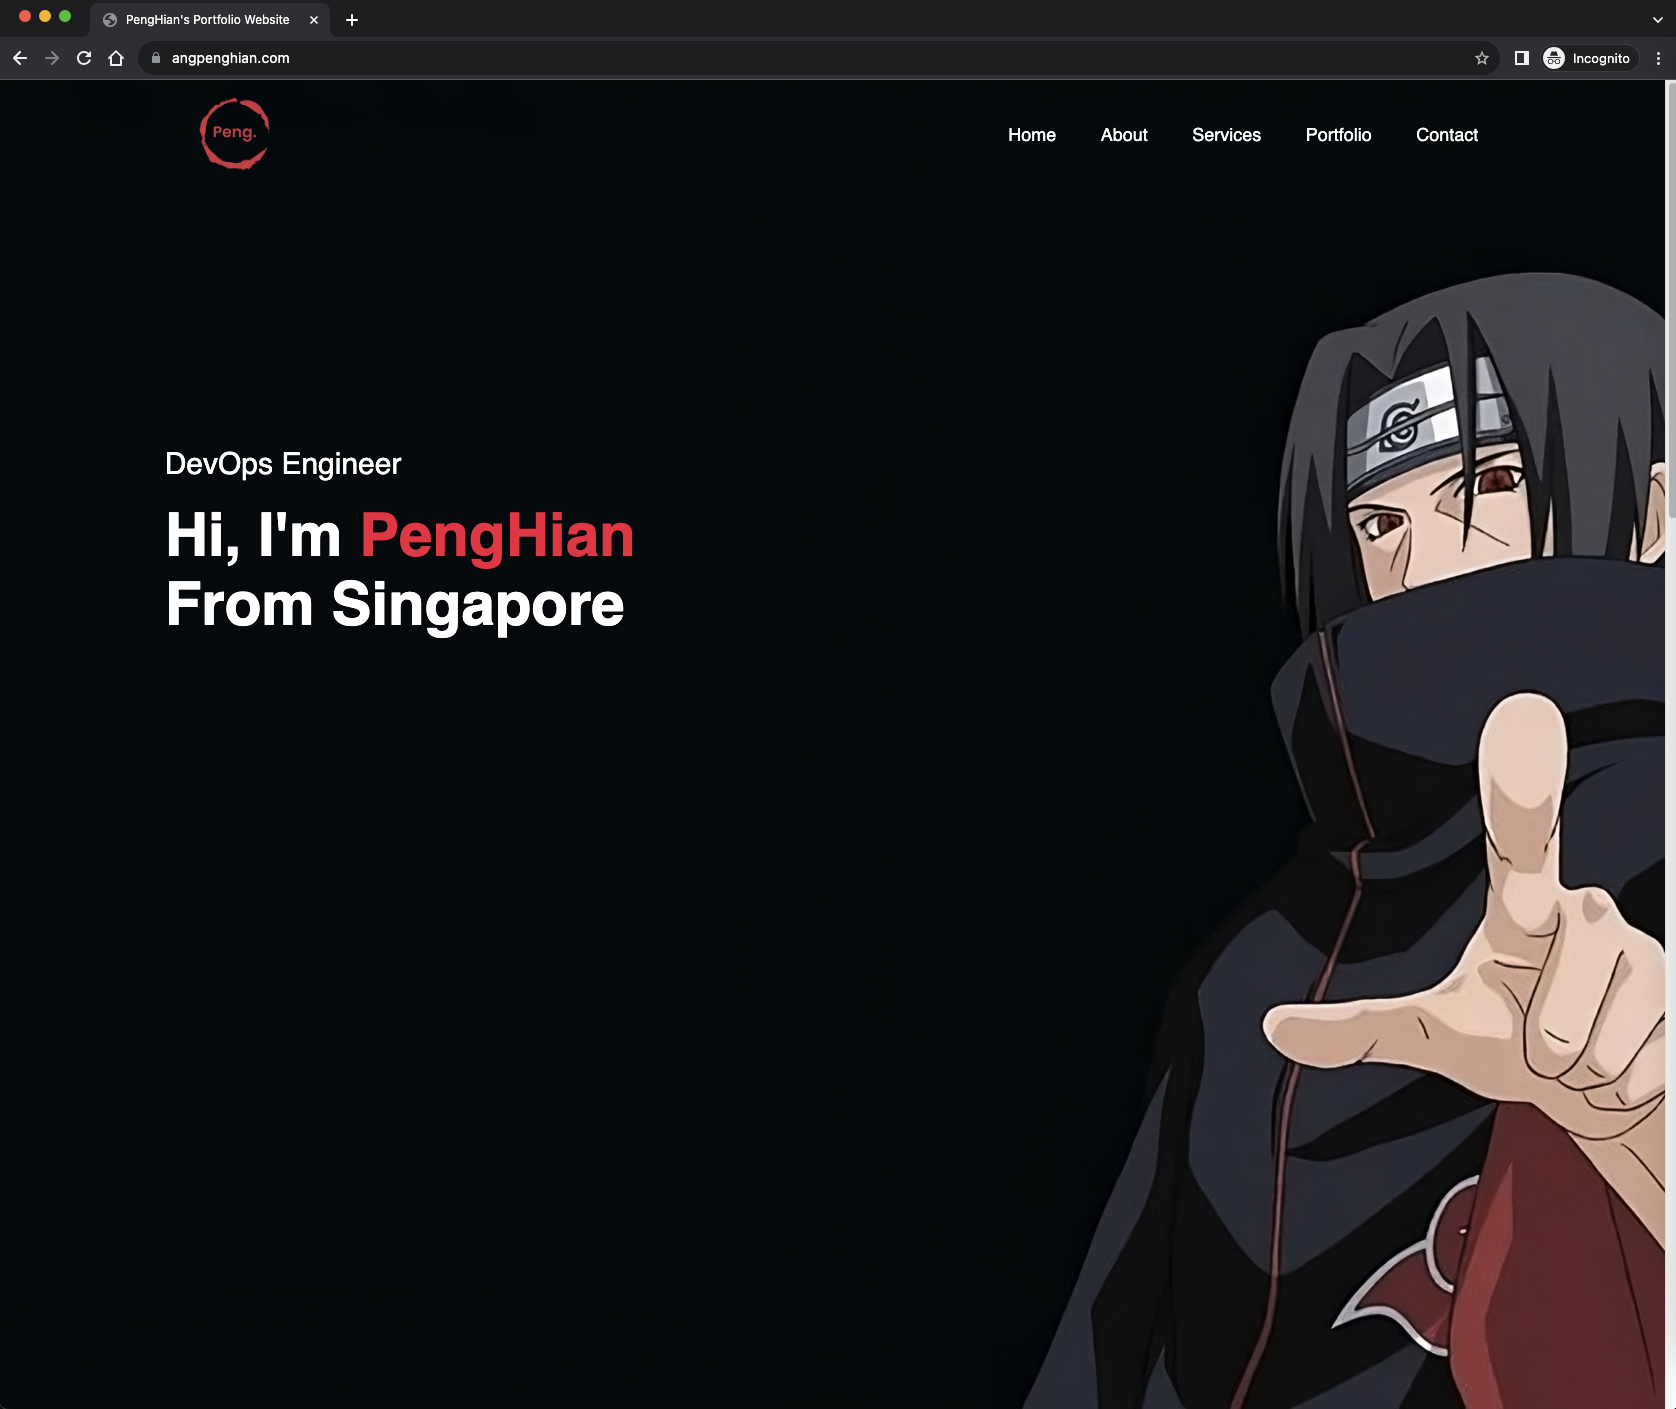
Step 24: Verify the website
Check if the nginx deployment is working by opening the URL in a browser.
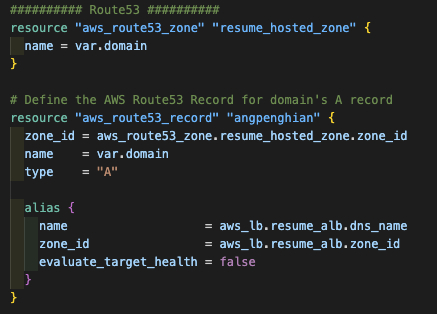
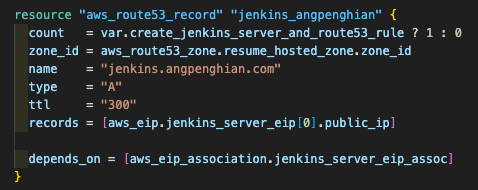
Step 25: Domain name configuration
The domain is configured in the Terraform file 8-route53.tf, which creates a record set for angpenghian.com:
Part 2: CI/CD Pipeline Setup
Now that we have completed the infrastructure setup, we can set up the CI/CD pipeline. For this stage (highlighted in red):
Step 1: SSH into Jenkins
Navigate to the secrets directory and SSH into the Jenkins EC2 instance:
ssh -i [your-key.pem] ec2-user@[your-ip]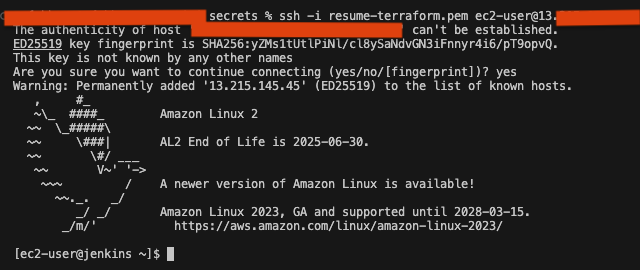
Step 2: Join Jenkins to the Kubernetes cluster
sudo kubeadm join [your-ip]:6443 --token [your-token] --discovery-token-ca-cert-hash [your-hash]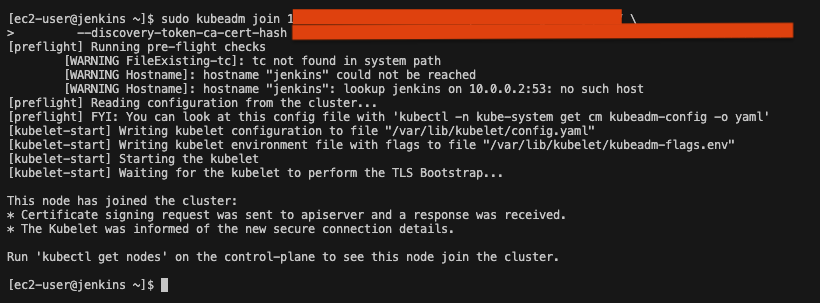
Step 3: Verify Jenkins node status
SSH into the master node and check node status:
ssh -i [your-key.pem] ec2-user@[your-ip]kubectl get node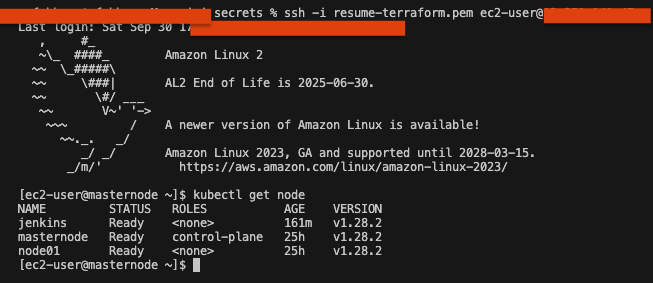
Step 4: Navigate to Kubernetes YAML files
cd /home/ec2-user/website/kubernetes-setupStep 5: Create Jenkins deployment
kubectl apply -f kubernetes-jenkins-setup.yaml
Step 6: Verify Jenkins website
Check if the Jenkins deployment is working by opening it in a browser.
Step 7: Jenkins domain name
The Jenkins domain is configured in 8-route53.tf with a record set for jenkins.angpenghian.com:
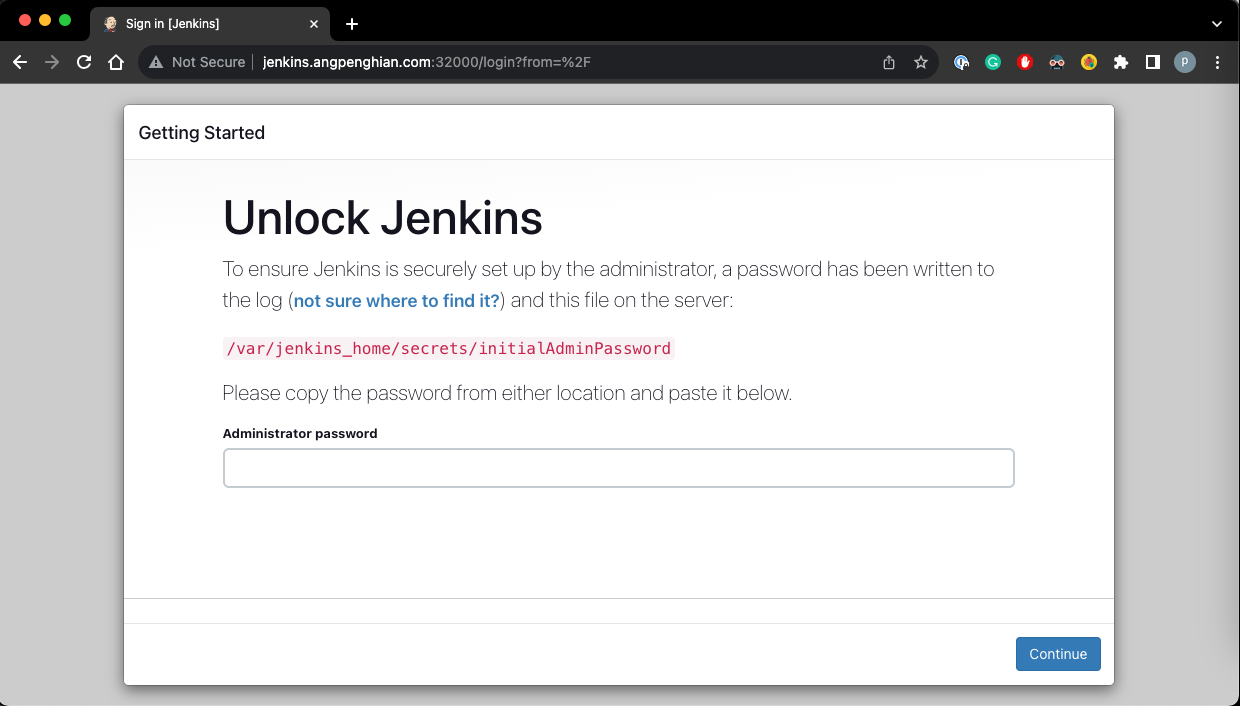
Step 8: Get Jenkins initial admin password
SSH into the master node and get the Jenkins pod name:
kubectl get pods --namespace=devops-tools
View the Jenkins pod log to find the initial admin password:
kubectl logs [Jenkins-pod-name] --namespace=devops-tools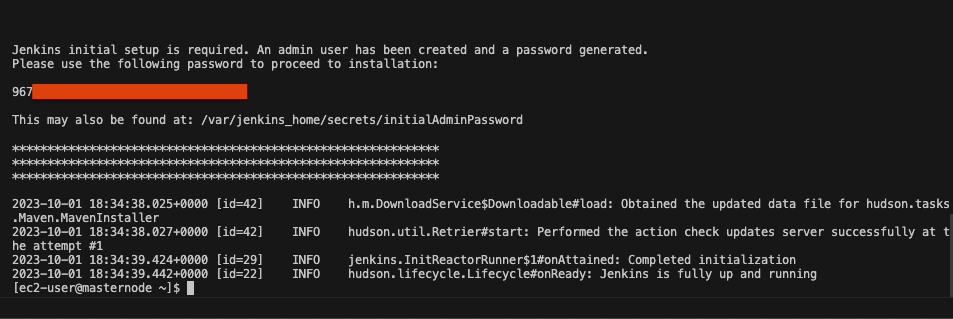
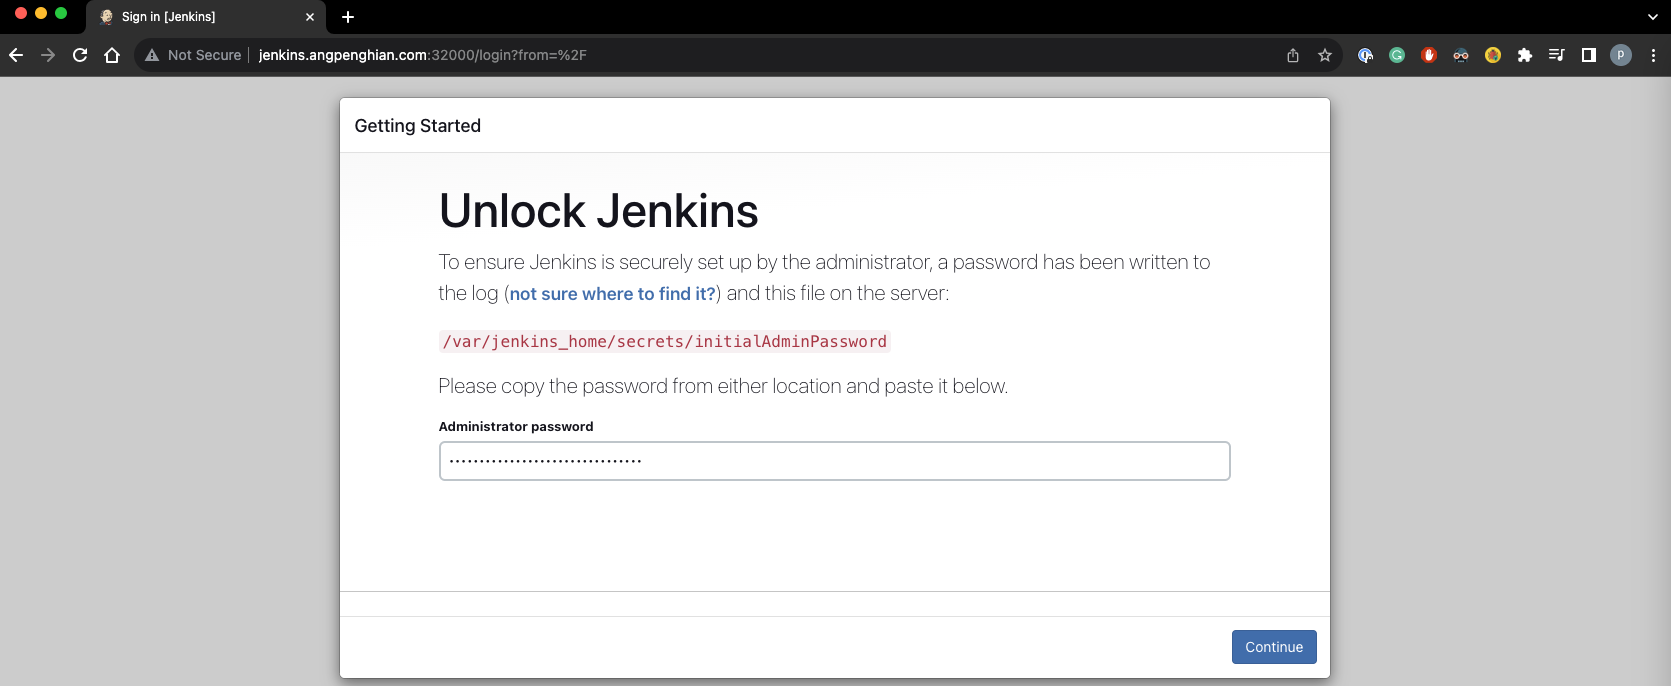
Step 9: Unlock Jenkins
Enter the initial admin password and click continue.
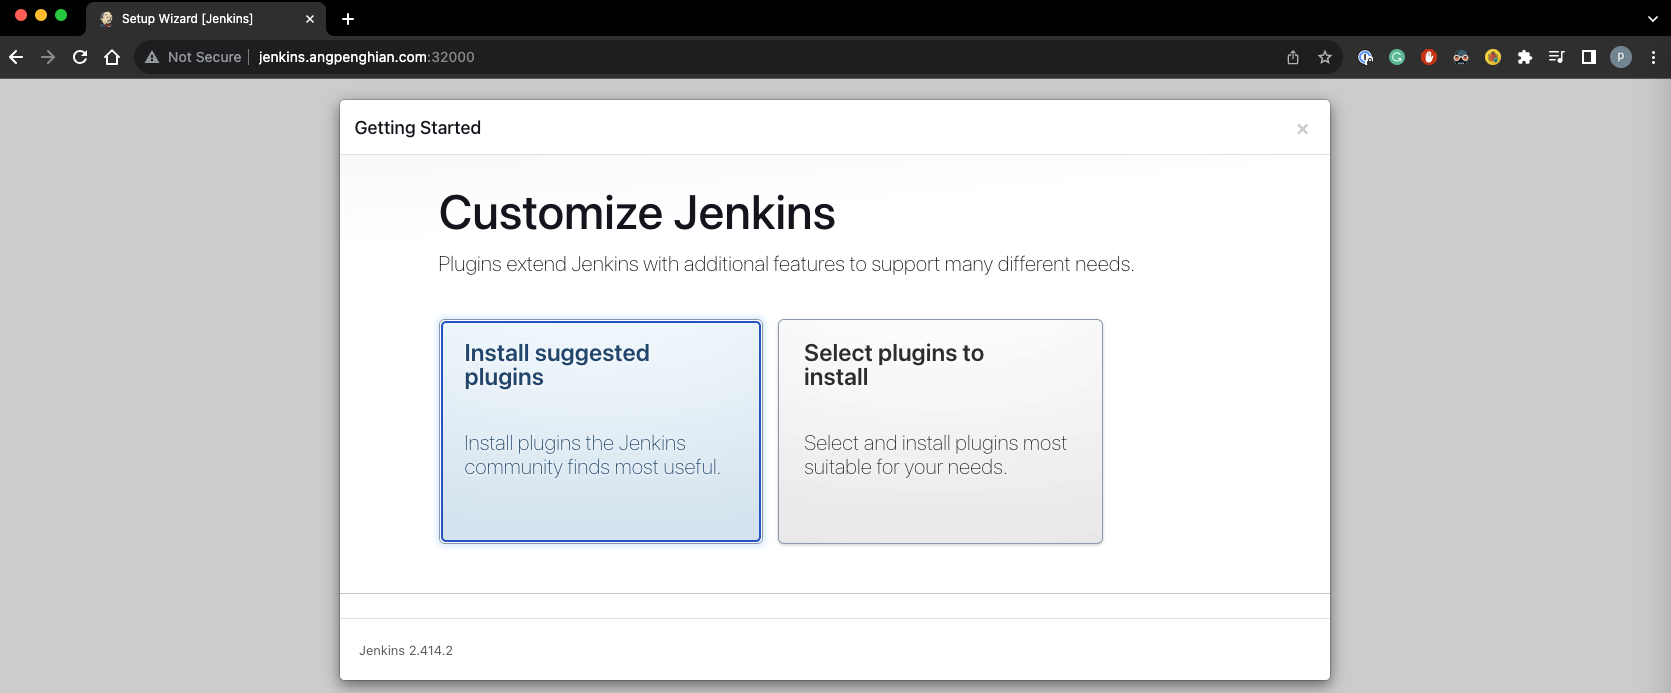
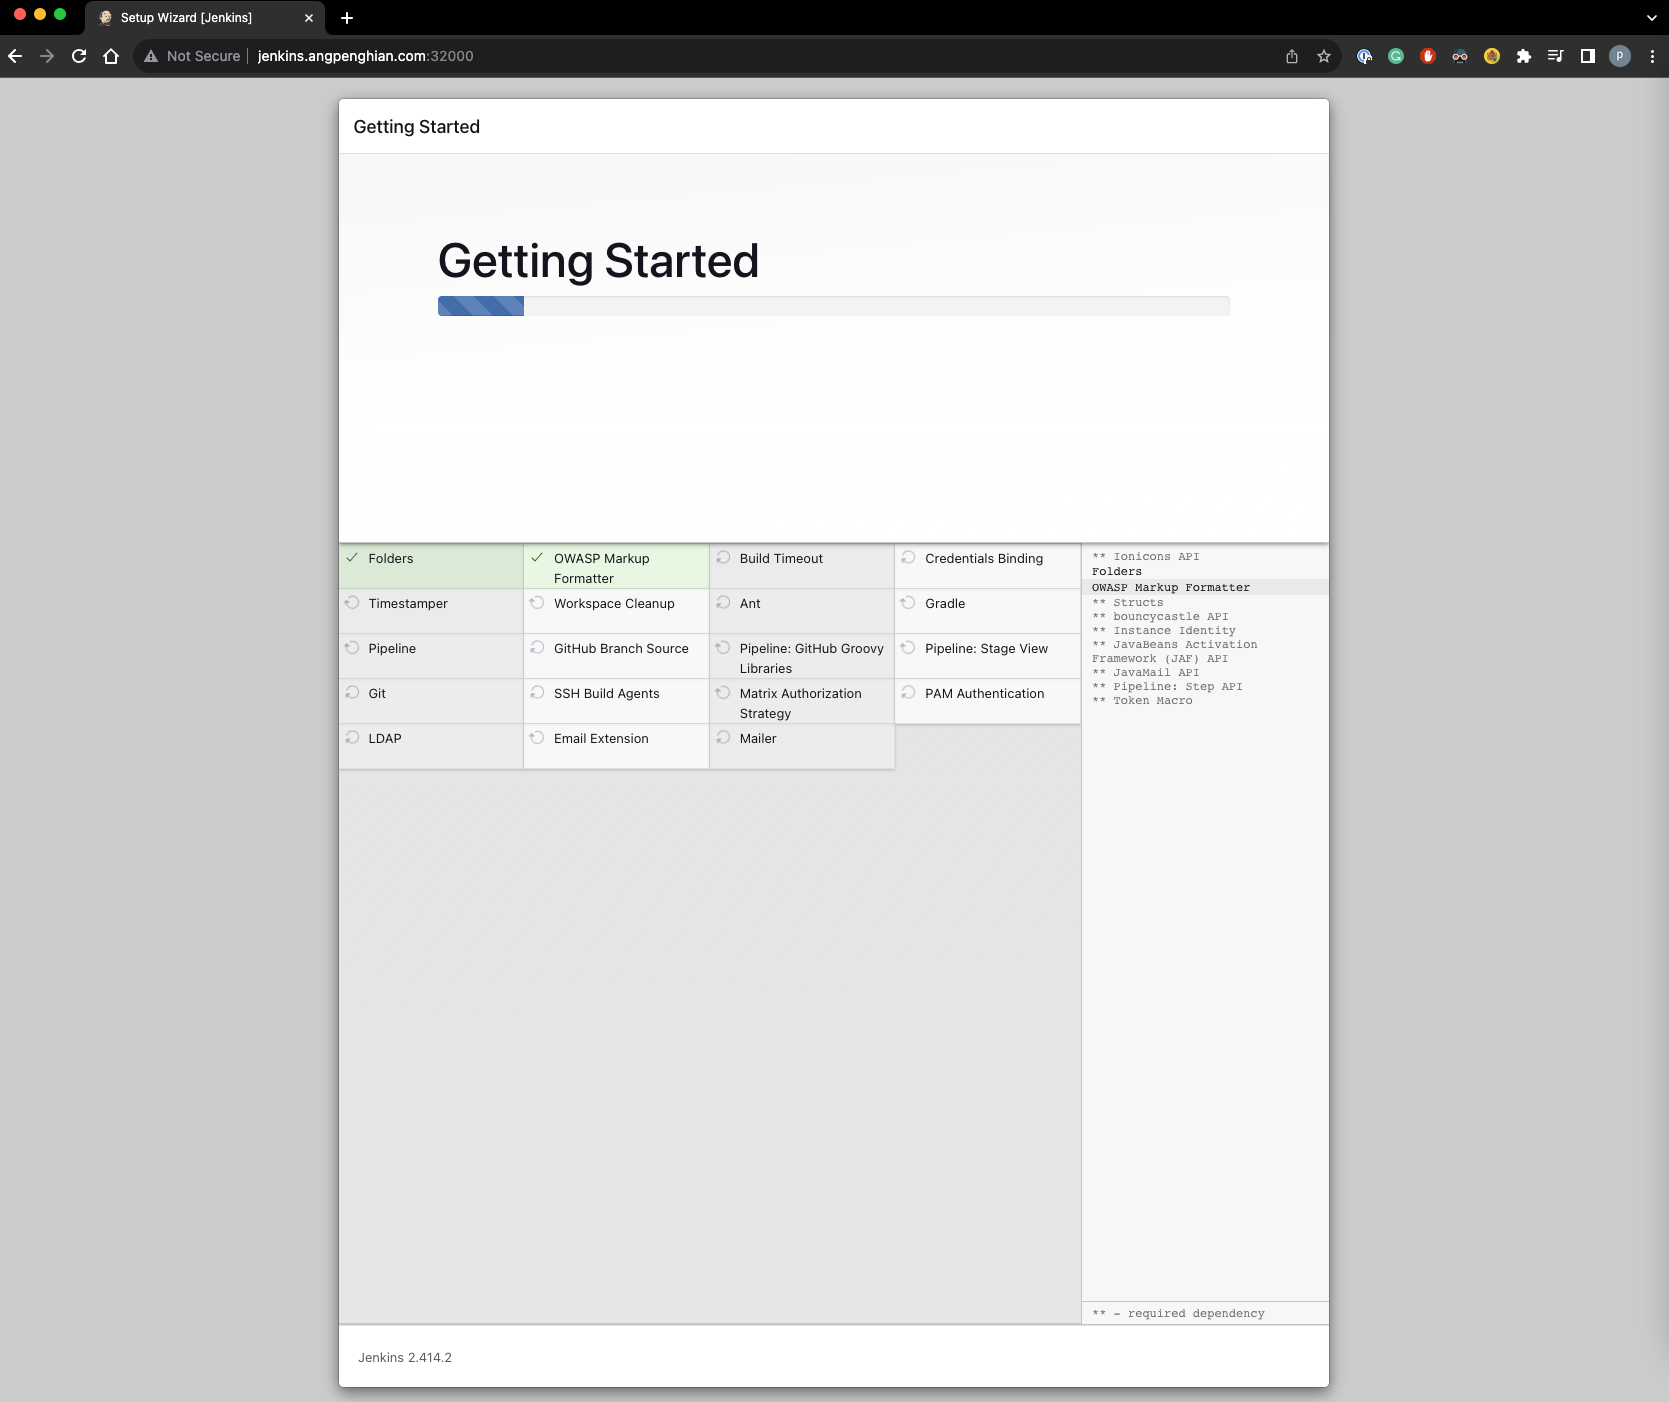
Step 10: Install suggested plugins
Click on install suggested plugins and wait for the installation to complete.
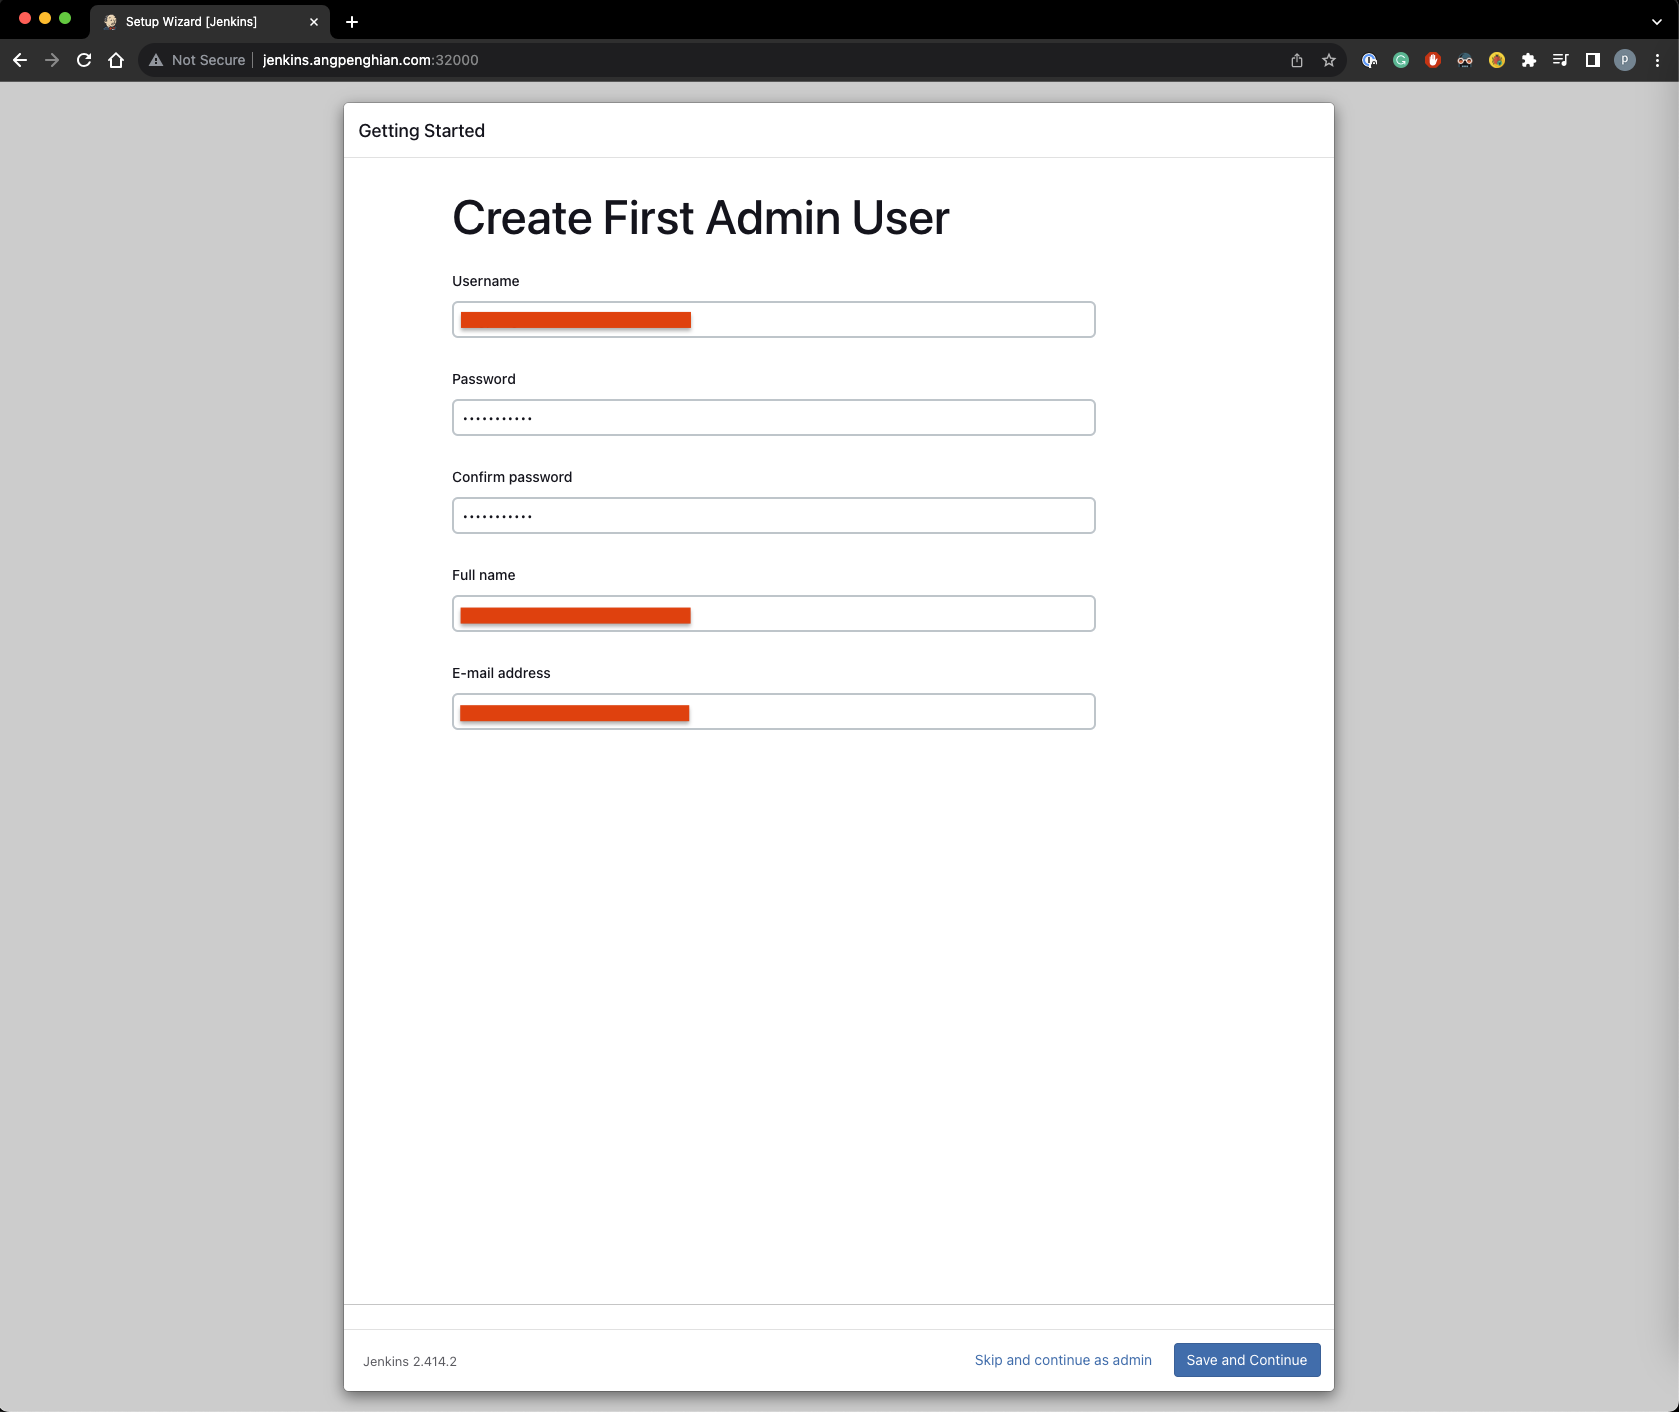
Step 11: Create first admin user
Input your username, password, full name and email. Save and continue.
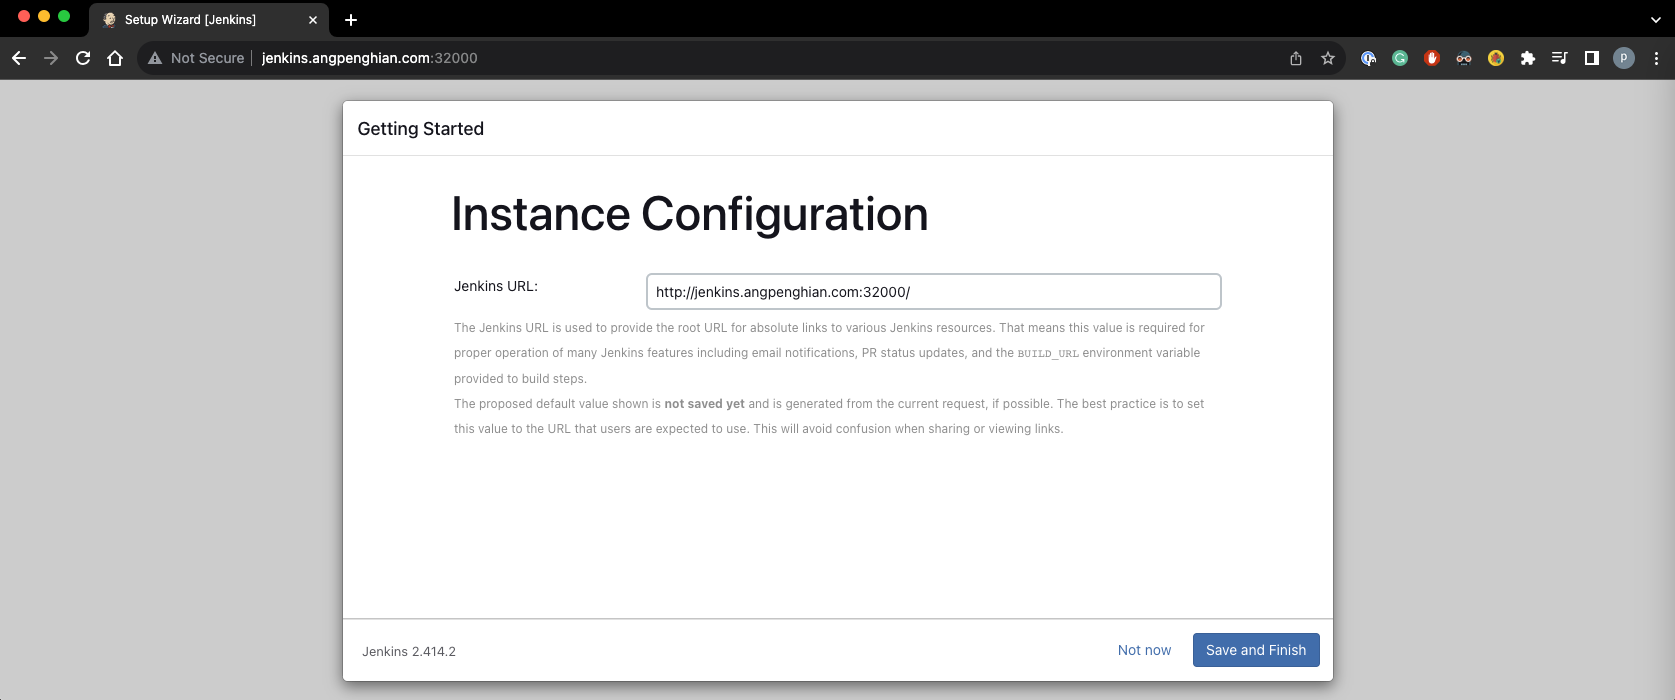
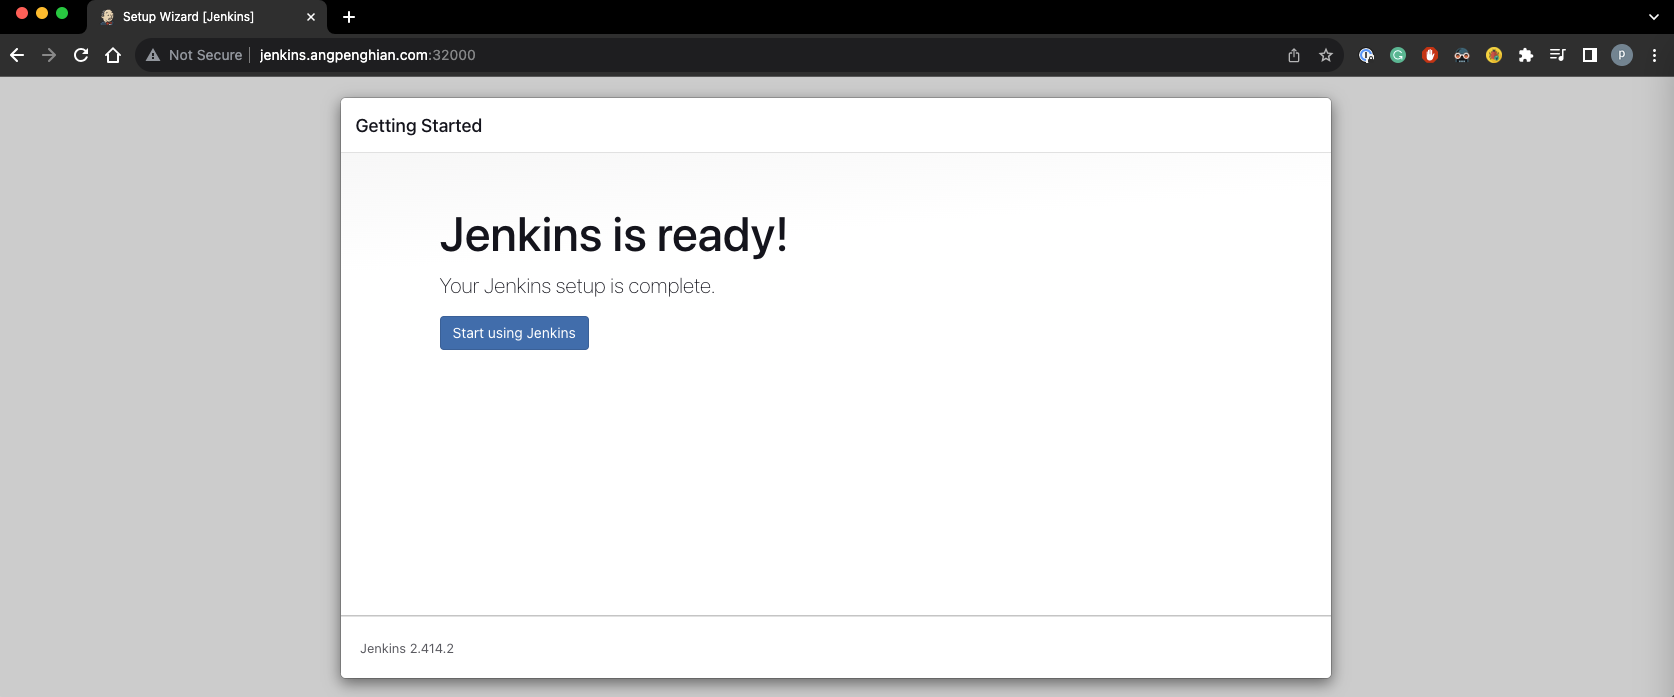
Step 12: Instance configuration
Click on save and finish.
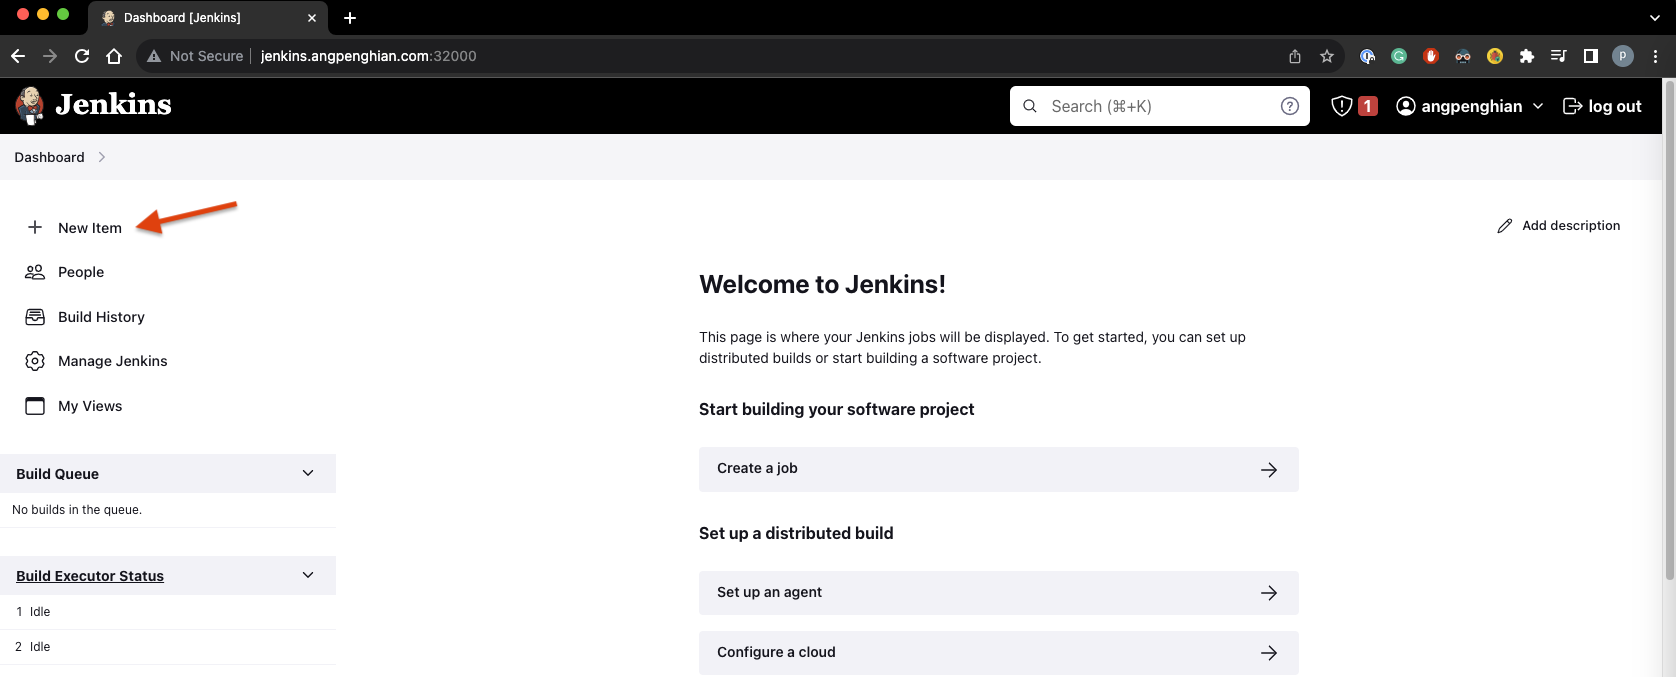
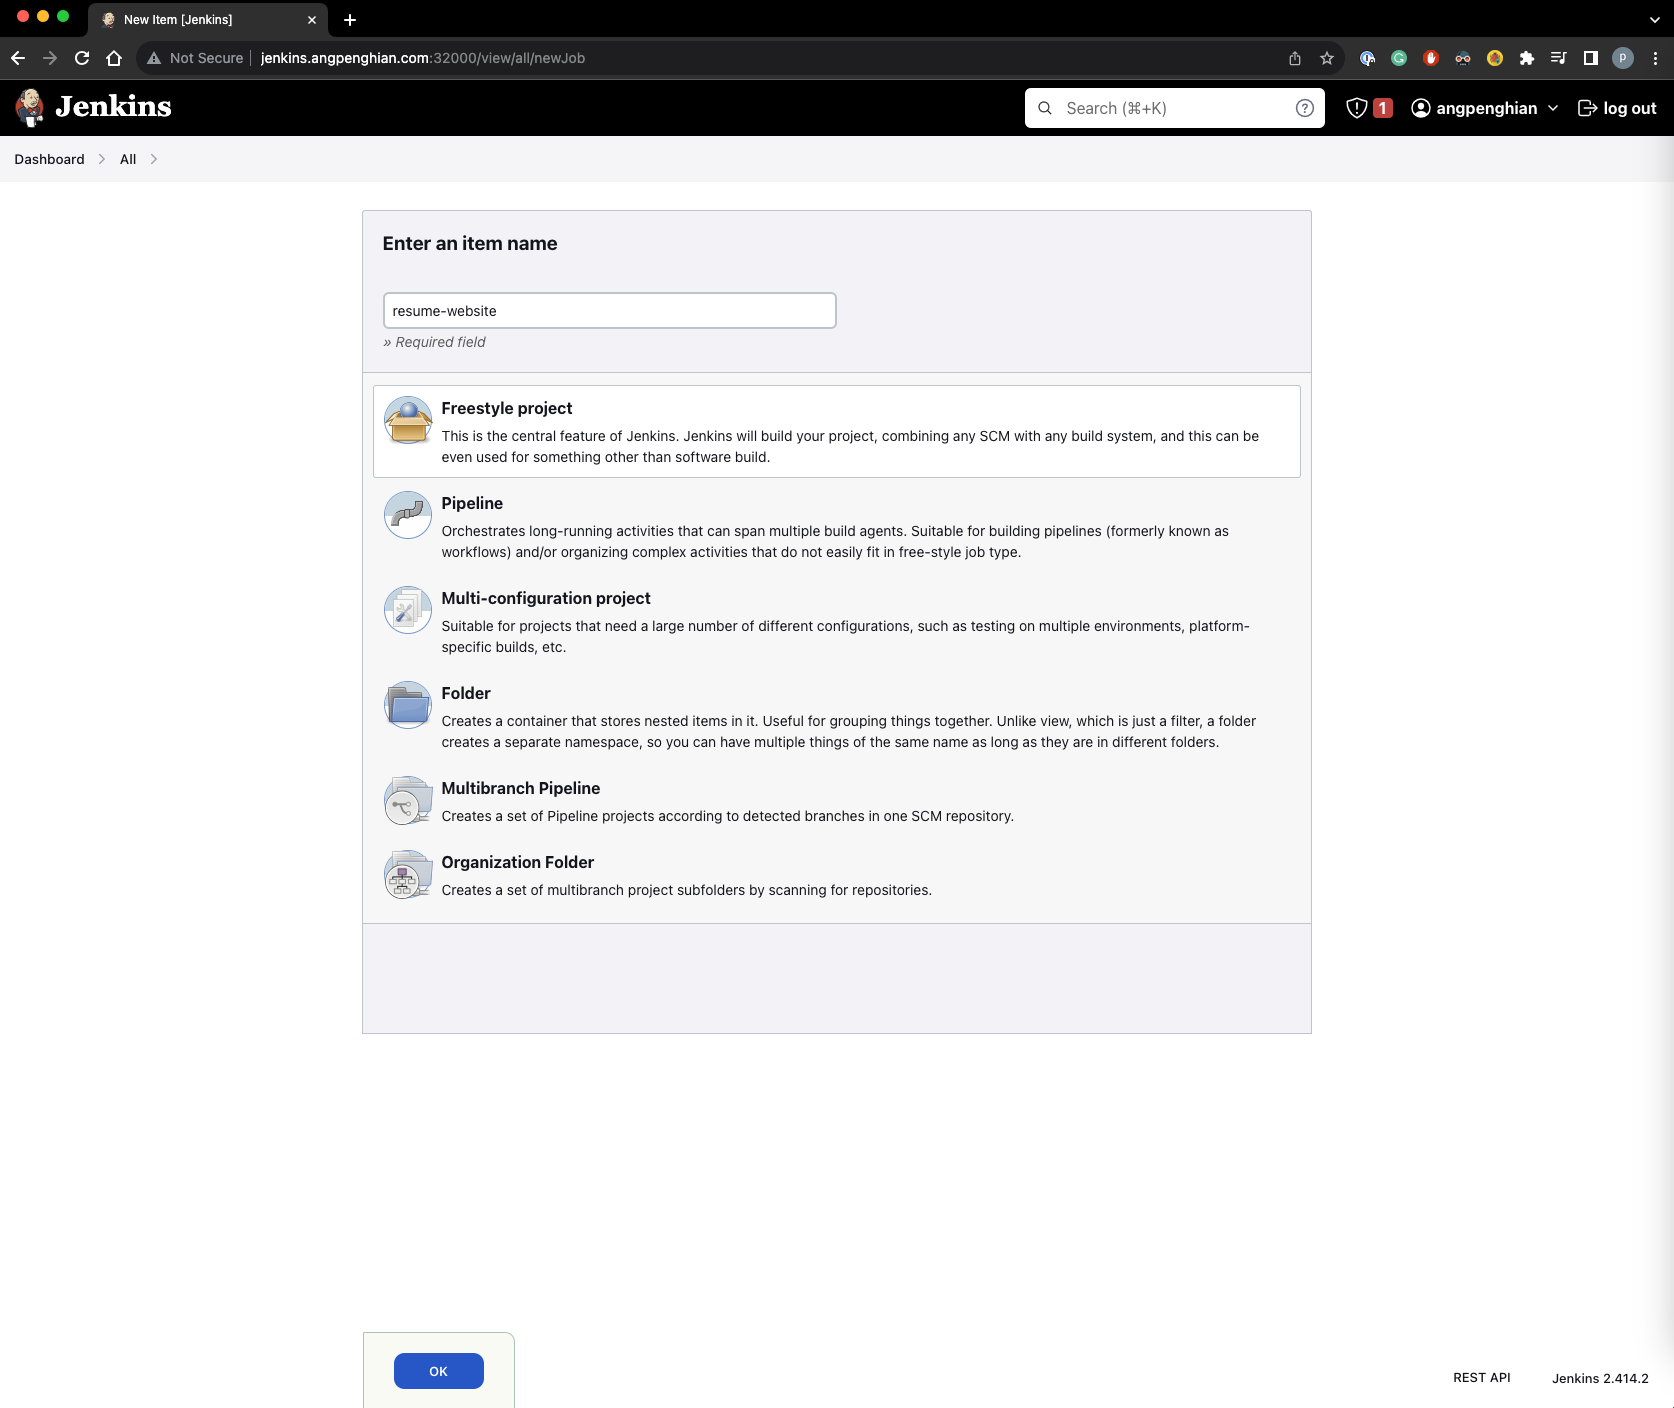
Step 13: Create a new pipeline
Click on new item and select freestyle project. Name it (e.g., "resume-website") and click OK.
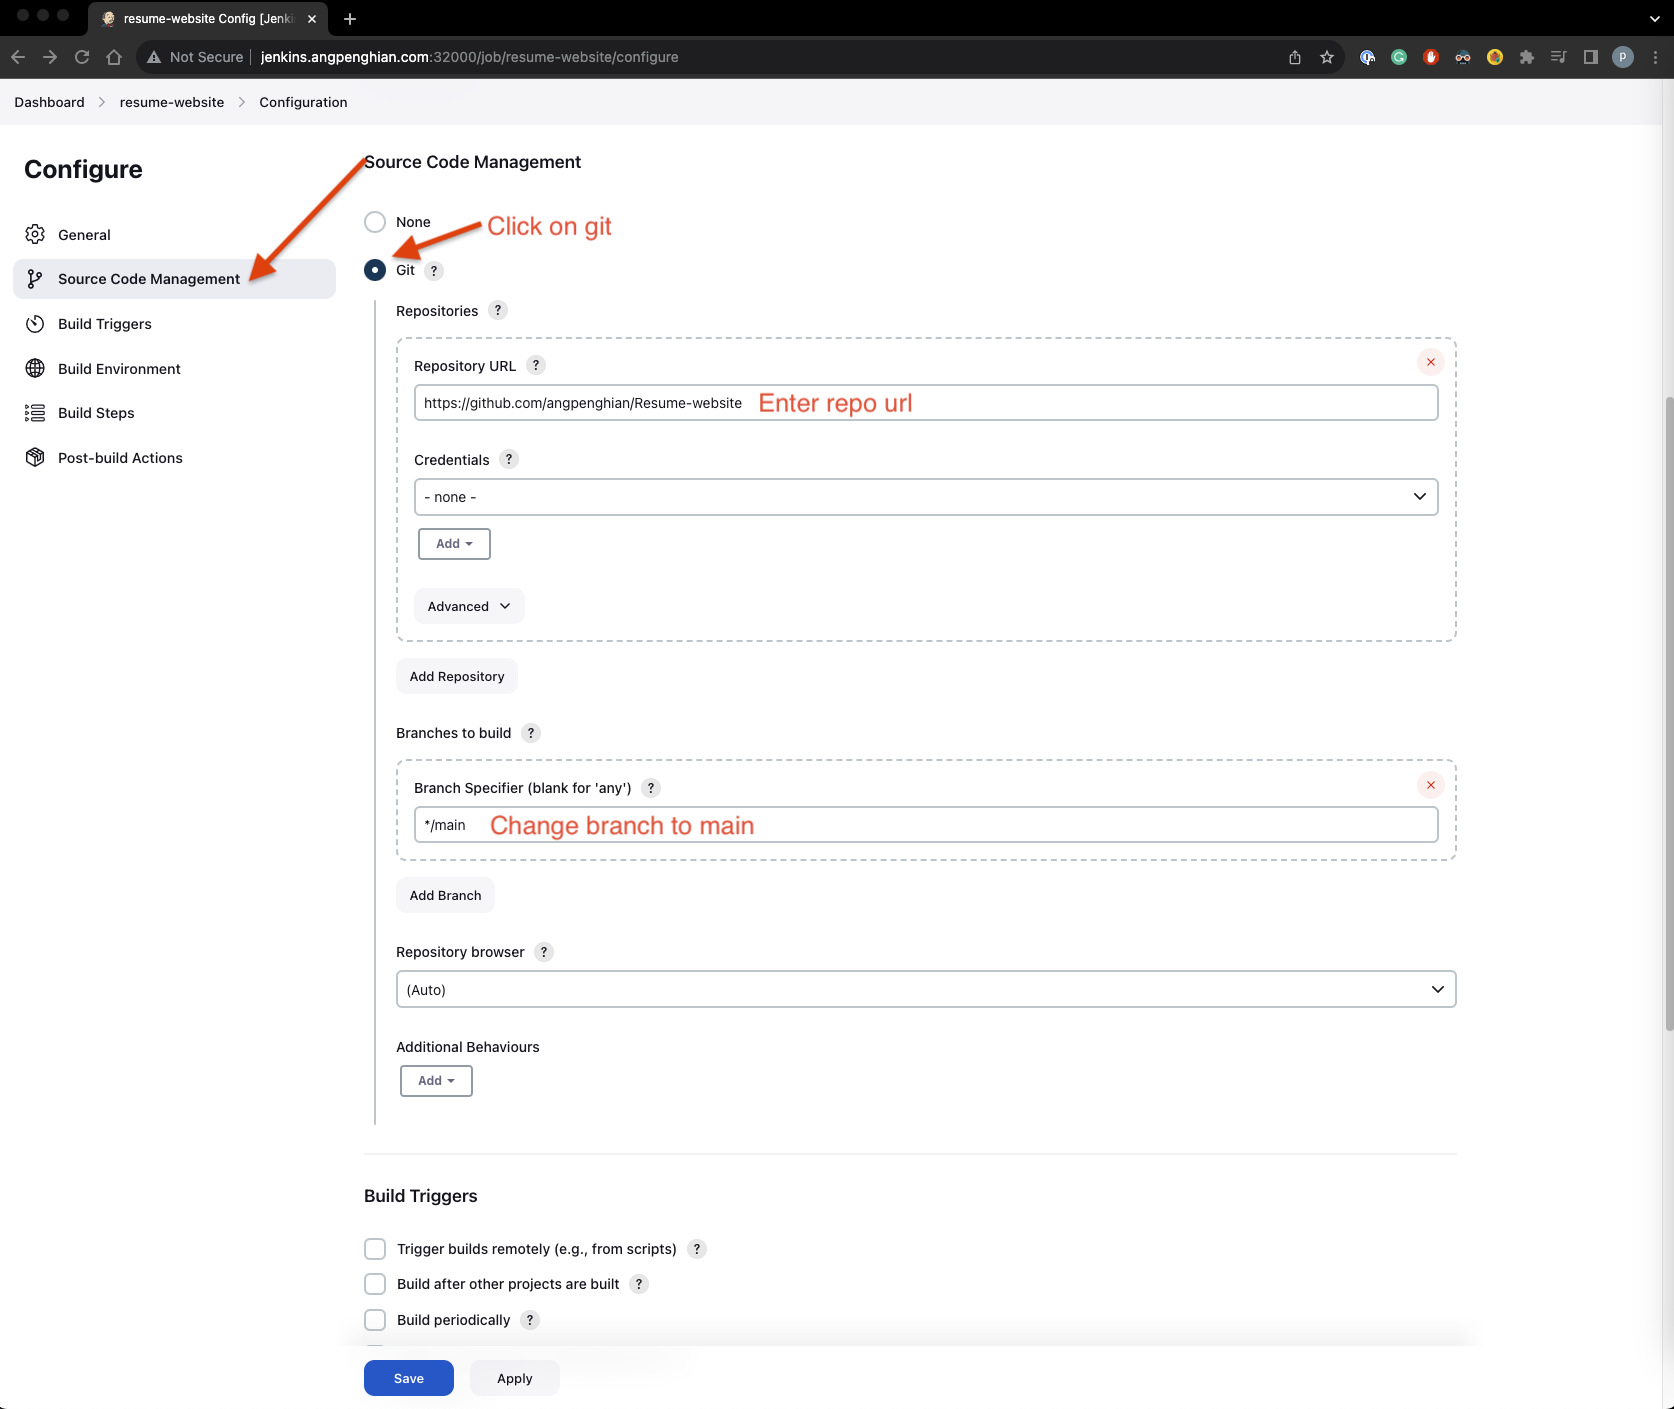
Step 14: Source code management
Select Git and input the repository URL:
https://github.com/angpenghian/Resume-websiteSelect the branch (main).
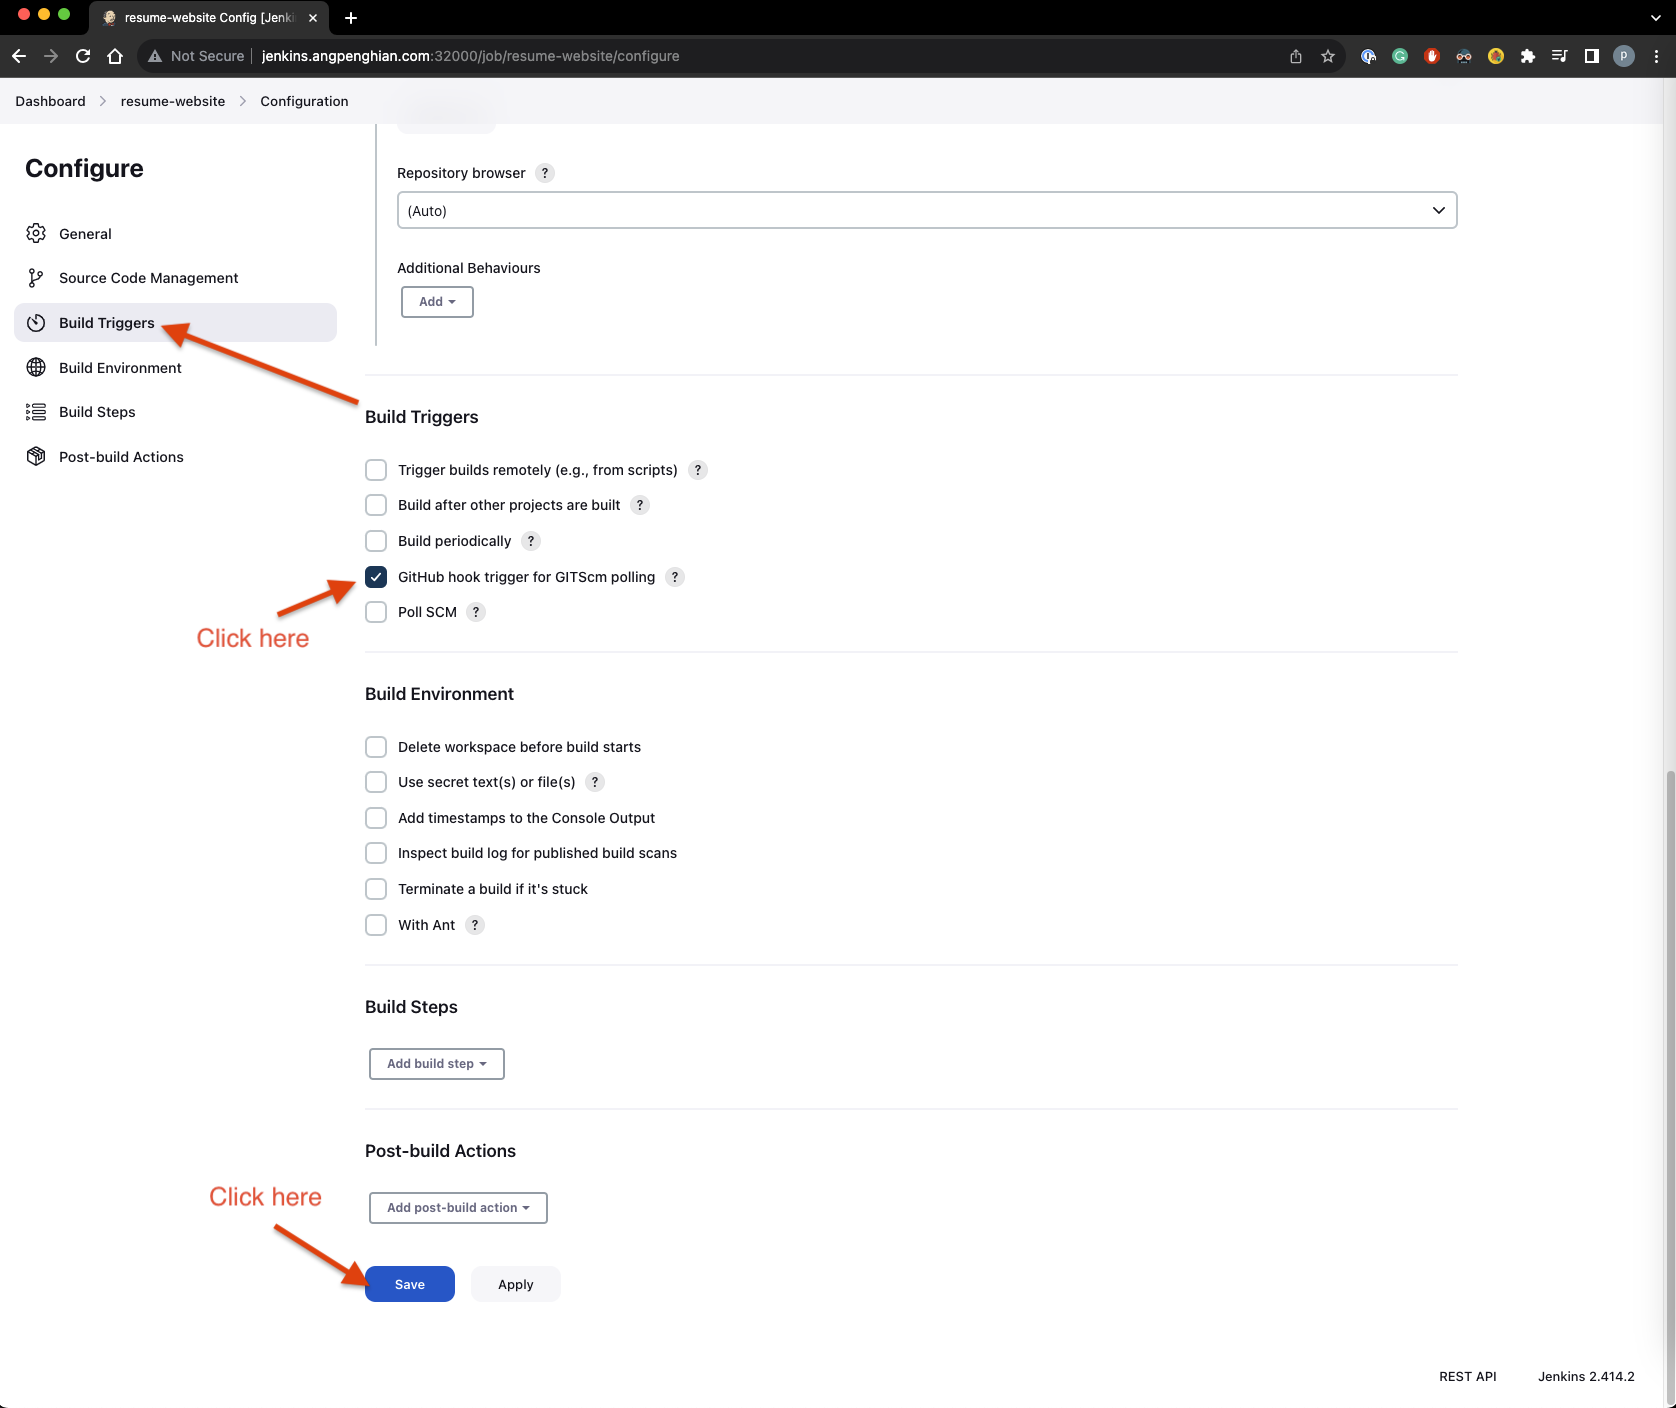
Step 15: Build triggers
Select "GitHub hook trigger for GITScm polling" and save.
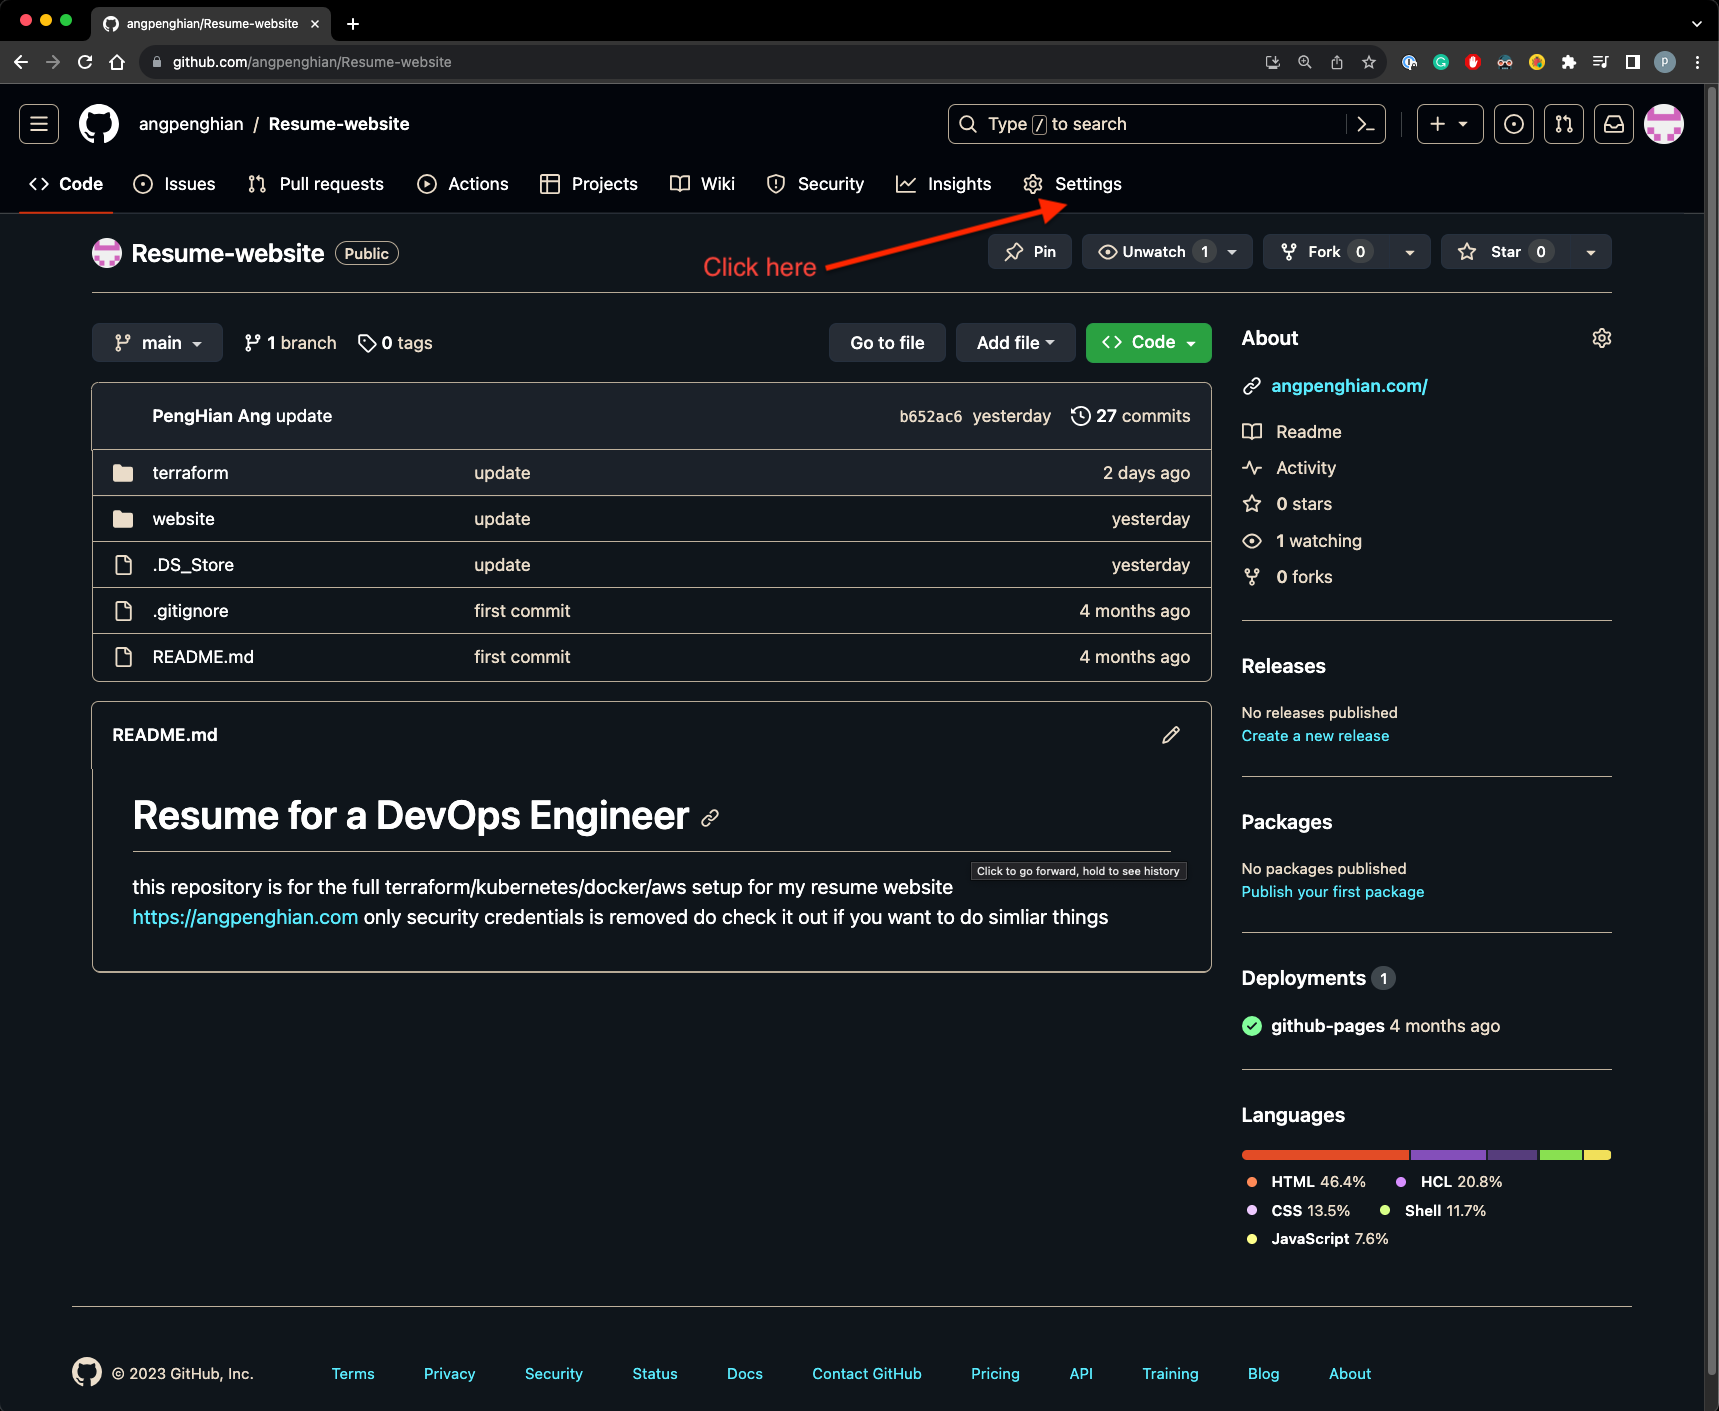
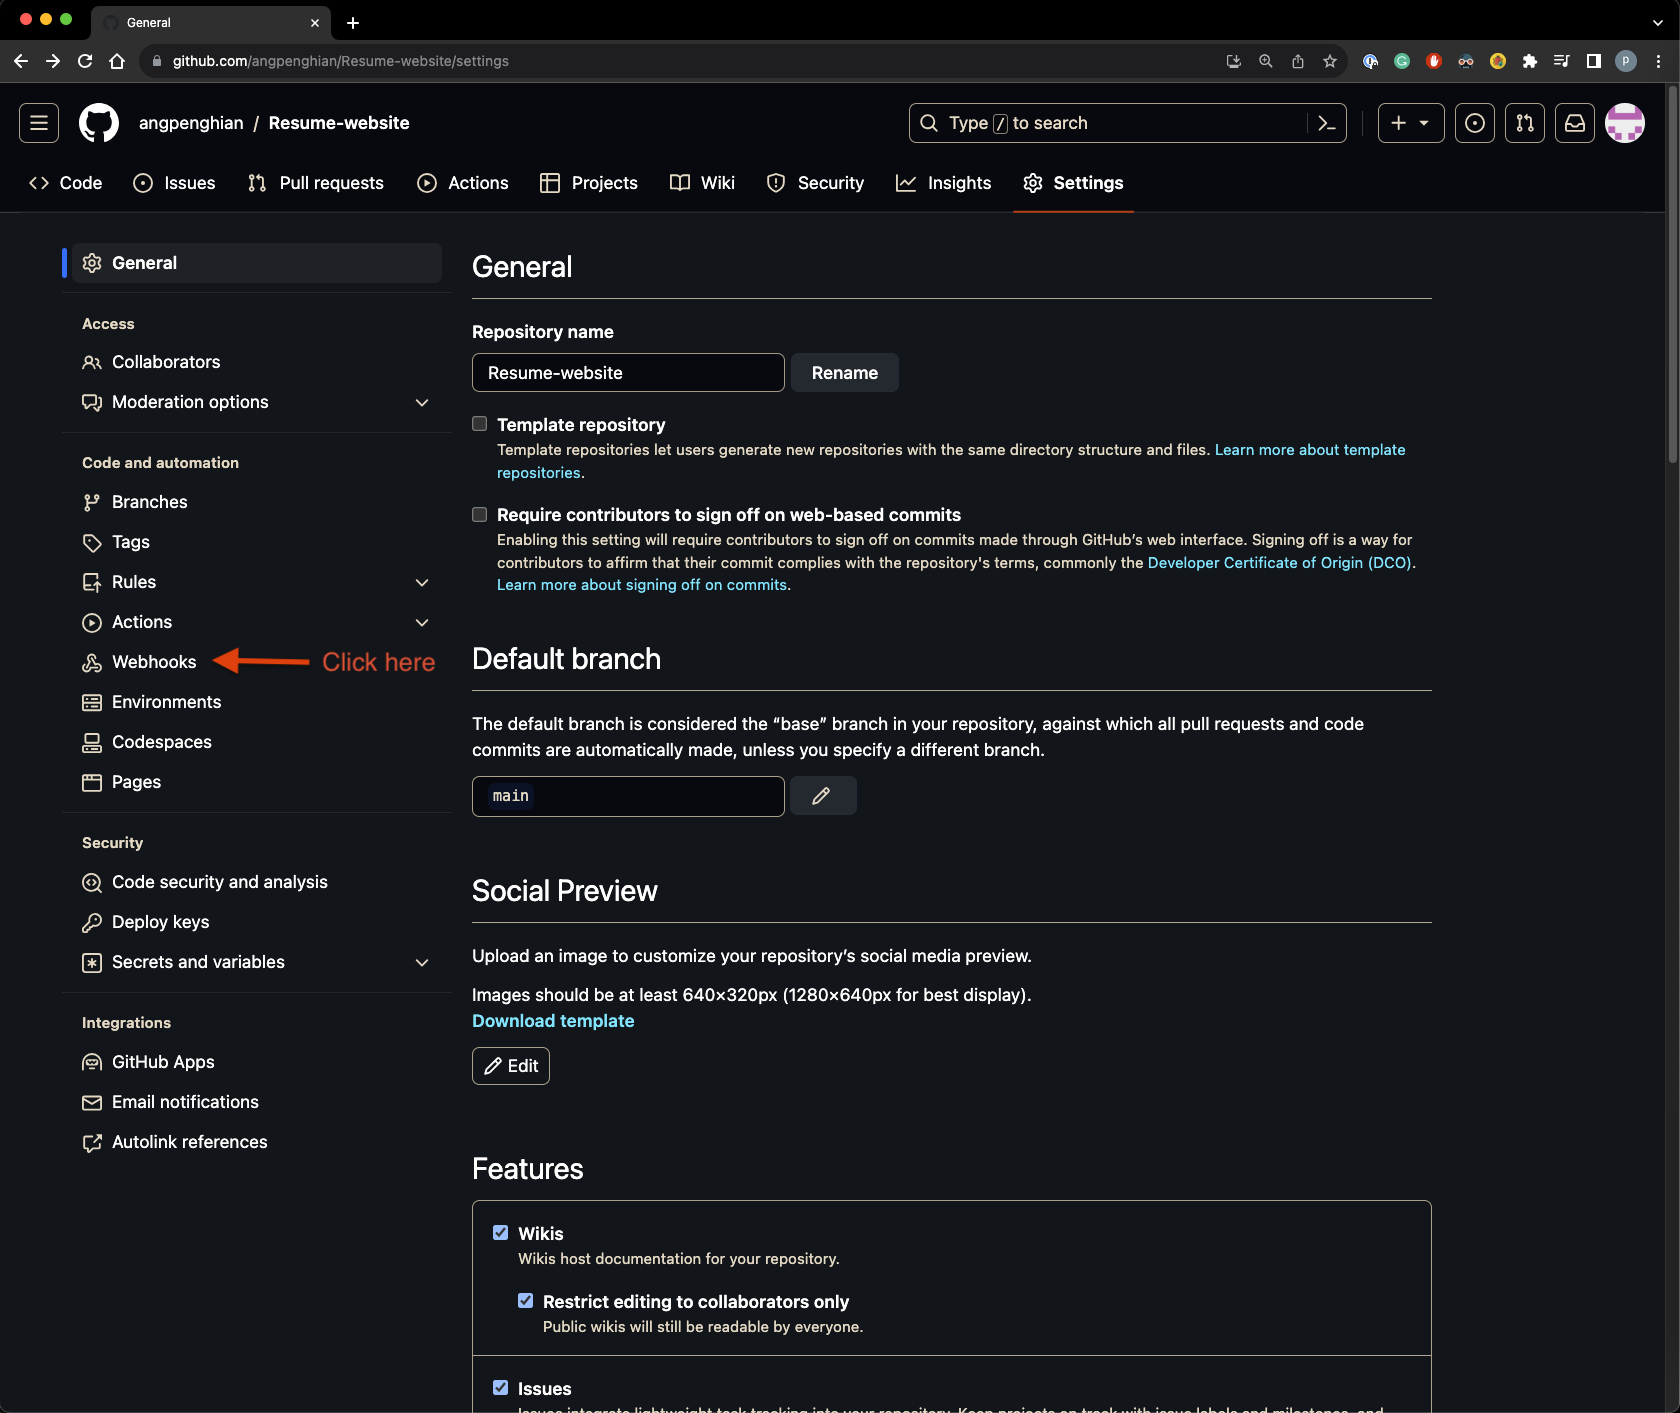
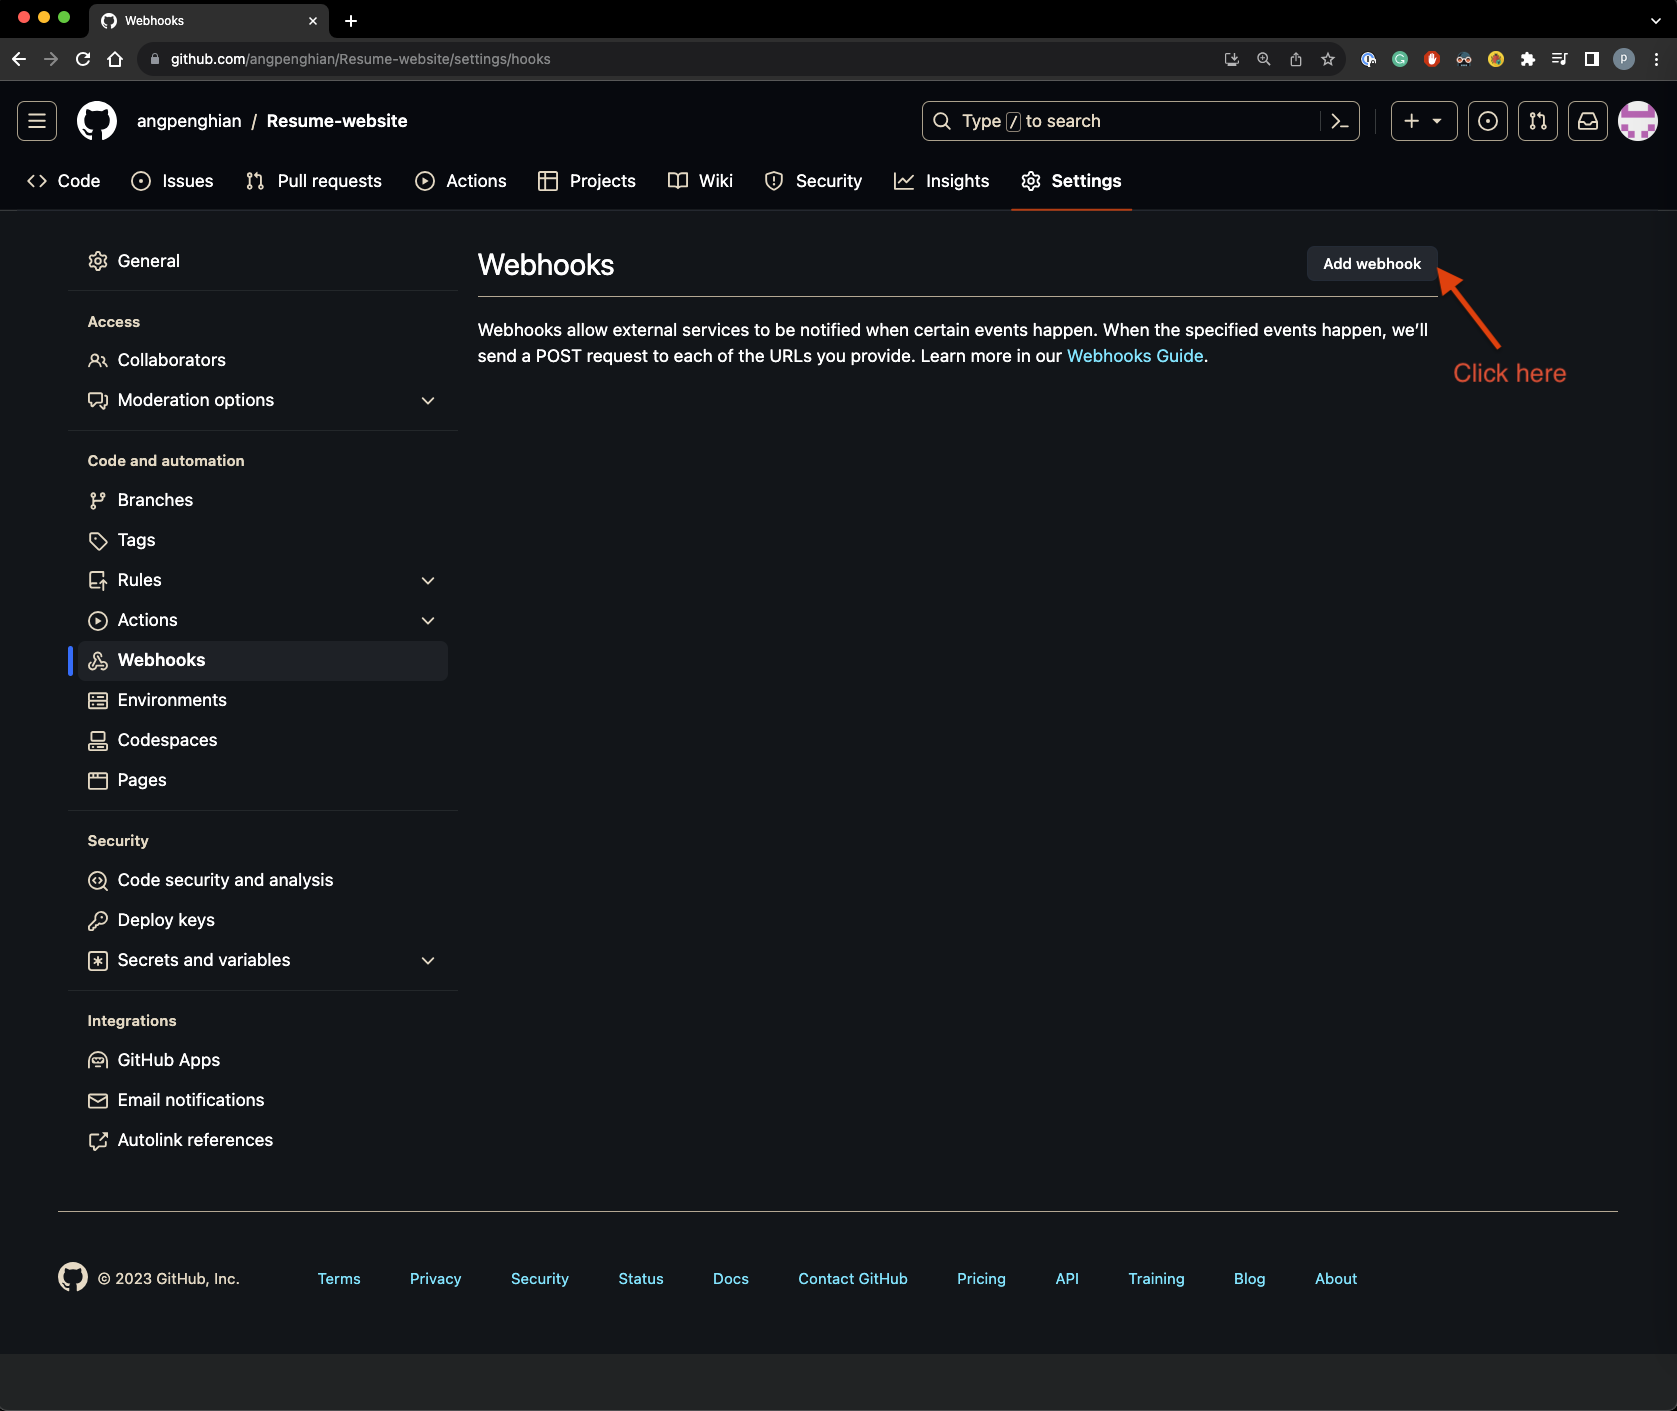
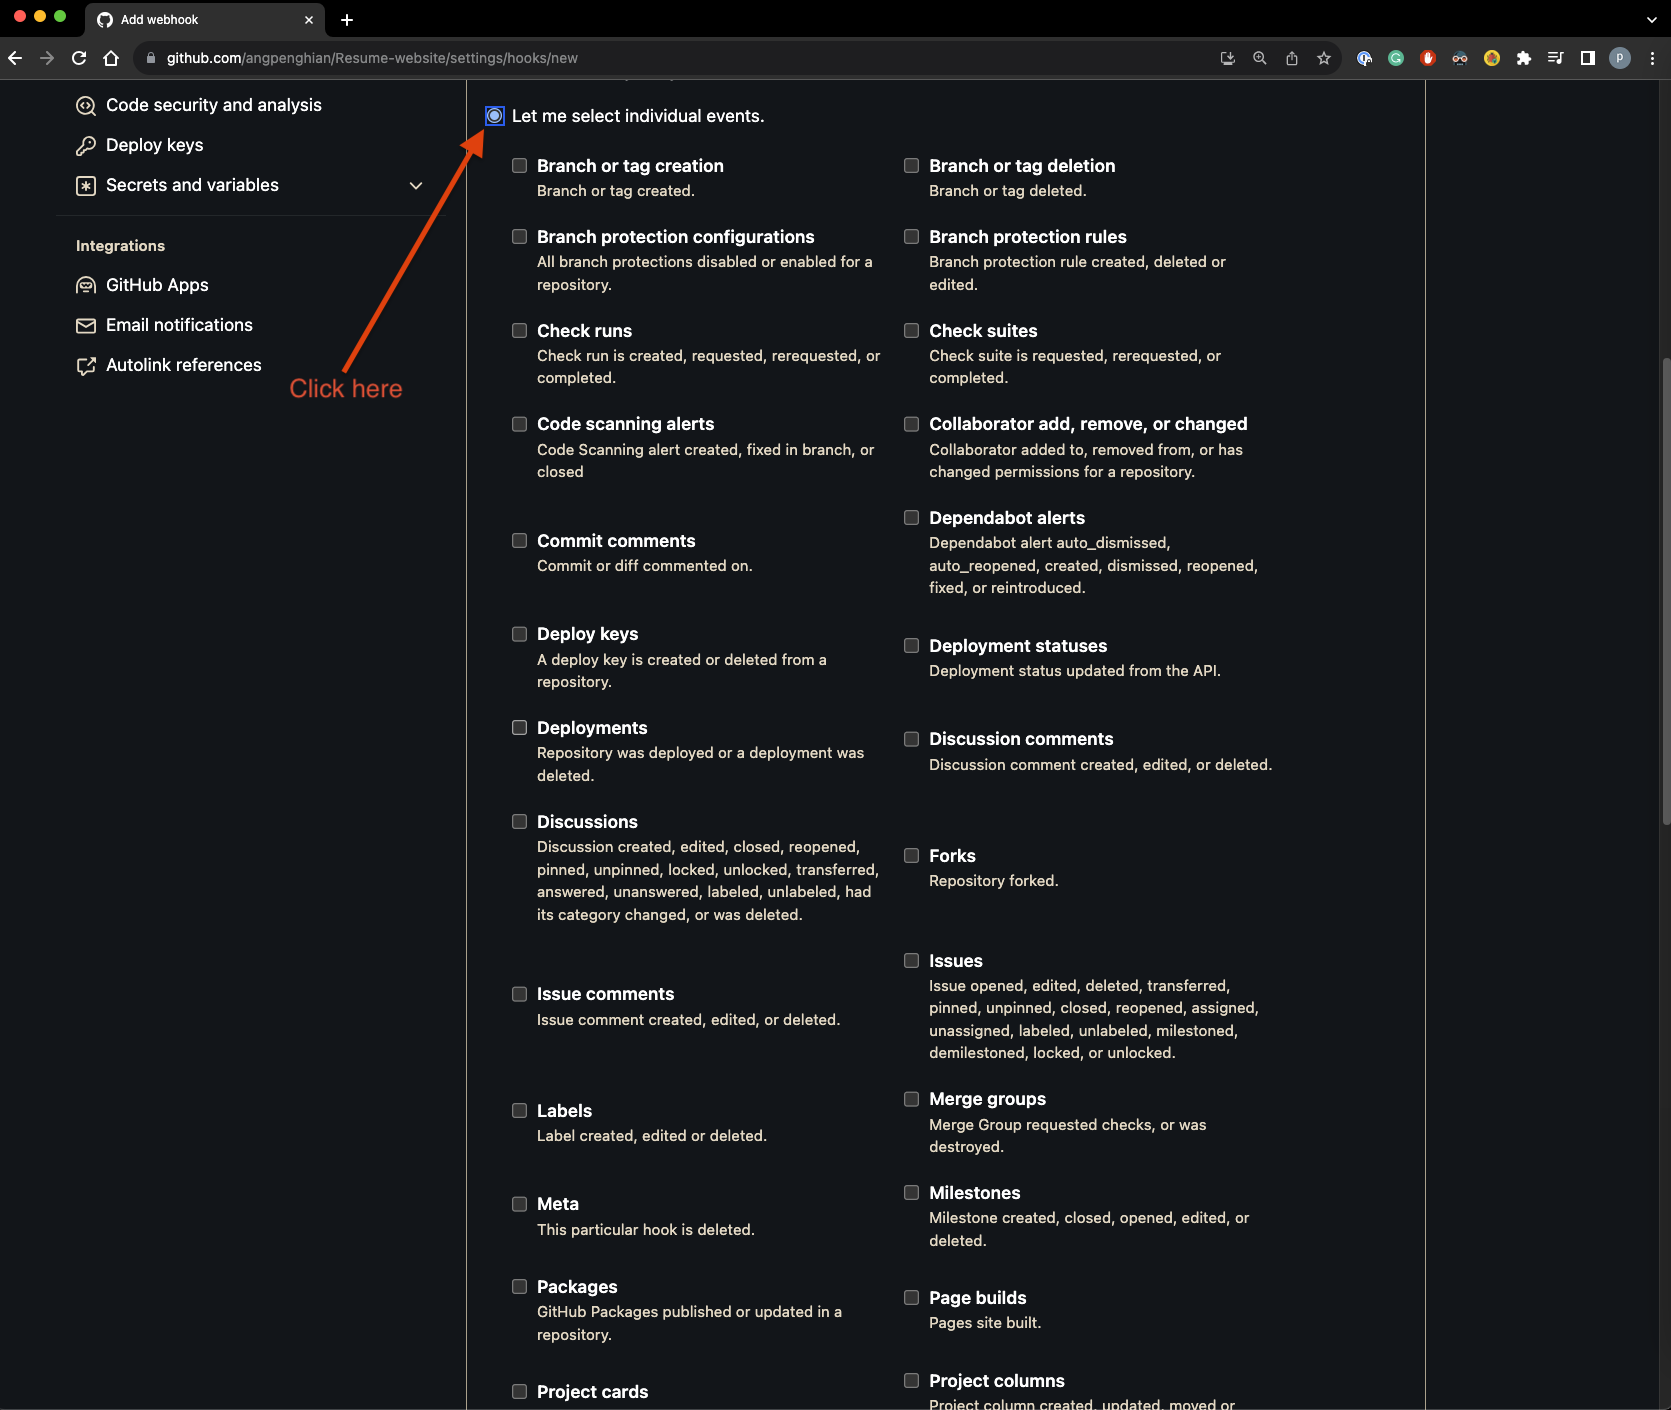
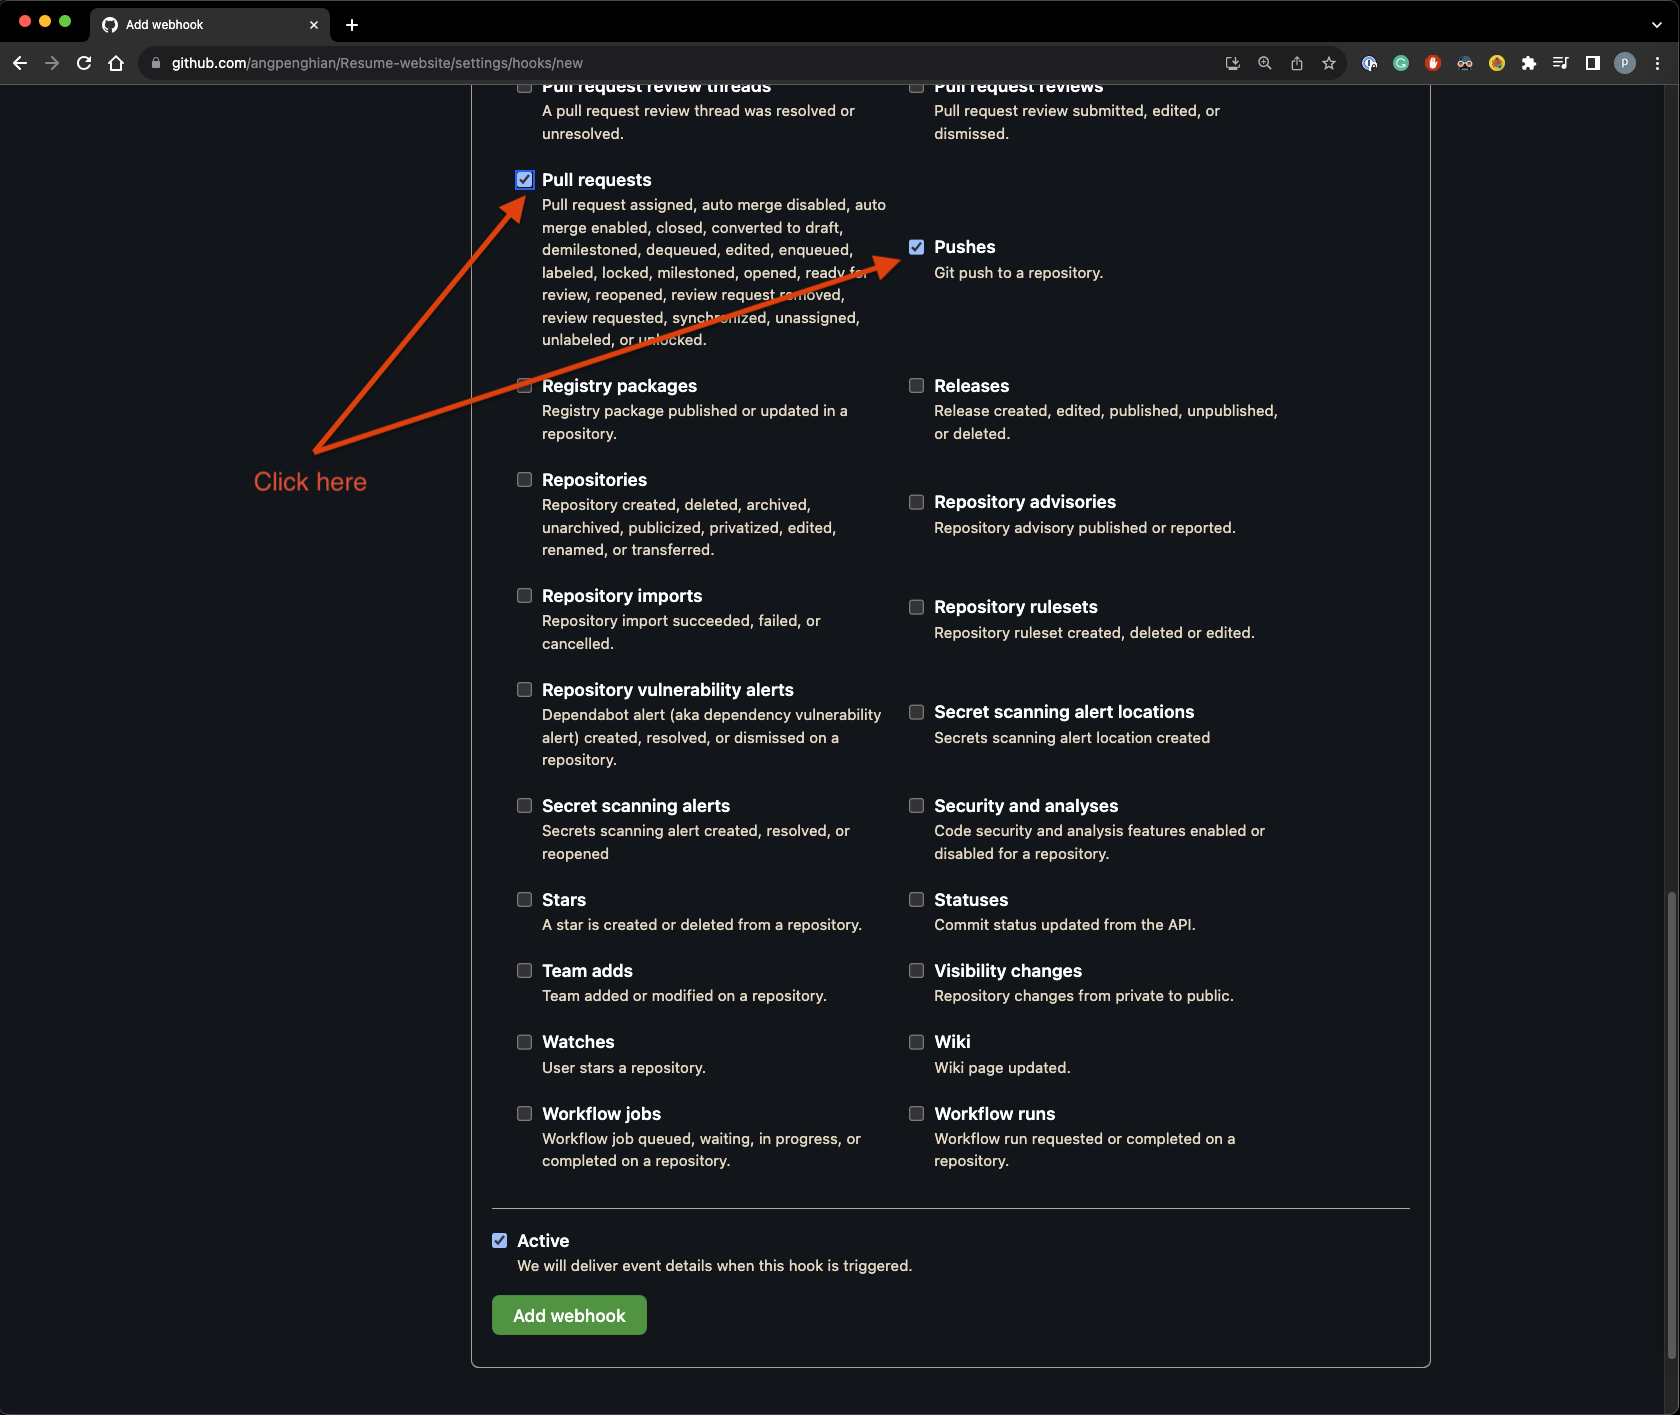
Step 16: Configure GitHub webhooks
In your GitHub repository settings, navigate to Webhooks.
Click "Add webhook" and enter the payload URL:
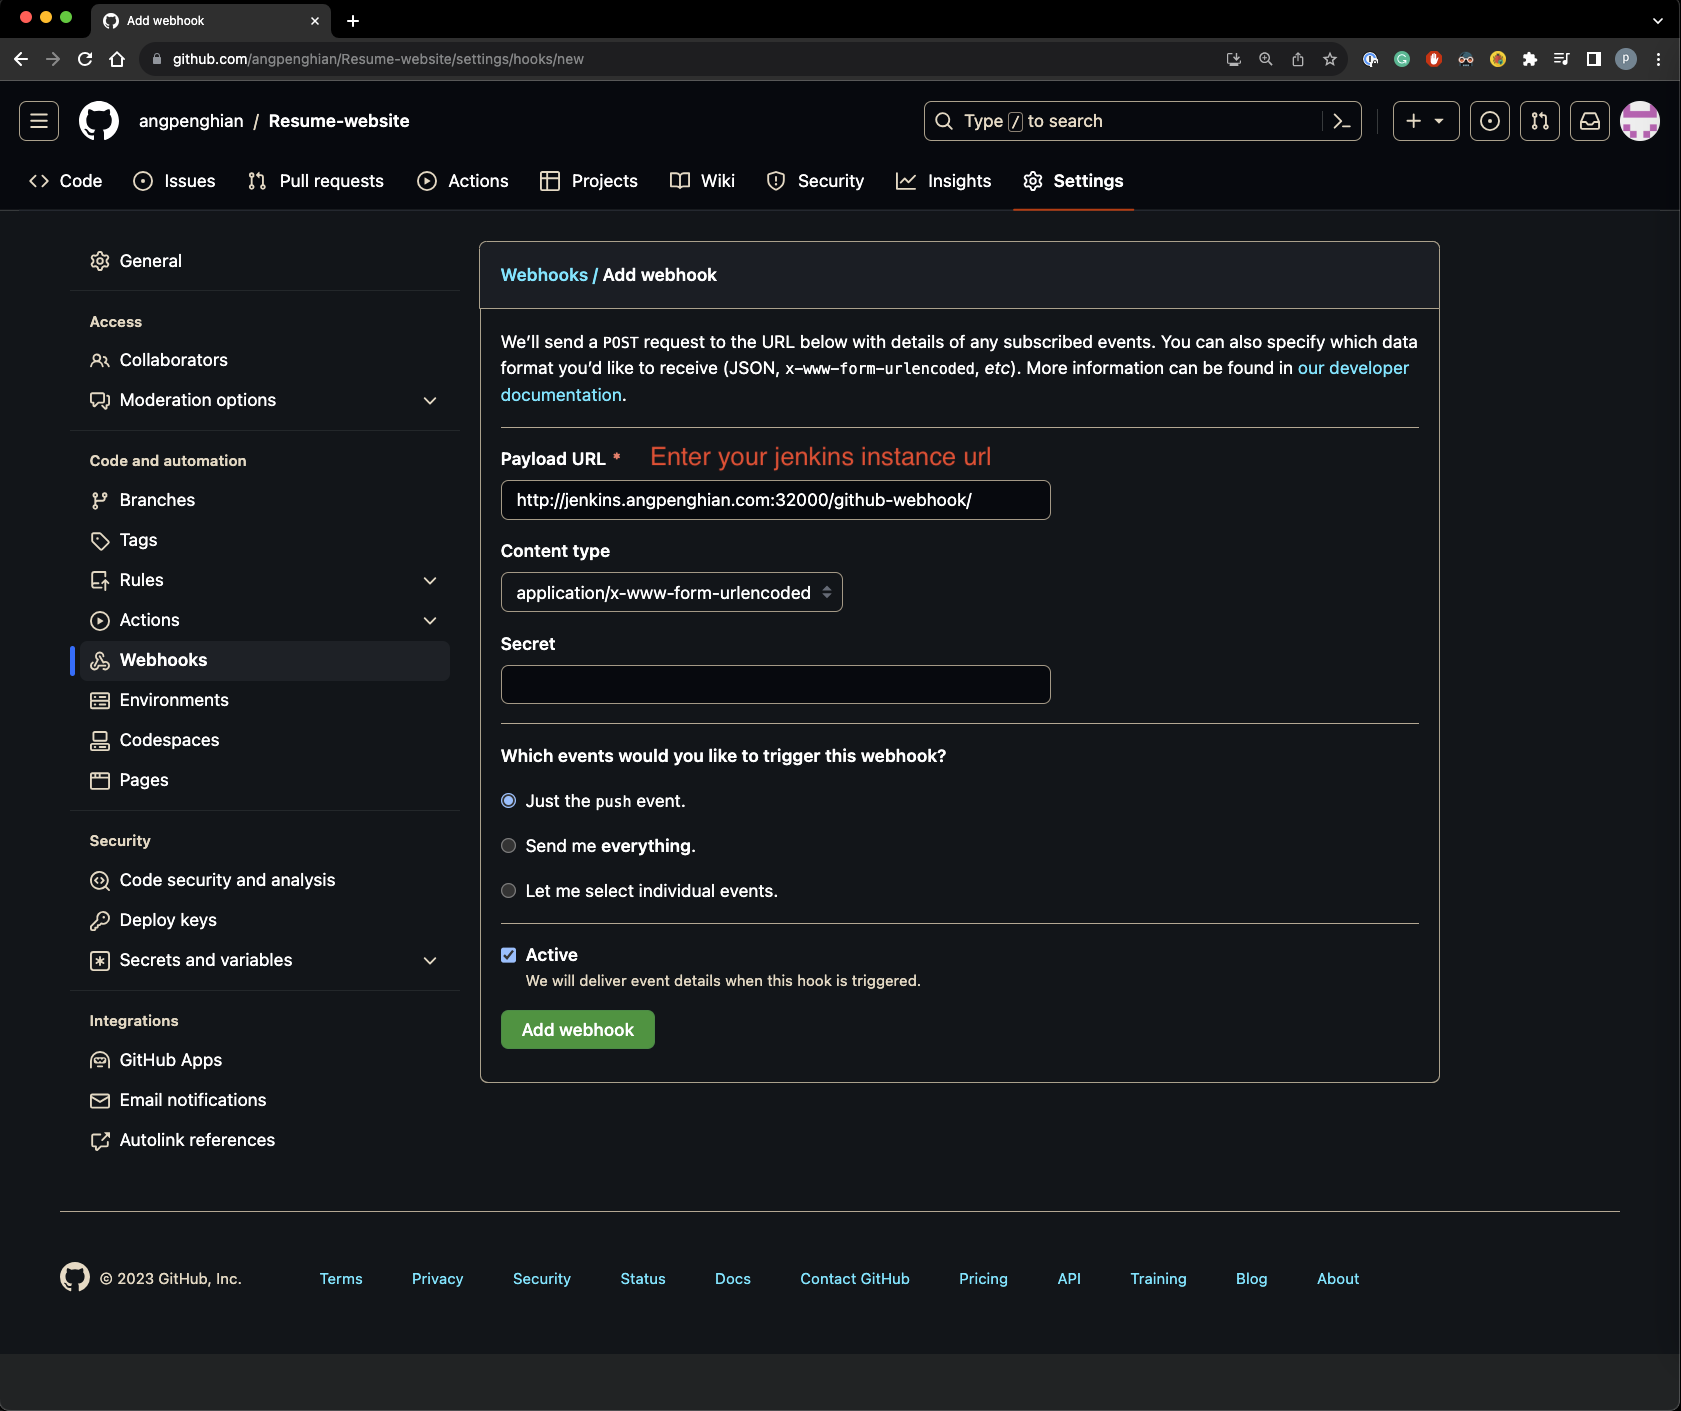
Select "Let me select individual events" and check Push and Pull Request.
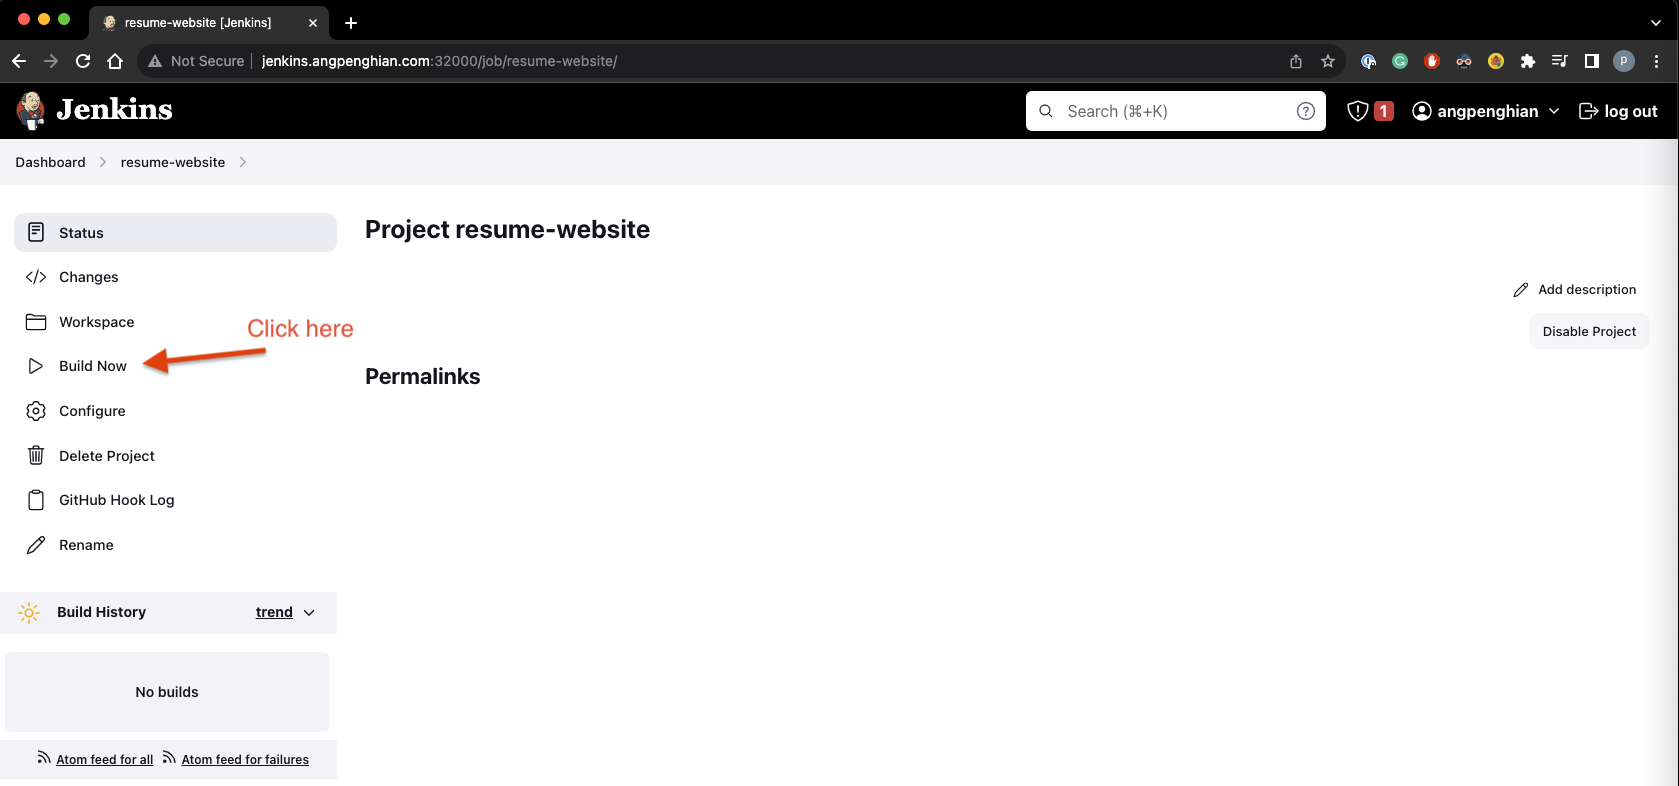
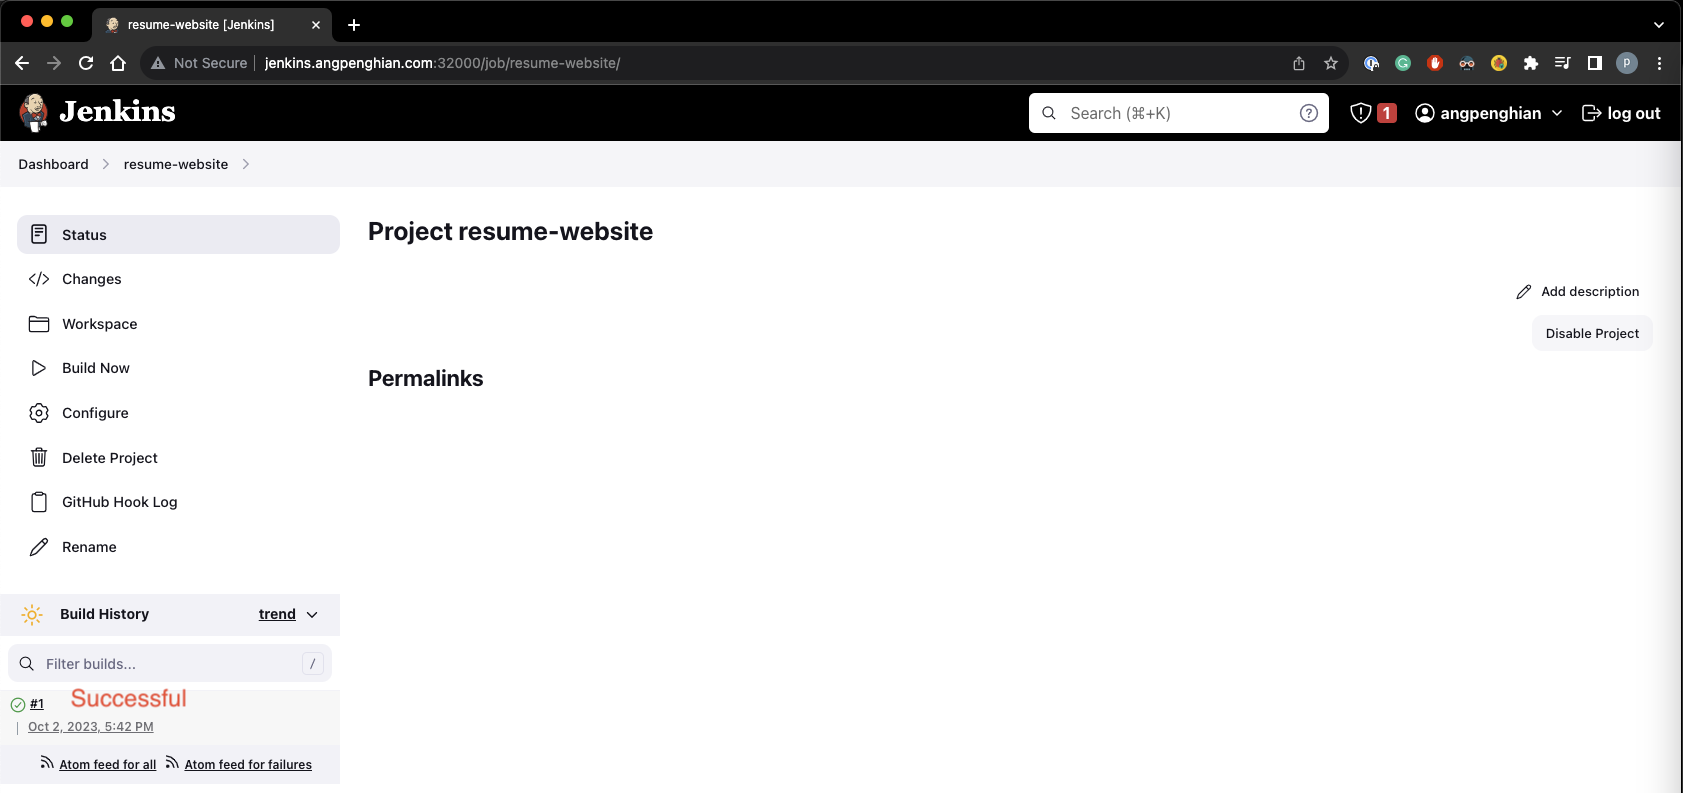
Step 17: Test the build
Go back to Jenkins and click "Build Now".
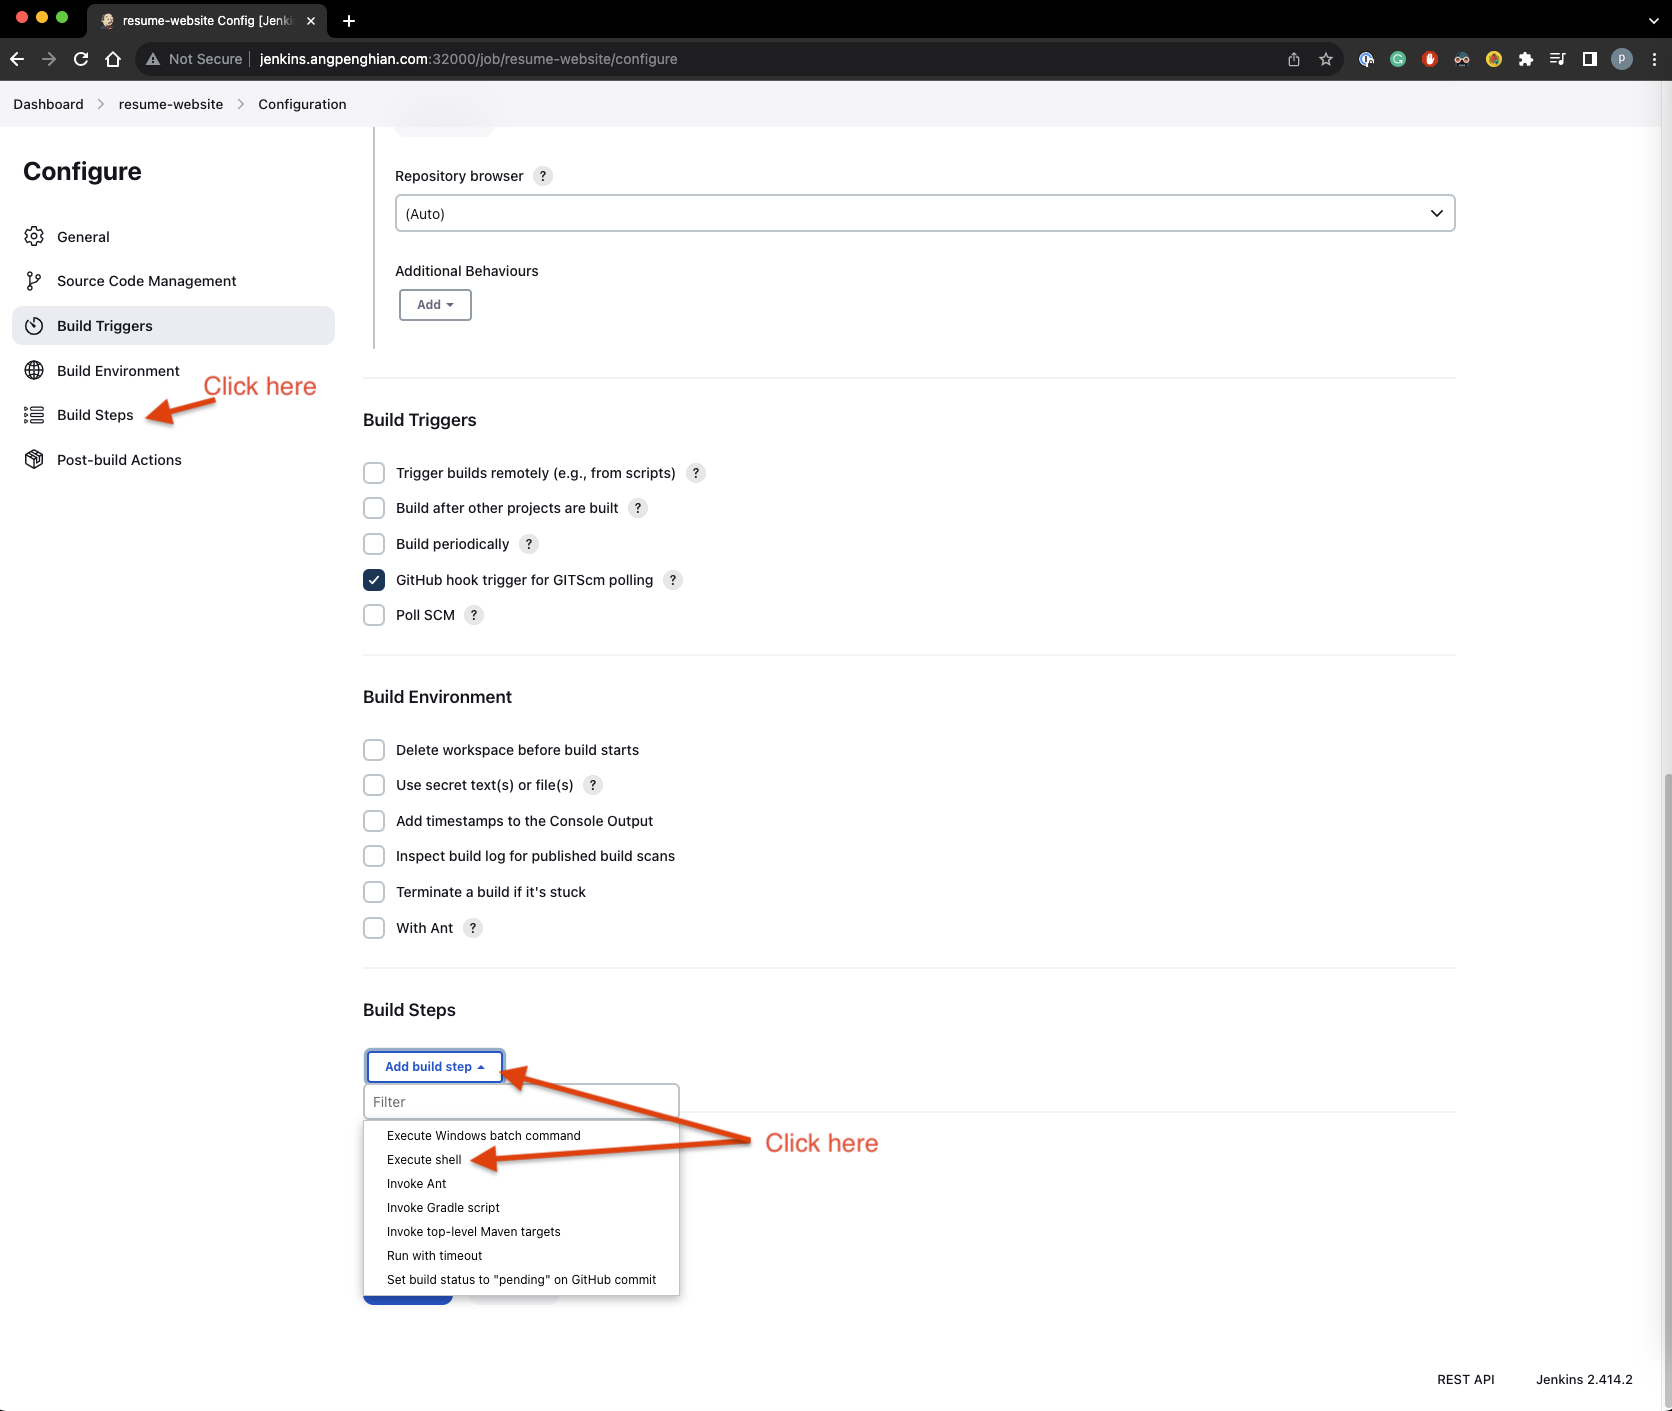
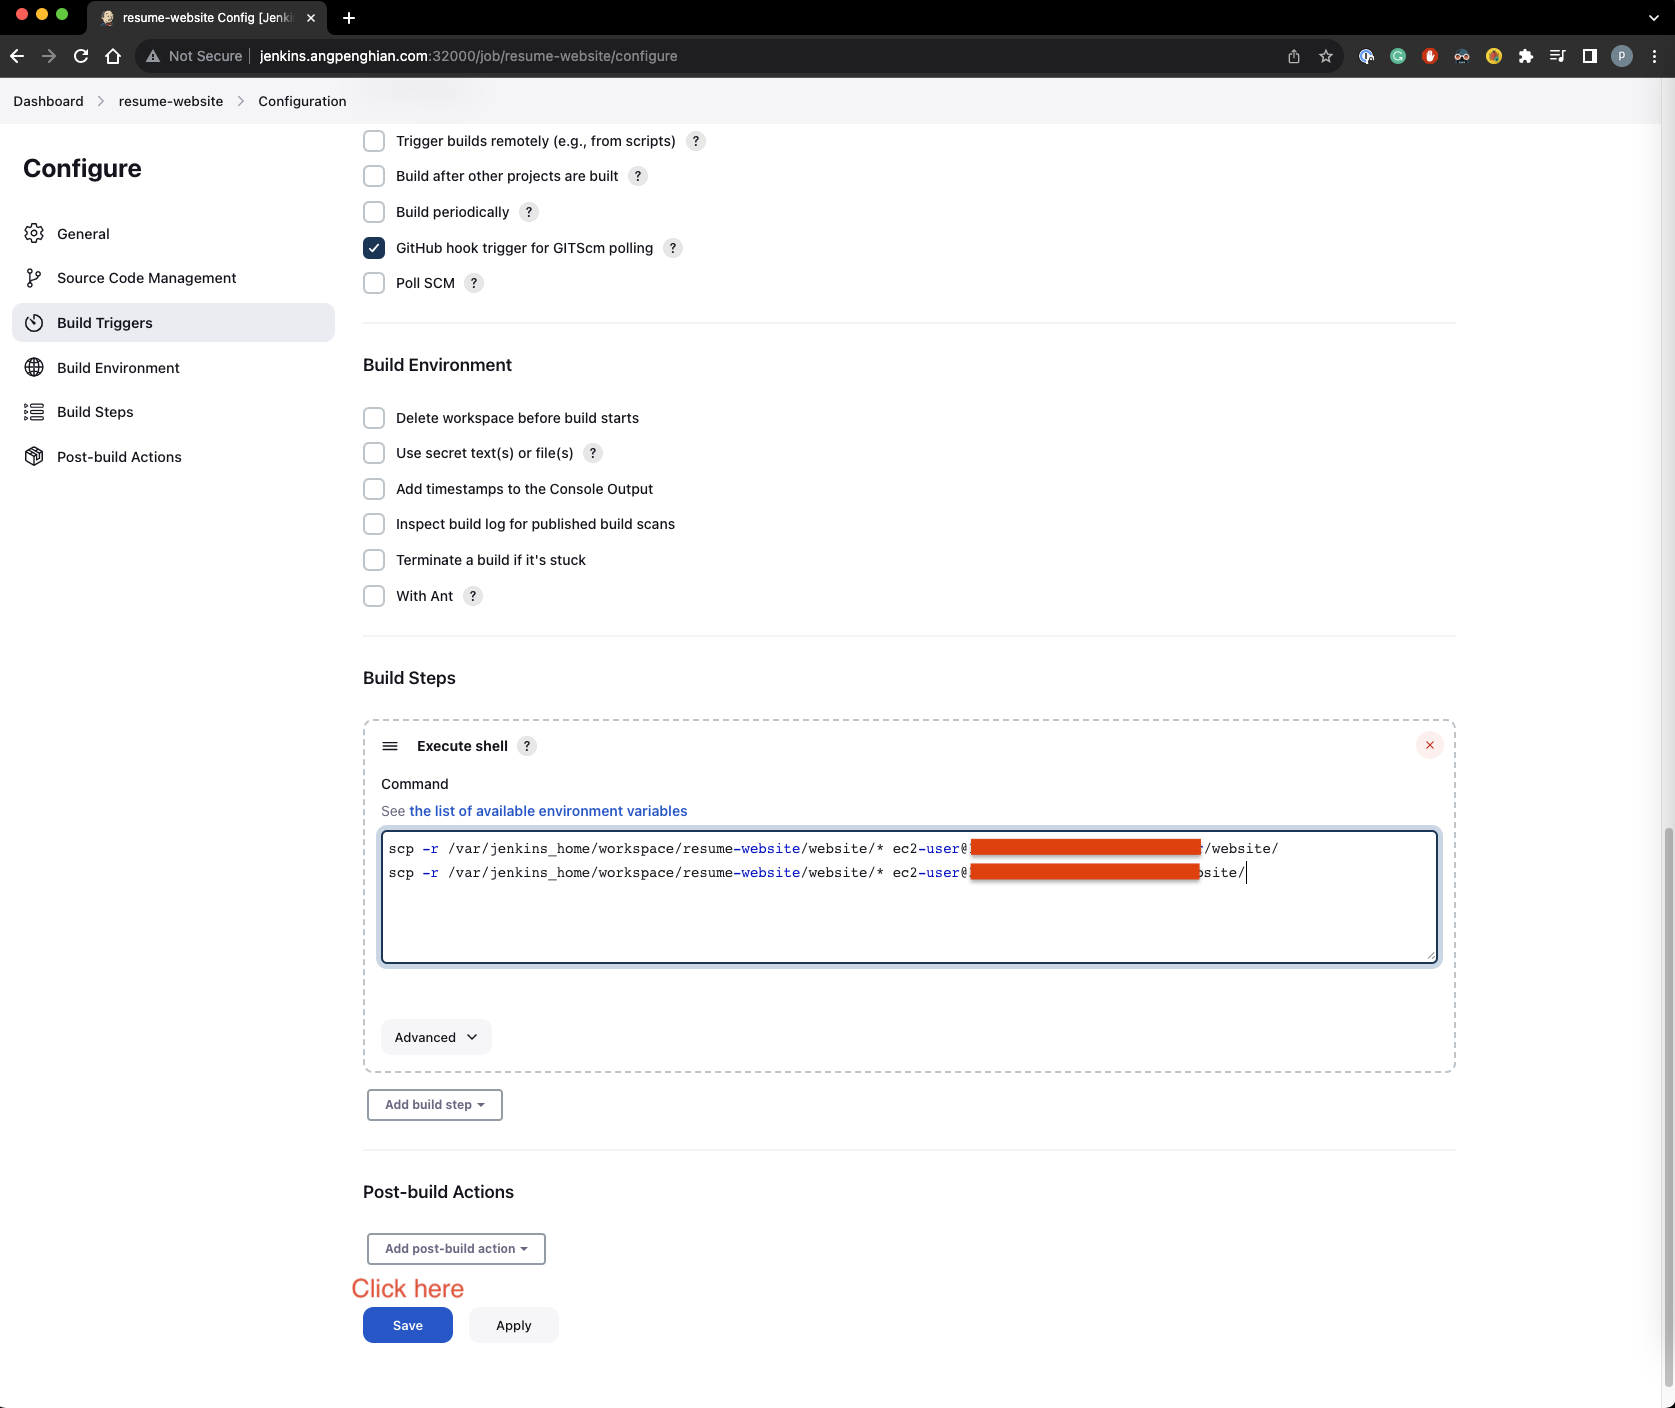
Step 18: Configure build steps
Click configure, select Build Steps, and add an Execute Shell step with:
scp -r /var/jenkins_home/workspace/resume-website/website/* ec2-user@<masternode-public-ip>:/home/ec2-user/website/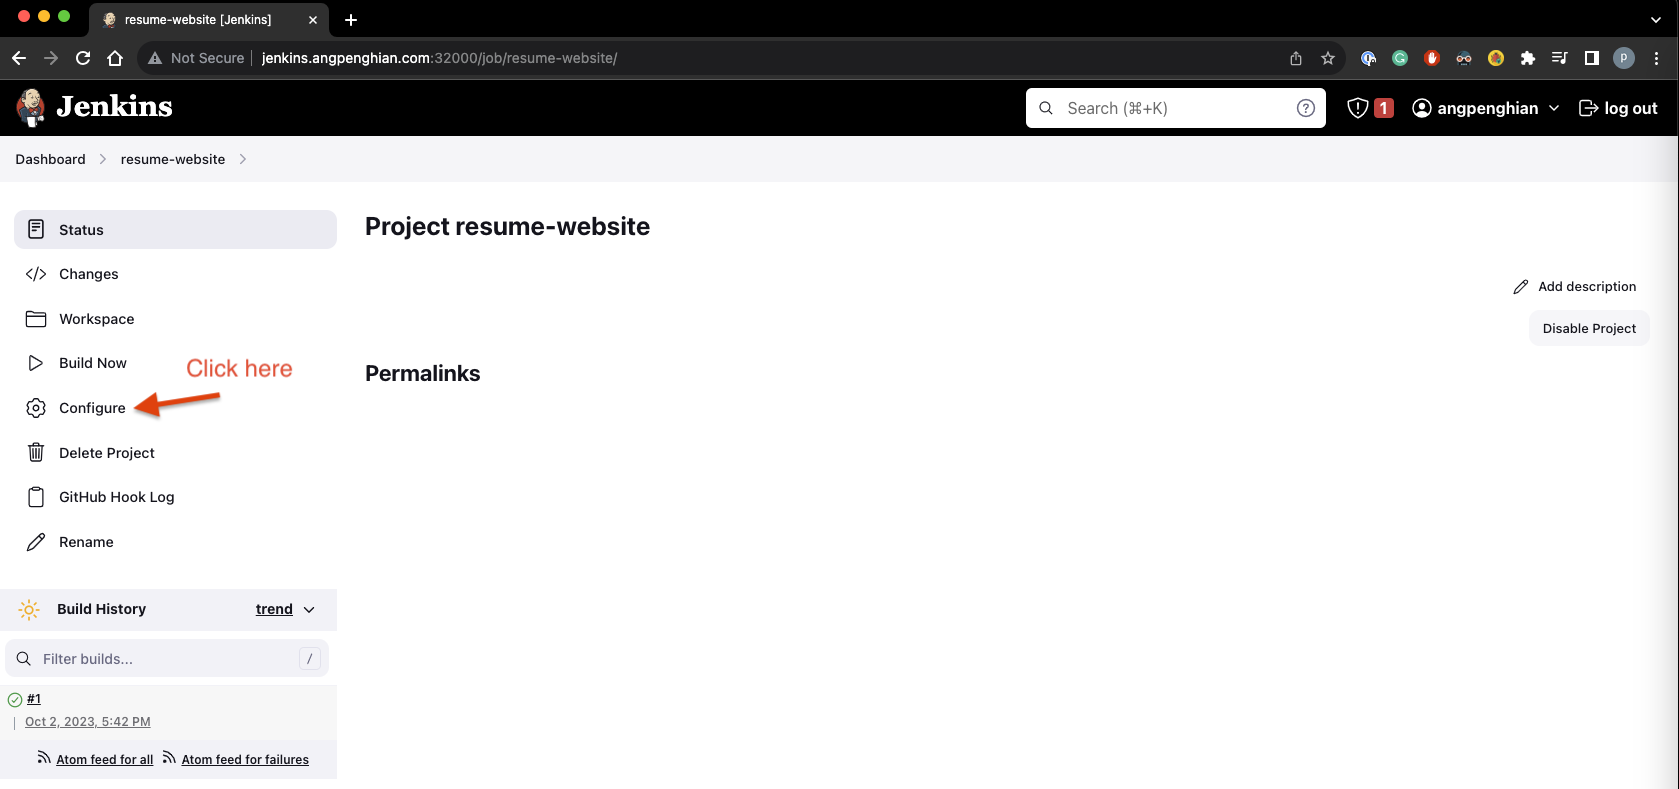
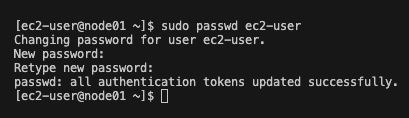
Step 19: Set passwords for EC2 instances
SSH into the master node and node01, then set passwords:
sudo passwd ec2-user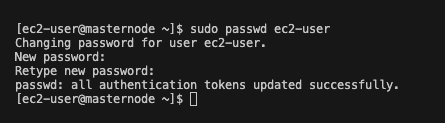
Step 20: Setup SSH keys for Jenkins
Get the Jenkins pod name and SSH into it:
kubectl get pods --namespace=devops-toolskubectl exec -it [jenkins-pod-name] --namespace=devops-tools -- /bin/bash
Generate SSH keys inside the Jenkins pod:
ssh-keygen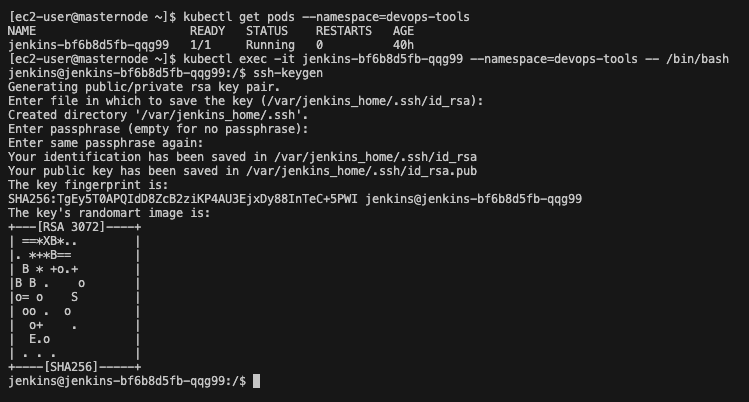
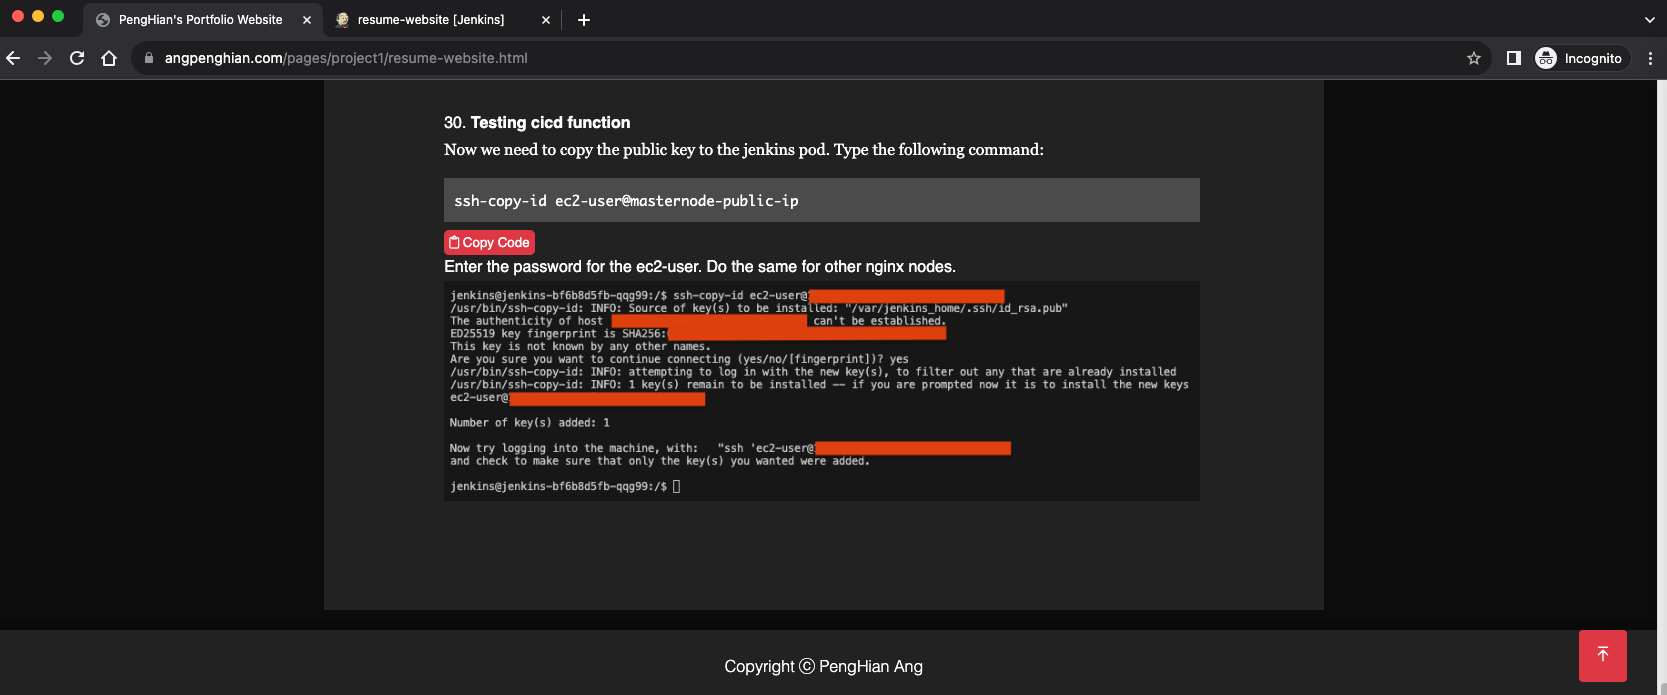
Copy the public key to the EC2 instances:
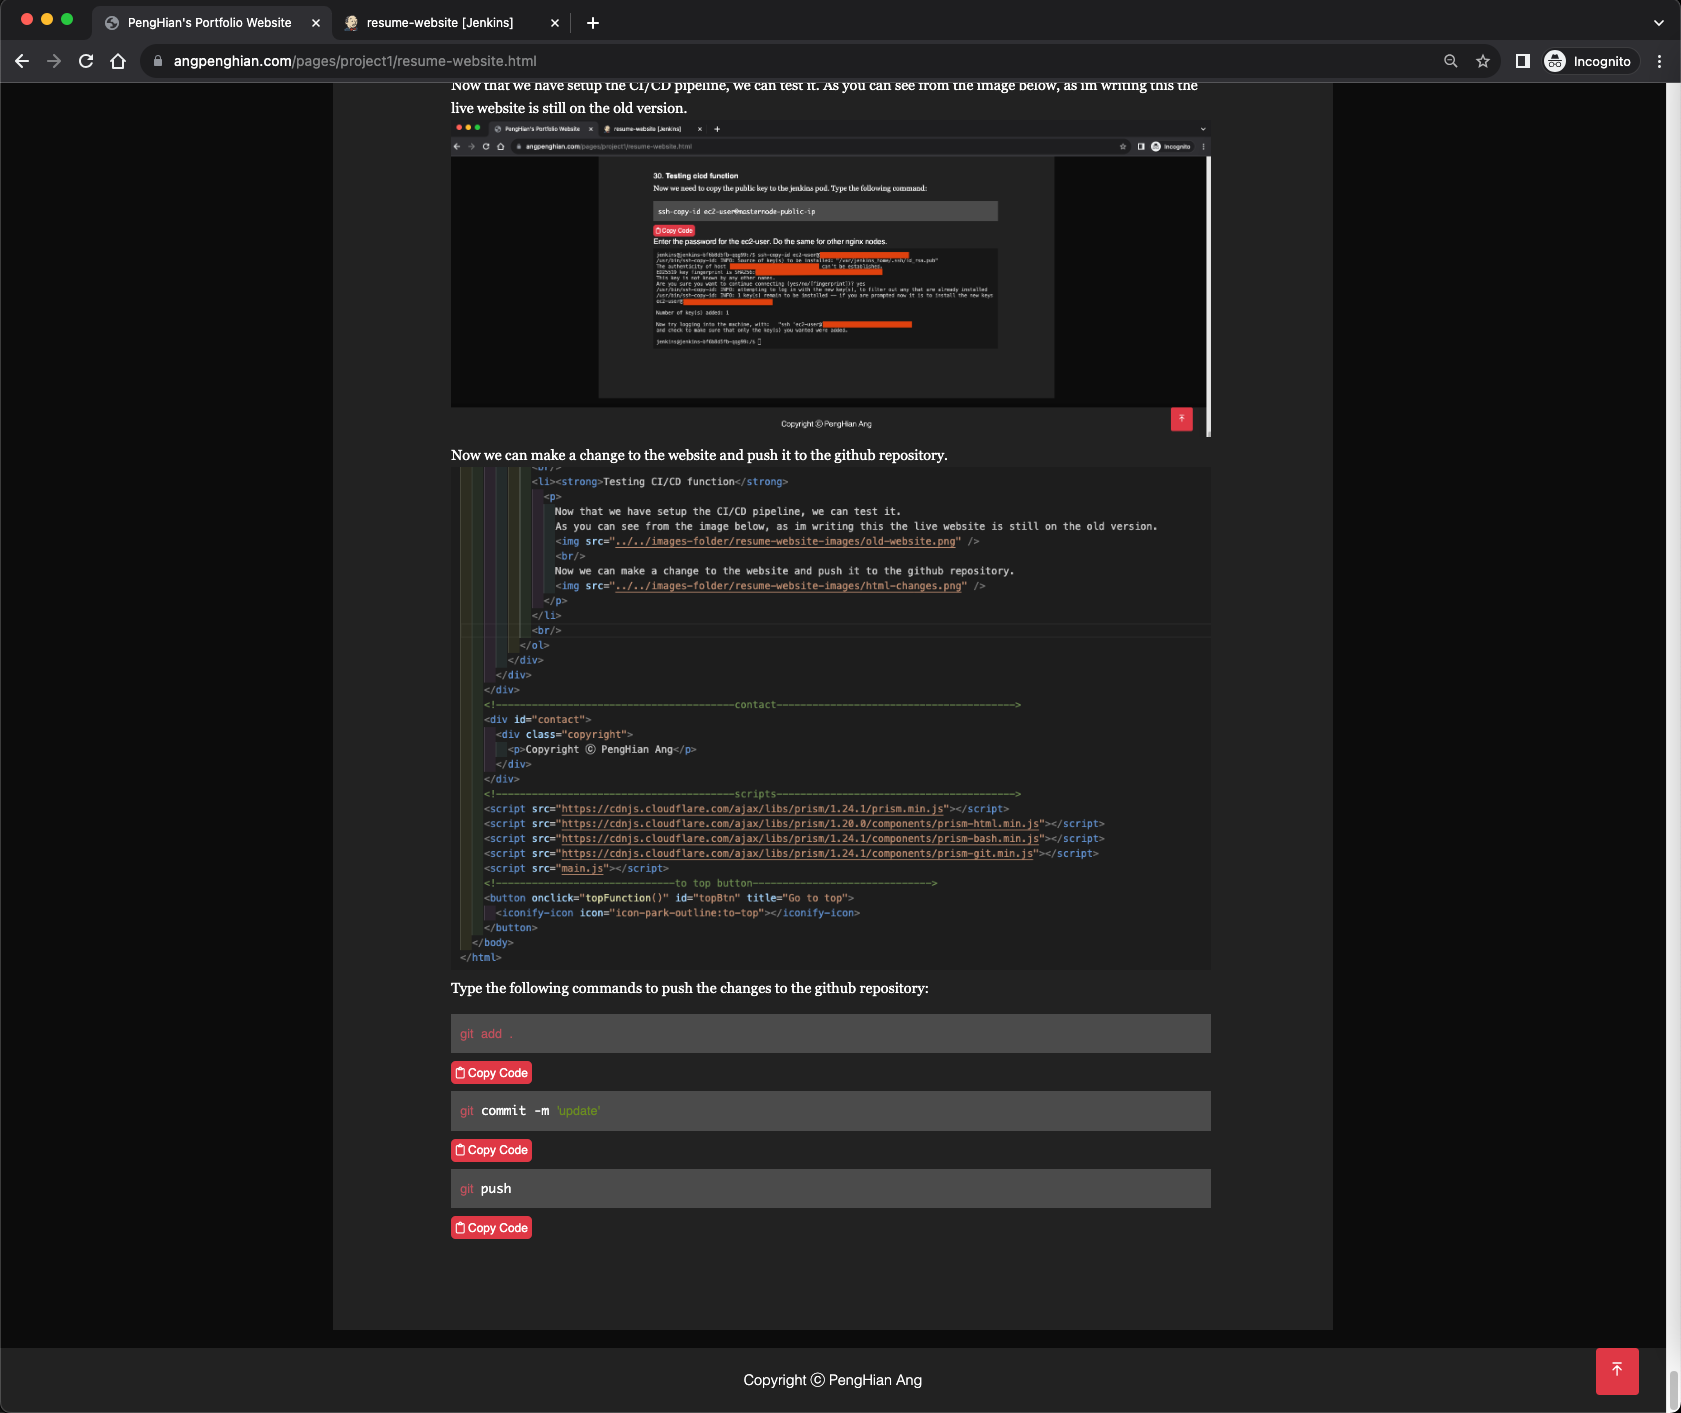
ssh-copy-id ec2-user@masternode-public-ip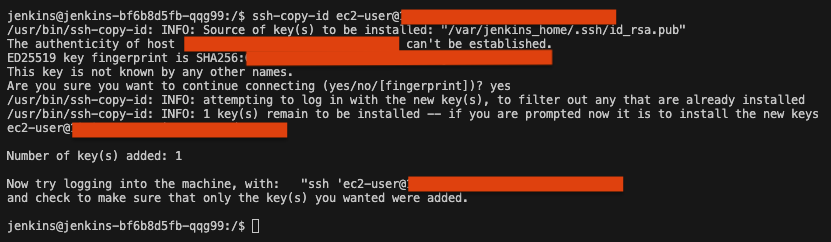
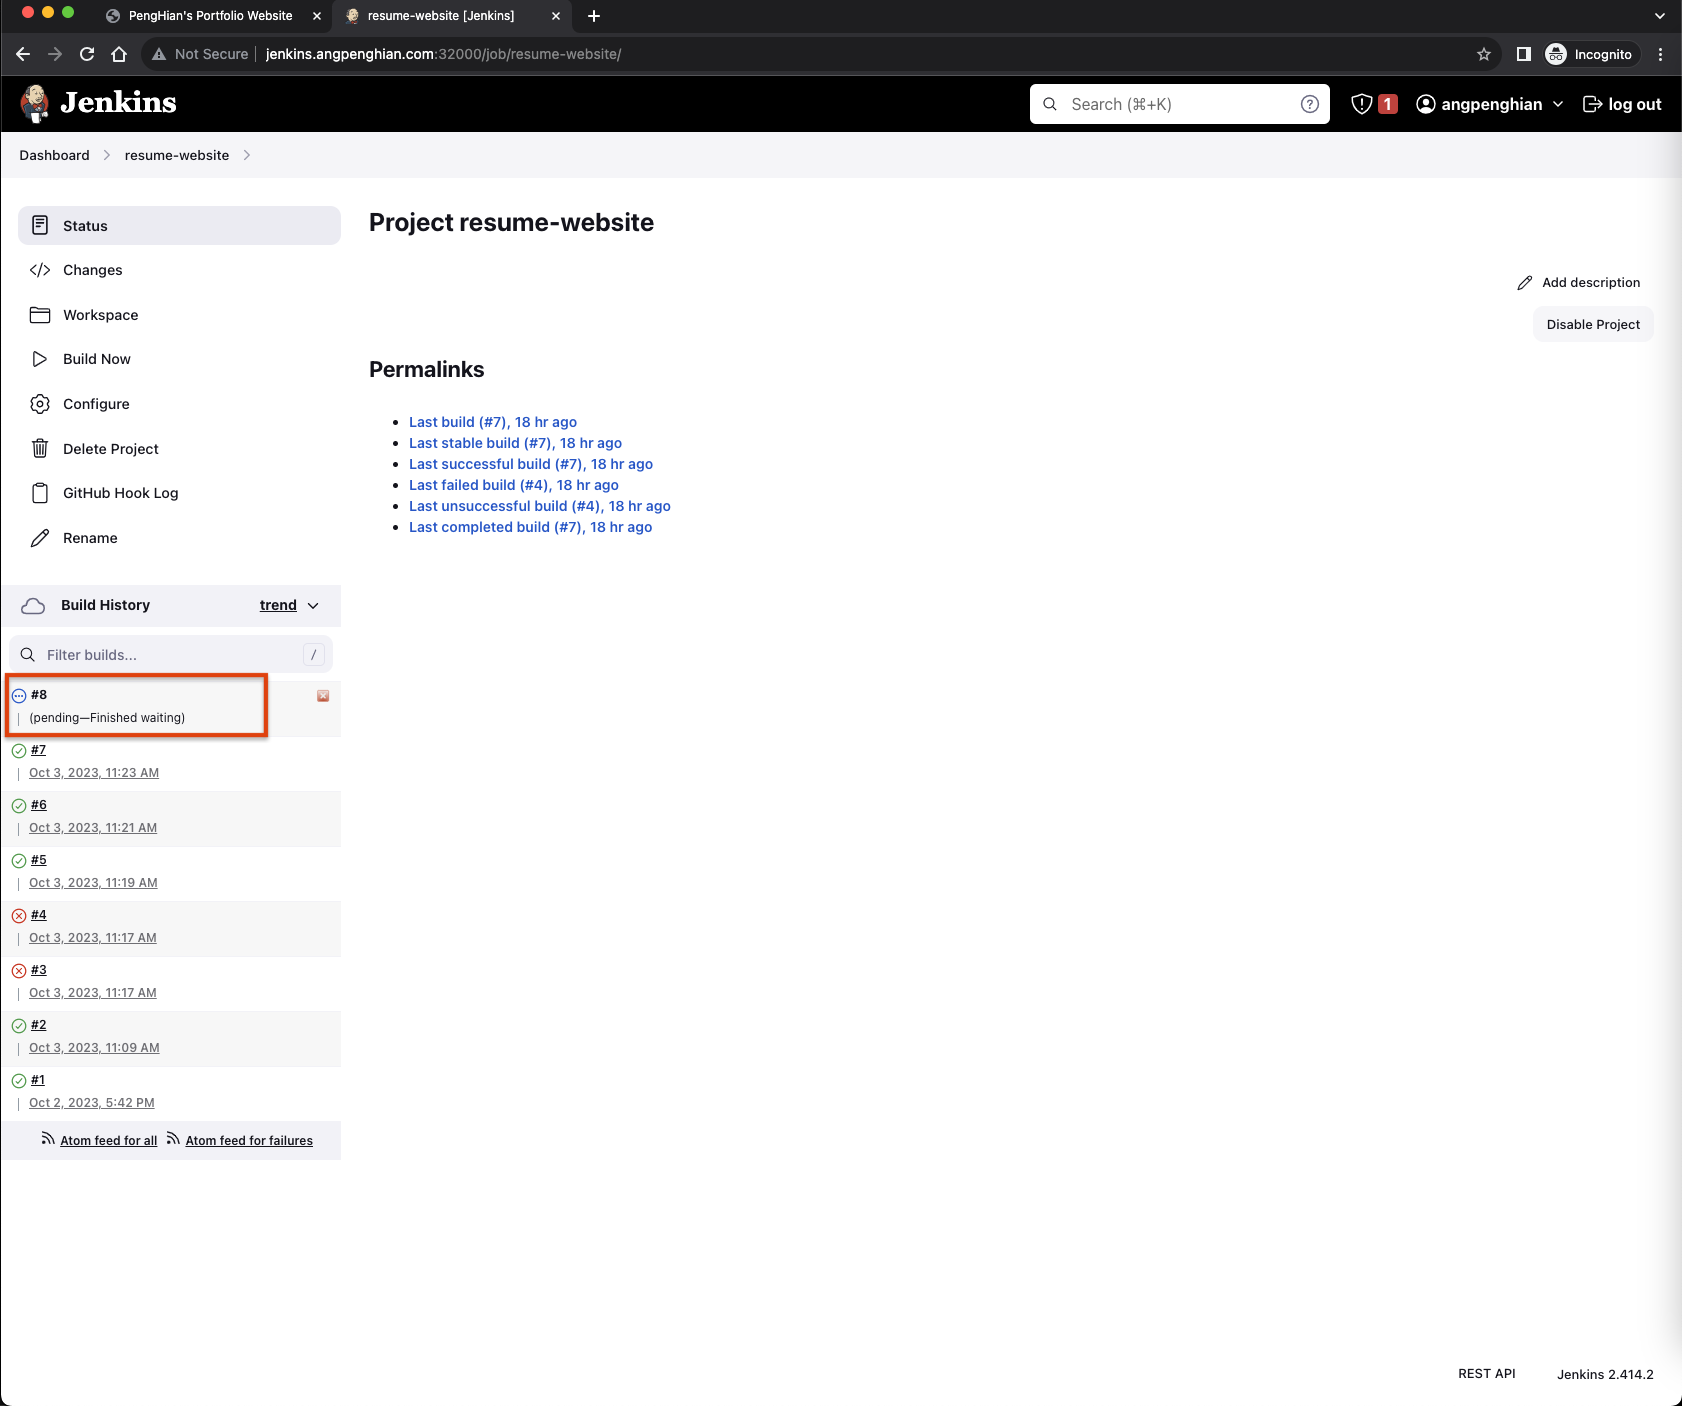
Step 21: Test the CI/CD pipeline
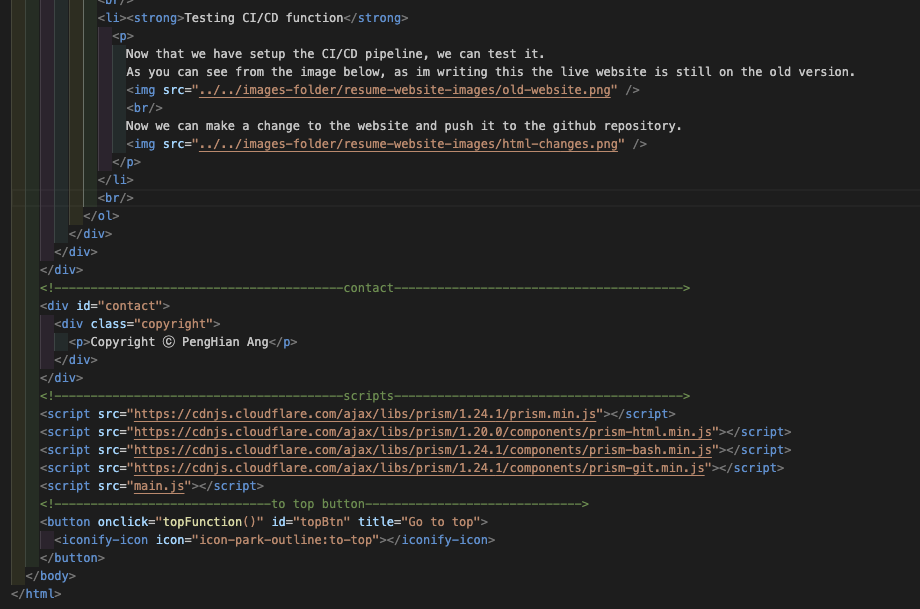
The live website is still on the old version:
Make a change to the website and push to GitHub:
git add .
git commit -m 'update'
git push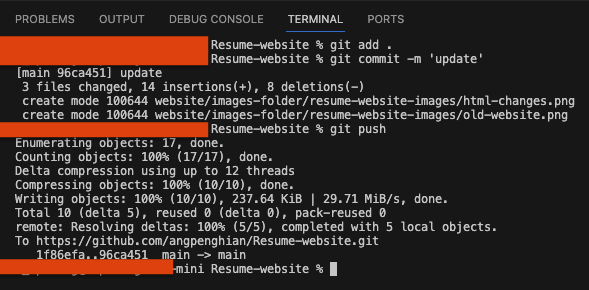
Jenkins picks up the change and builds automatically:
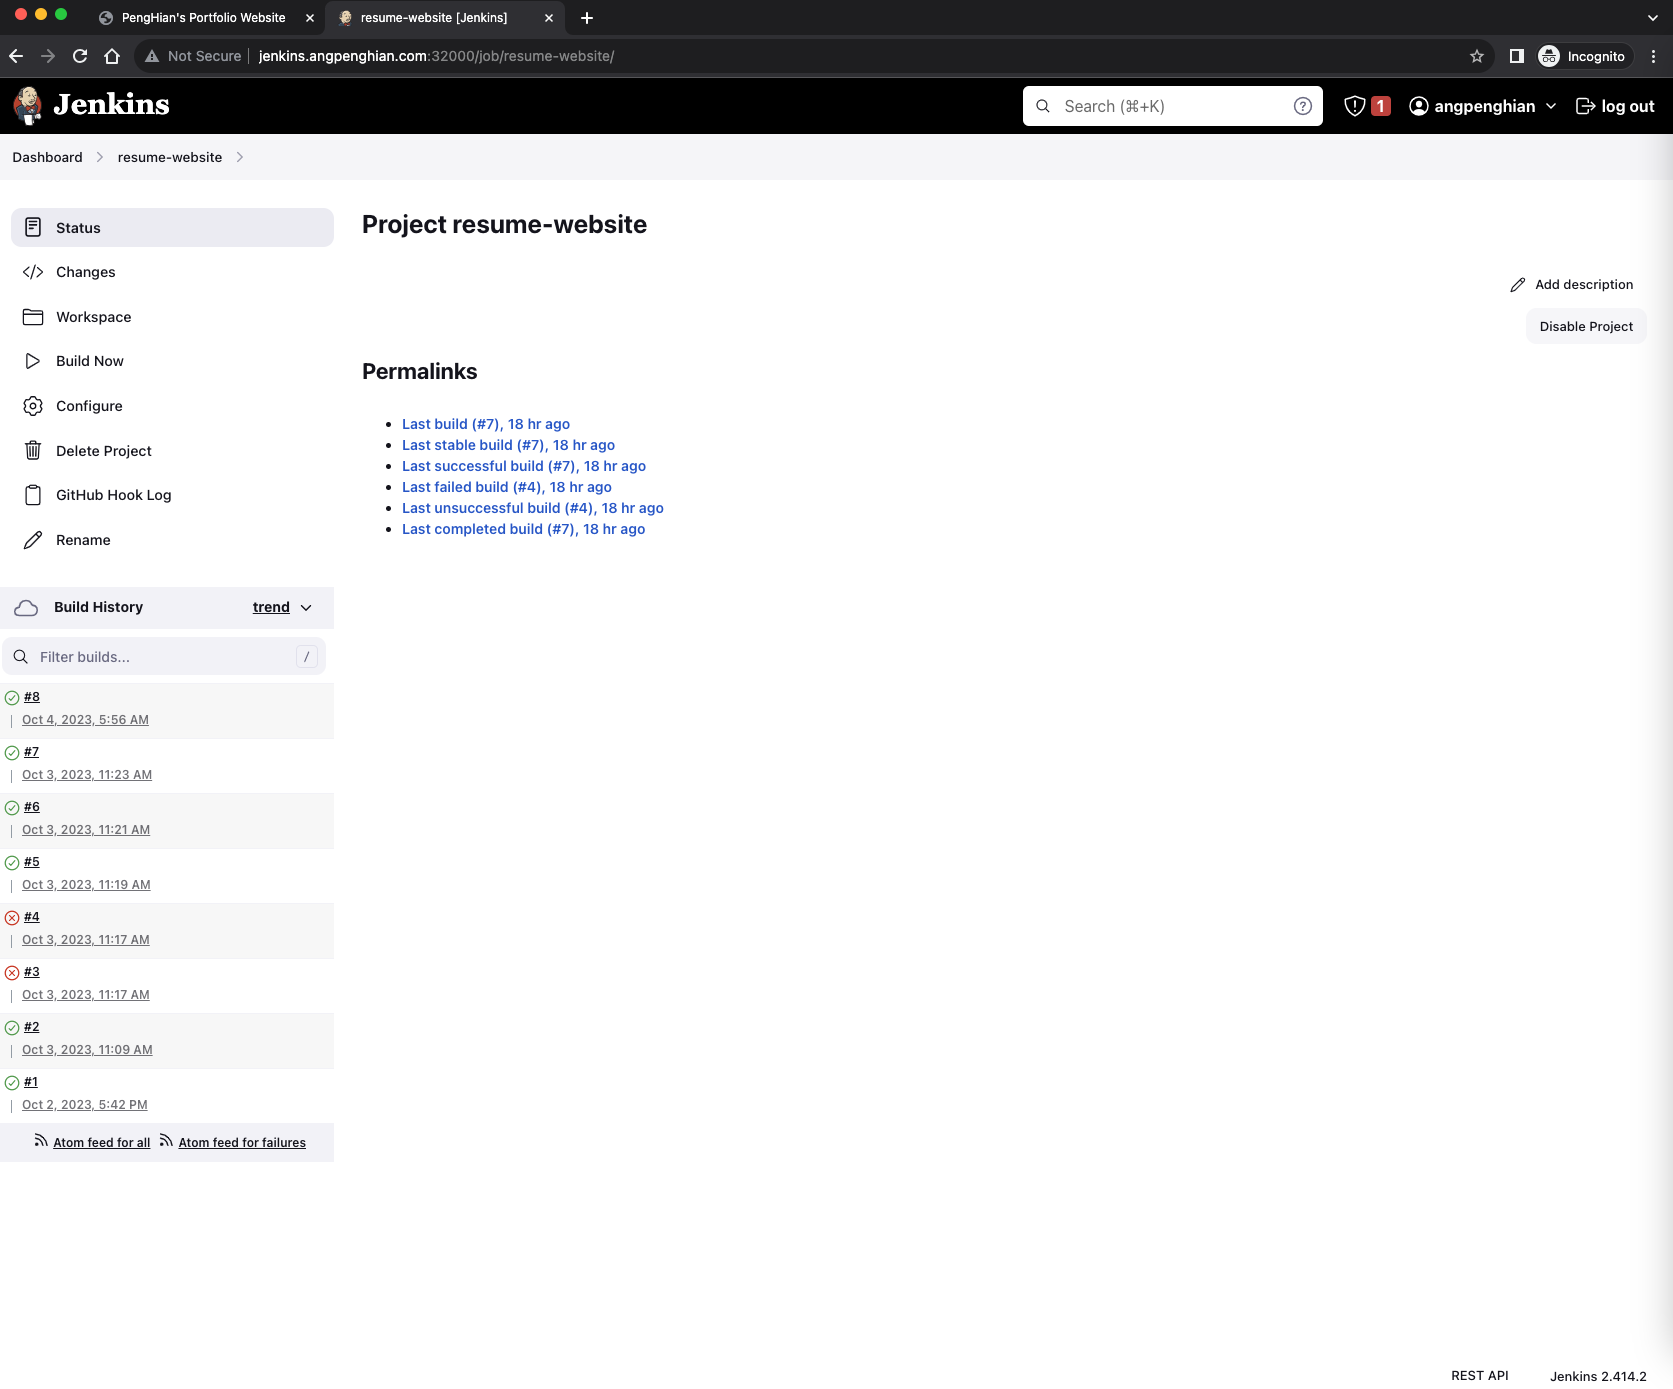
The updated website is now live: